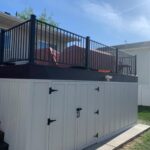
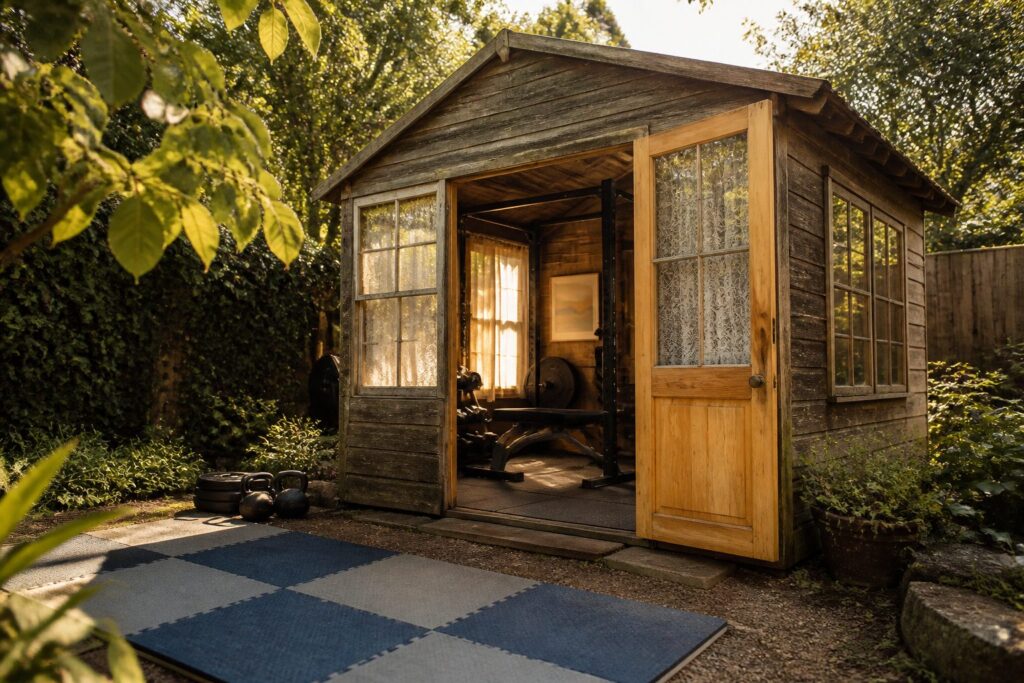
A finished DIY workout shed runs $5,000 to $15,000 and takes a few weekends of actual work, but most people rush the foundation check and end up with a tilting rack by month three.
The real cost is not the rubber stall mats or the insulation; it is the half-inch of frost heave you ignore because you want to move equipment in faster.
[link-whisper-related-posts]1. Assess and Prepare Your Shed
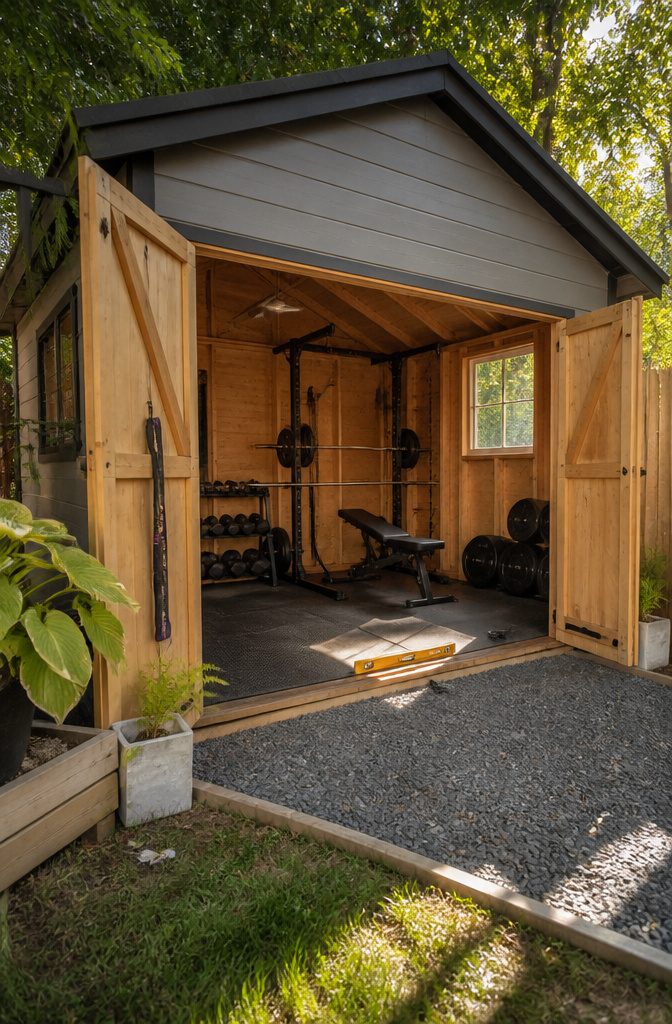
A shed that shifts under your feet turns every squat into a balance test and every deadlift into a risk.
Before anything else, check whether the structure still sits level on its foundation. Ground settles, frost heaves, and the whole frame tilts a half-inch at a time until equipment rocks and joints strain to compensate.
I would walk the perimeter with a level every spring and fall, and I would shim or block any low corner the same day I find it. A level foundation is what keeps the rack upright and your ankles intact.
The floor itself has to handle weight without bouncing.
If the existing boards are standard 3/4-inch plywood over spaced joists, dropped plates will eventually punch through. Sources mention tongue-and-groove 2×8 flooring as the kind of upgrade that takes real load, but most of us will not re-floor entirely.
What I would do instead is sweep out every cobweb and splinter, check corners for rodent signs, and lay rubber matting over the cleaned surface. That matting quiets the clang and spreads the point load enough that standard subflooring survives.
This is the step I would not rush. The insulation and the power and the mirror wall come later, and they all assume a solid box to start with.
2. Insulate and Control the Climate
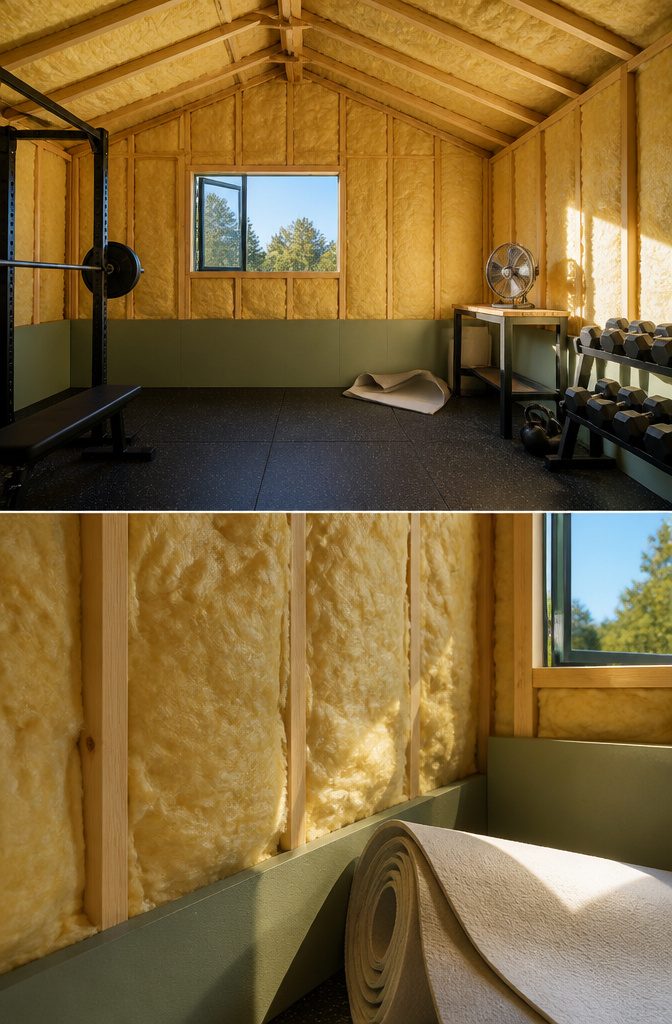
The right insulation turns a shed from a seasonal storage box into a space you will use in January and July.
I would start with the ceiling, since that is where most heat escapes, then run the same material down the walls before the interior sheathing goes up.
Three options sit on the shelf at most big-box stores, and they break cleanly by budget and effort. Spray foam seals every crack and gap as it goes on, which matters in a structure that was never built airtight.
It costs the most and usually needs a pro with a rig, so I would skip it on a first build unless your framing is especially rough.
Fiberglass batts are the cheap bet and the one I would choose for a straightforward rectangle of studs on 16-inch centers. Easy to cut, easy to tuck, and you handle the install yourself in a Saturday morning.
Foam board lands in the middle: rigid panels you can carry home in a car, cut with a utility knife, and screw straight to the studs for a clean plane to drywall over.
The R-value holds steady, and the consistent thickness makes it forgiving for beginners.
Comfortable gym temperature sits between 65°F and 68°F, and insulation alone will not keep you there. Without airflow, you get a humid box that smells like old sweat and grows mold in the corners.
A window that opens, positioned to catch a cross-breeze with the door, does more than a fan ever will on a mild day.
For the stagnant middle of summer or the dead of winter, add a small exhaust fan or a portable fan on a timer.
Circulated air keeps your lungs working and the structure dry; insulation keeps the work you put in from leaking straight out through the rafters.
3. Add Power and Lighting
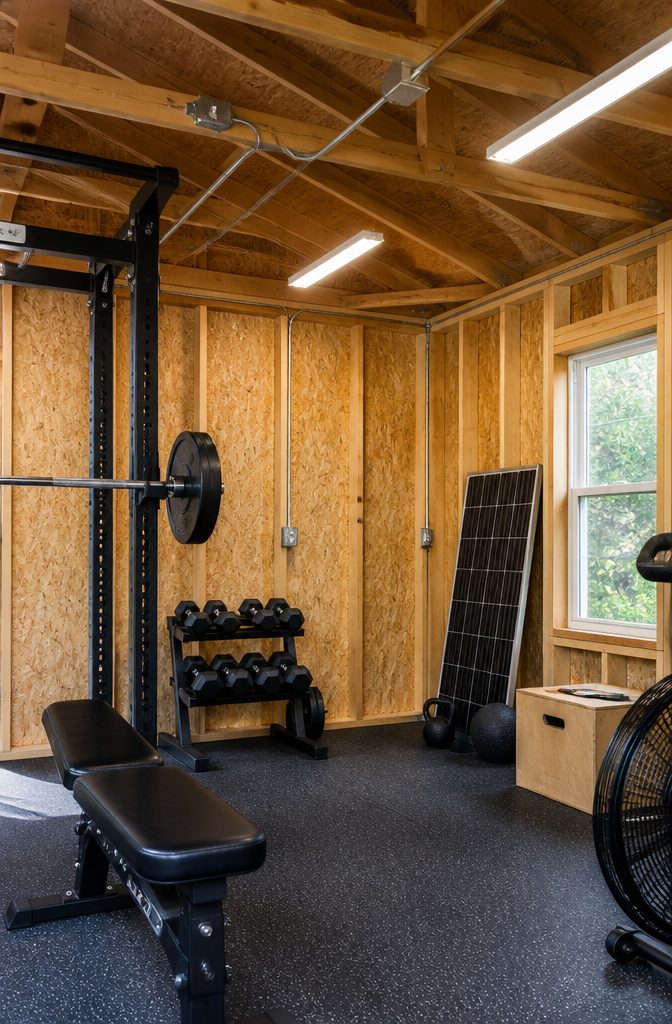
Most gym setups need more than one outlet, and the machines draw enough load that a dedicated circuit with GFCI protection is the minimum safe starting point. I would not run the wiring myself.
Electricity is the one step in this build where a licensed electrician pays for itself in safety, and in most jurisdictions the work triggers permit requirements that an electrician can navigate faster than a first-timer.
Position outlets where your equipment, fans, and any screens will actually sit; LED overhead lighting keeps the space bright without the heat of older fixtures.
Solar panels are an option if running a line from the house is impractical, though a grid-tied circuit is usually simpler for consistent power.
4. Install Gym Flooring
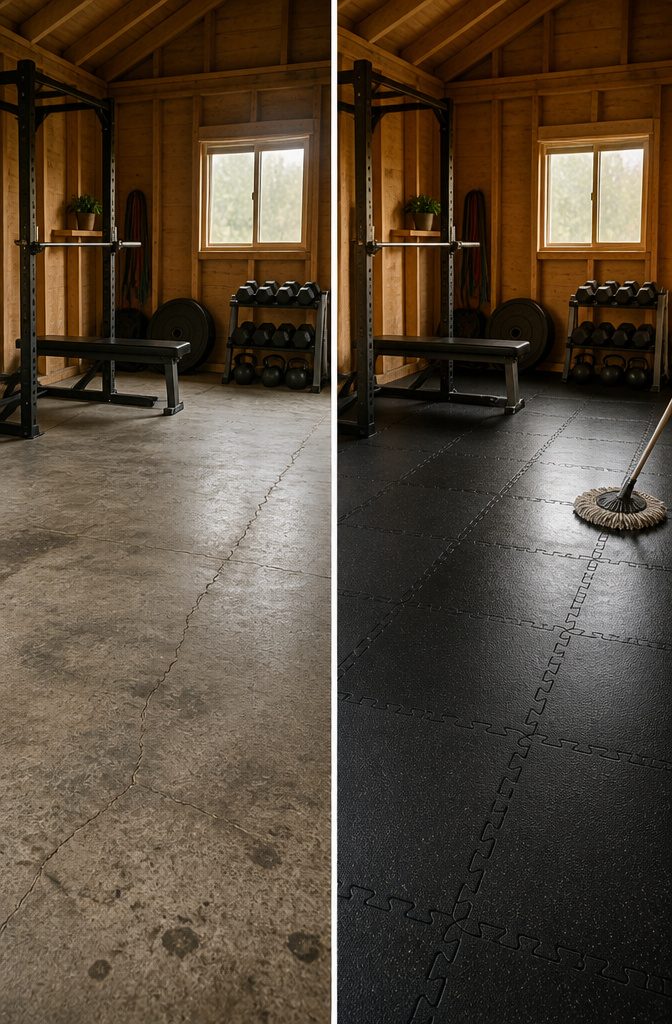
Rubber mats, vinyl, and laminate each handle the shed gym floor differently, and the choice comes down to what you’re actually doing in there.
For heavy lifting, rubber stall mats at ¾ inch thickness absorb shock from dropped weights and keep a barbell from punching through the subfloor.
The material deadens sound too, which matters more than you’d think when you’re working out six feet from a neighbor’s fence line.
Vinyl and laminate win on cleanup.
A quick pass with a mop handles sweat, dust, and whatever you track in from the yard. If your routine mixes lifting with cardio machines, these surfaces look sharper and need less attention.
Skip laminate if you’re dropping anything heavier than a yoga block; weights dent it fast, and a shed gym is not the place for flooring that shows damage after one missed clean.
Interlocking rubber tiles split the difference for most home builds. They install without adhesive, absorb enough impact for moderate lifting, and pull up clean if you move or repurpose the shed.
Foam tiles work for stretching and bodyweight work, though I’d avoid them for a space that looks like a grown-up gym rather than a playschool.
My pick: rubber stall mats under the rack and bench, vinyl or laminate for the open floor where you’re doing warm-ups and mobility work. The split costs a little more upfront, but each zone gets the surface it actually needs.

THE GAP AND CRACK ATTACKER! Reduce drafts and save energy

Expands To Fill: Loctite Tite Foam Gaps & Cracks fills, seals, and insulates effectively around gaps and cracks up to 1 inch in size
5. Equip and Organize Your Gym
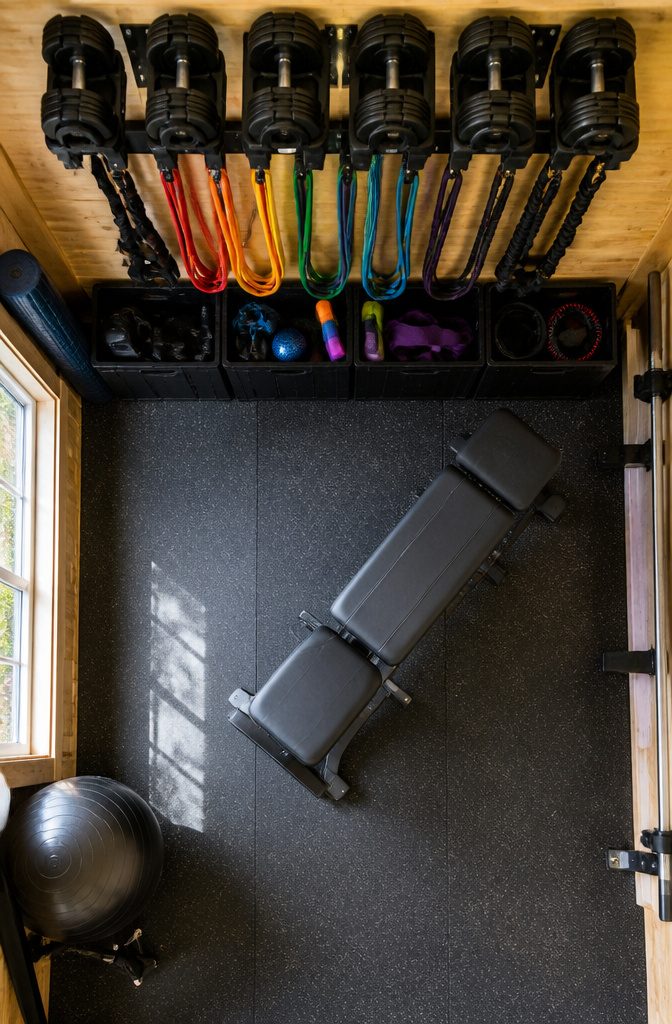
Wall space is your best friend in a shed gym. Wall-mounted racks keep weights, resistance bands, and accessories off the floor and within reach, which matters when you are working with maybe 80 square feet and a low ceiling.
Pegboards or hooks handle jump ropes and smaller gear that otherwise ends up in a corner.
For equipment, I would skip the full dumbbell rack and go with adjustable dumbbells.
One set replaces ten pairs, and you can tuck them on a shelf when you are done. Foldable benches and compact machines save the floor space you need for actually moving.
Resistance bands are the other pick I would not build without. They store in a drawer and cover exercises that would take three machines in a commercial gym.
The organization part is what keeps you using the space.
Assign every item a spot. A weight tree or a couple of bins for small gear keeps clutter from creeping back in, and a clutter-free shed makes workouts smoother.
If you are mounting anything heavier than a rack, standard shed framing runs 16 inches on-center, which matches most wall-mounted machines. Check your shed’s stud spacing before you buy, but most prefab frames will take the load.

Spring Steel That Holds Firm: Each wire flexes during installation and presses outward against the framing to help stay in place while supporting insulation batts.
Spring Steel That Holds Firm: Each wire flexes during installation and presses outward against the framing to help stay in place while supporting insulation batts.

Cut to size fiberglass
6. Personalize Your Space
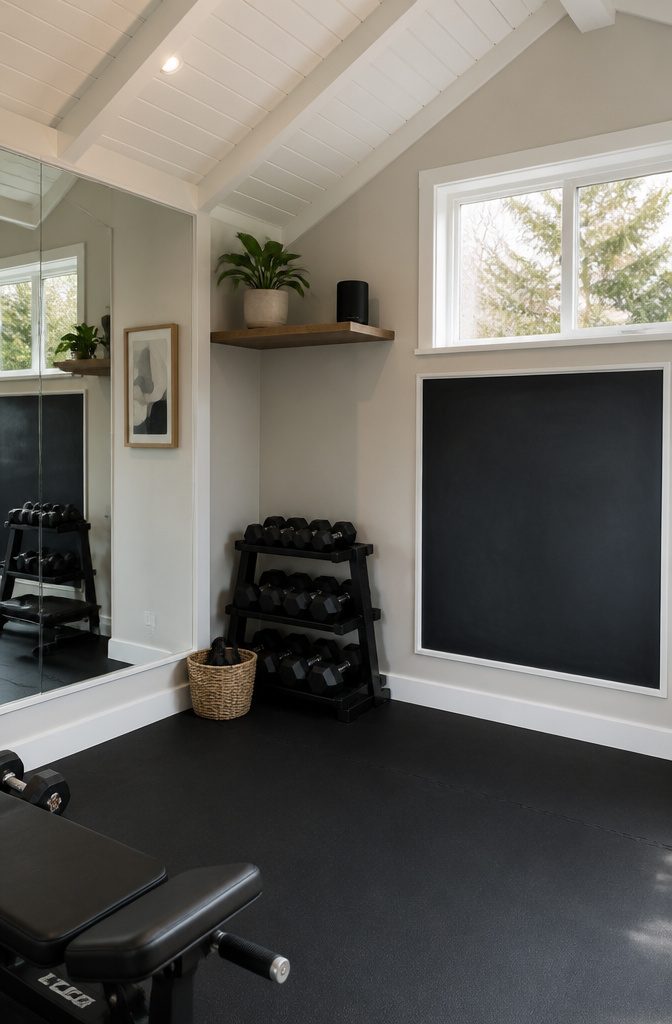
A Bluetooth speaker or compact sound system keeps energy up during workouts, and the placement matters more than the wattage.
I would put it where the sound reaches you at normal volume rather than cranked high, because a shed gym is small and reflection off metal or glass gets harsh fast.
A fresh coat of paint on the walls before you move equipment in does more than decor; it makes the space feel finished in a way that gets you out the door and lifting.
Do this before you buy equipment, not after. Paint with gear already inside is twice the work.
Mirrors help form, but in a shed they also bounce light around a tight box.
One large panel on the wall you face during squats or presses is enough; more than that and the space starts to feel like a funhouse.
Motivational artwork or a chalkboard wall for tracking lifts works if it is for your own numbers, not generic quotes. The chalkboard doubles as log-keeping, which matters more than the look.
I would skip the TV or tablet stand unless you already know you follow guided workouts; it is dead space otherwise, and a phone propped on a rack does the same job for most routines.
Wi-Fi through a repeater lets you stream, but test the signal before you mount anything permanent.
A dead zone in the back corner where the heavy bag hangs is a frustration you can avoid by walking the space with your phone first.

Proudly Made in the USA: Made of 100% recycled materials, our composite shims are great for leveling in both indoor and outdoor applications. Our stackable shims are a heavy duty solution to wooden wedges that won’t rot, warp, or crack. With 37 pre-scored lines, our composite shims are 4x easier to snap than wood. They also support more weight, allowing you to level heavy appliances, furniture, and more!

STRONG AND DURABLE: TUFFBOY Plastic Wedge Shims, made from high-quality recycled plastic, are designed for various leveling, repair, and home improvement projects, both indoors and outdoors. These plastic shims are intended to replace wooden shim, offering support for any task that requires reliable materials. Great for a wide range of DIY tasks, including rubber shims for leveling, composite shims, black shims, plastic wedges, door shims, appliance shims, and black plastic shims.

STRONG AND DURABLE: TUFFBOY Plastic Wedge Shims, made from high-quality recycled plastic, are designed for various leveling, repair, and home improvement projects, both indoors and outdoors. These plastic shims are intended to replace wooden shims, offering support for any task that requires reliable materials. Great for a wide range of DIY tasks, including rubber shims for leveling, composite shims, black shims, plastic wedges, door shims, appliance shims, and black plastic shims.
Shed Sizes That Actually Work
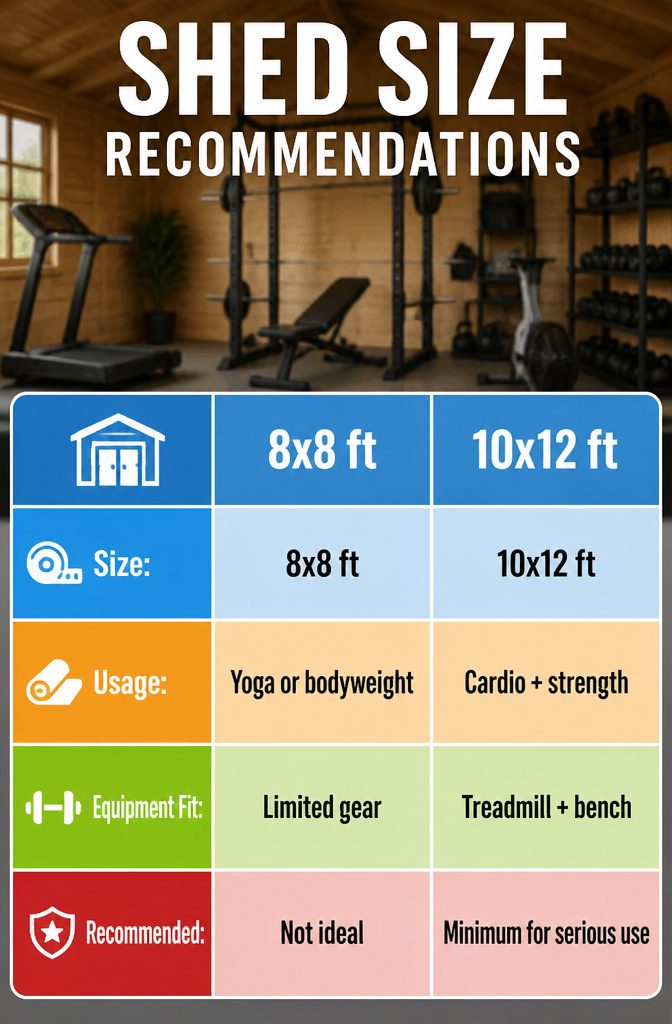
The shed size you pick determines whether you actually use the thing or end up storing lawn equipment in it by June.
- 8×8 ft works for yoga mats, bodyweight work, and a small dumbbell rack. I would not try to fit a bench in here; the walls close in fast once you add any real equipment.
- 10×12 ft is the size I would build if I were starting fresh. It holds a treadmill or rower, a bench with some clearance, and floor space for warm-ups. This is the practical minimum for strength plus cardio together.
- 12×16 ft gives you multiple zones: lifting on one end, cardio on the other, maybe a corner for stretching. The extra four feet in each direction sounds small on paper but changes how the space feels when you are mid-workout and need to move around a loaded bar.
If you’re building something you’ll actually use, go with 10×12 ft or larger. Anything smaller and you are making compromises on every session.

【High Quality Material】Outdoor shed floor mat is made of high-quality felt material, which has excellent water and oil absorption functions. Bottom is a sturdy and wear-resistant waterproof PE backing, providing anti-seepage protection. Providing protection for valuable equipment and shed floors to prevent rusting. Ensure that storage space is in a dry state for a long time
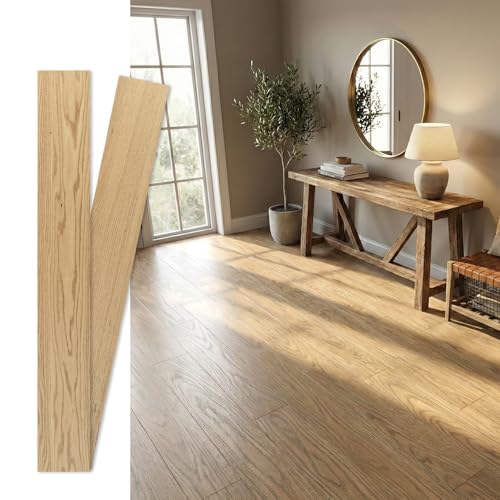
Tongue and Groove Design: Jeedeson engineered hardwood flooring features a classic tongue and groove construction.
Flooring and Insulation Compared
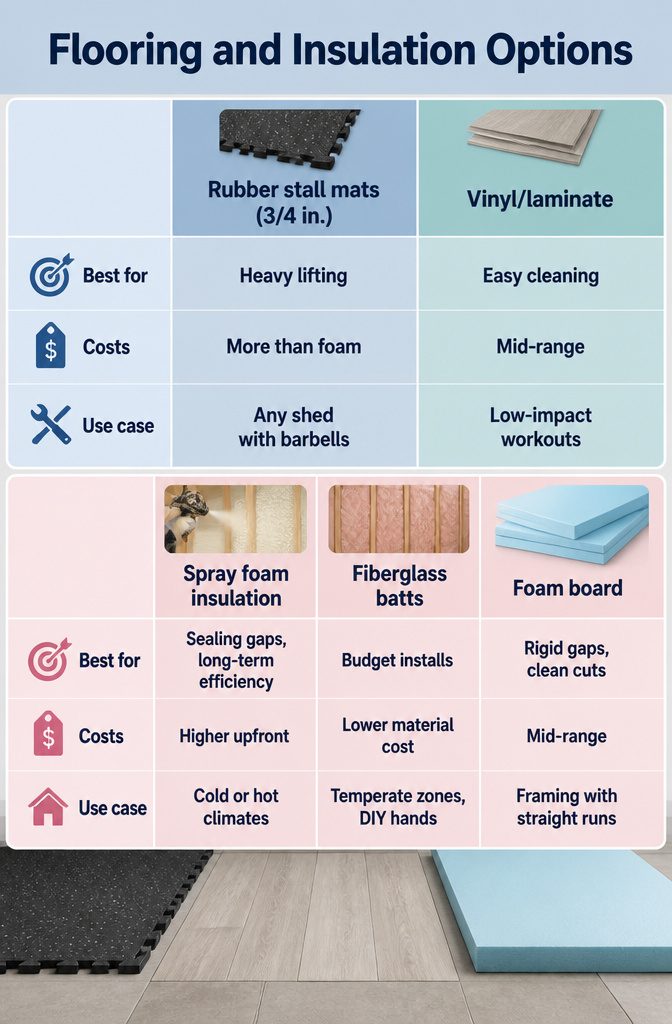
Rubber stall mats at three-quarter inch thickness are what I would put down for any shed gym that sees dropped barbells.
Skip hardwood or laminate; weights leave dents fast. That said, vinyl or laminate cleans easier and looks less industrial if your workout skews toward yoga and bodyweight moves rather than heavy deadlifts.
Interlocking foam tiles work for stretching but feel like a playroom, and I would not trust them under a loaded bar.
For insulation, spray foam saves on heating and cooling costs and goes in tight to the framing, but a Ductless mini-split on the wall will handle the real climate control.
Fiberglass batts and foam board are the alternatives if spray foam runs past your budget, though neither seals the small gaps that let shed air leak the way foam does.
| Best for | What it Costs/Needs | Where I Would Use It | |
|---|---|---|---|
| Rubber stall mats (3/4 in.) | Heavy lifting, dropped weights | More than foam, less than reinforced PLAE flooring | Any shed with barbells |
| Vinyl/laminate | Easy cleaning, looks finished | Mid-range | Bodyweight, cardio, low-impact |
| Laminate (general gym use) | n/a | n/a | n/a |
| Spray foam insulation | Sealing gaps, long-term efficiency | Higher upfront | Cold or hot climates |
| Fiberglass batts | Budget installs | Lower material cost | Temperate zones, DIY hands |
| Foam board | Rigid gaps, clean cuts | Mid-range | Framing with straight runs |
Floor reinforcement matters before any of these go down. One builder spent $150 on lumber to bridge the base, then $700 on PLAE flooring over it.
For a weekend project on a few hundred dollars, rubber stall mats over a plywood subfloor get you most of that protection without the four-figure bill.
What This Build Costs
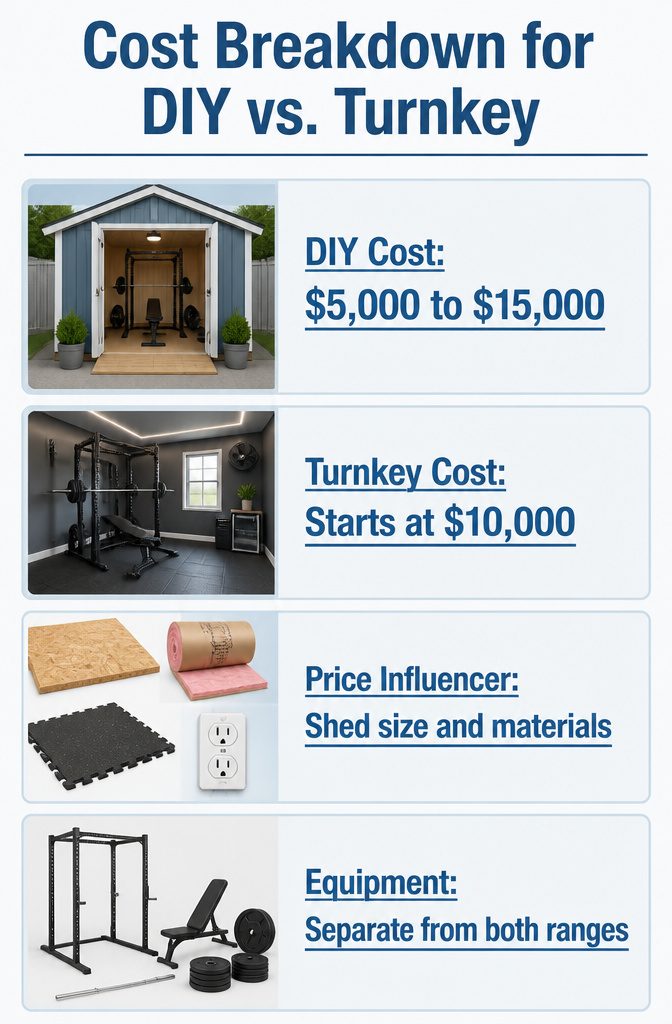
A DIY conversion runs $5,000 to $15,000, while turnkey solutions start at $10,000 and climb past $25,000. That gap is real, and it comes down to what you handle yourself versus what you outsource.
The variability sits in three places: shed size, materials, and how far you take the infrastructure. A 10×12-foot structure needs less flooring, less insulation, and fewer outlets than something larger.
A basic rubber mat floor and a single electrical line land at the low end of the range. Add climate control, proper gym flooring, and upgraded lighting, and you push toward that $15,000 ceiling fast.
Turnkey pricing scales with the same inputs plus labor markup and project management.
You’re paying for speed and for someone else to chase permits. If your timeline is tight or electrical work is outside your comfort zone, the premium buys training sooner rather than later.
Equipment sits outside both ranges entirely. A rack, bar, and plates can run $300 or $2,500 depending on whether you buy new, refurbished, or hunt second-hand.
I factor equipment separately because it is: the shed is the envelope, and the gear is what you swap out as needs change. Spend the money on structure first.
Equipment That Fits Small Spaces
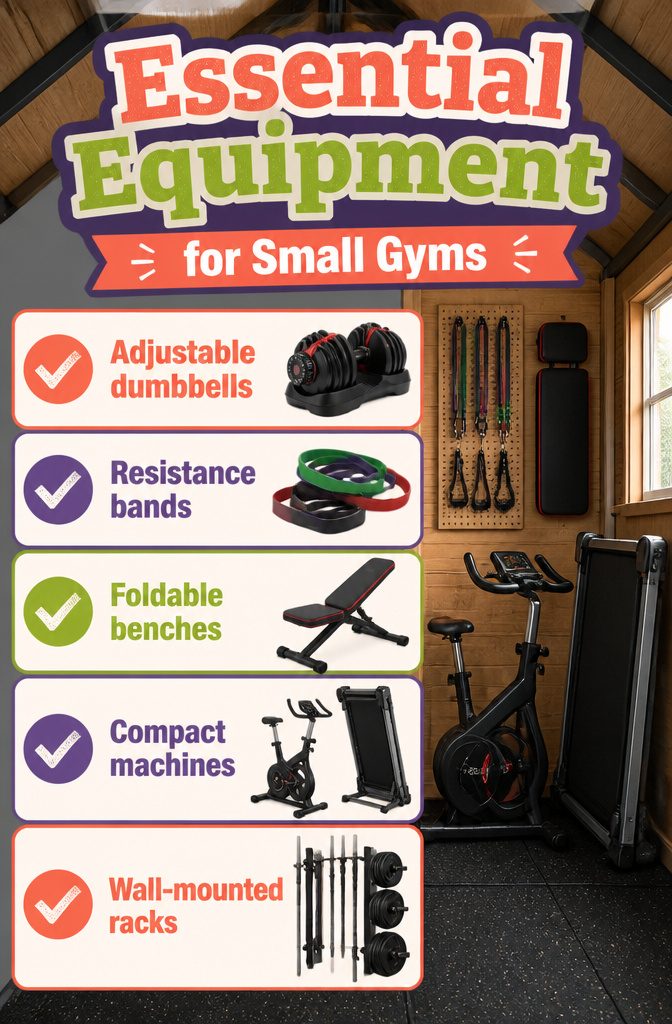
In a shed gym, every square foot matters. I would skip anything that lives on the floor full-time and build around gear that either adjusts, folds, or mounts out of the way.
- Adjustable dumbbells replace an entire rack. I would pick these first; one set gives you the same range as ten pairs of fixed weights, and they tuck onto a shelf when you are done.
- Resistance bands weigh almost nothing and store on a pegboard or hook. I keep a set for rows, pull-aparts, and assisted work that would otherwise need a cable station.
- Foldable benches open for presses and step-ups, then lean flat against a wall. A fixed bench eats floor space you do not have.
- Compact machines, like a foldable treadmill or small stationary bike, only work if they fit your routine and your square footage. I would measure twice and buy once here; a 10×12 shed handles one comfortably, but an 8×8 does not.
Wall-mounted racks and vertical barbell holders keep the center clear. Floor space is for moving, not for storage.
Ventilation Options That Work
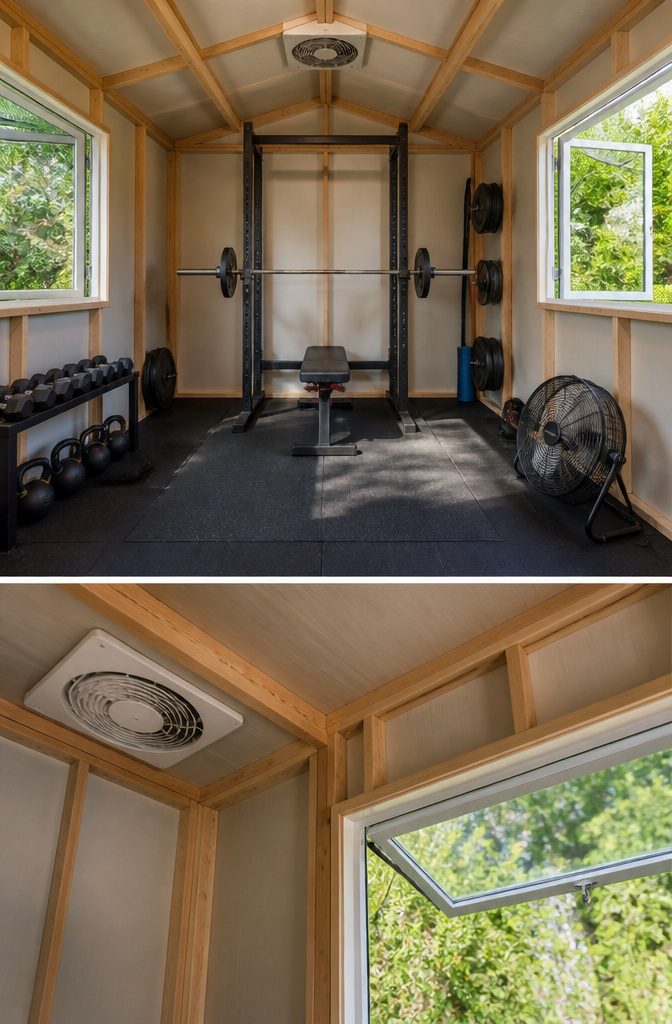
Windows are the baseline I would start from. Two operable windows set on opposite walls pull air through on their own whenever the weather allows, and that cross-breeze does more than cool you down.
It is the simplest way to keep moisture from settling into insulation after a heavy workout, especially in a small shed where humidity spikes fast.
A studio-style shed with two rows of windows up front gets you both the airflow and the natural light that helps motivation on early mornings.
An exhaust fan is what I would add if I were running cardio equipment or training through humid summers. It pushes stale, wet air out actively rather than waiting for wind, which matters when the shed is closed up.
You need the electrical rough-in anyway if you’re plugging in a treadmill, so the receptacle for a ceiling fan box fits neatly into the same plan.
For air circulation inside the space, a portable fan is the cheapest fix and the one I would keep on hand even with windows and exhaust in place.
Circulated air keeps the corners from going stale, though I would not expect it to drop the temperature on its own.
It is a supplement, not a replacement, and the combination of all three is what keeps a diy workout shed from turning into a sauna or a mold risk.
Frequently Asked Questions
How much does it cost to turn a shed into a gym?
A DIY conversion runs $5,000 to $15,000, while turnkey solutions start at $10,000 and climb past $25,000. Equipment sits outside both ranges entirely and can add $300 to $2,500 or more depending on what you buy and whether you shop new, refurbished, or second-hand.
The gap between DIY and turnkey comes down to what you handle yourself versus what you outsource, plus labor markup and project management on the professional end.
What is the best flooring for a shed gym?
Rubber stall mats at 3/4 inch thickness are the pick for any shed gym that sees dropped barbells, since they absorb shock and keep a barbell from punching through the subfloor.
Vinyl or laminate win on cleanup and looks for bodyweight or cardio-focused spaces, though weights will dent laminate fast.
Interlocking rubber tiles split the difference for most home builds: they install without adhesive, handle moderate lifting, and pull up clean if you move or repurpose the shed.
How do I insulate a shed for a gym?
Start with the ceiling, since that is where most heat escapes, then run the same material down the walls before interior sheathing goes up.
Fiberglass batts are the cheap bet for a straightforward rectangle of studs on 16-inch centers; foam board lands in the middle with rigid panels you cut with a utility knife and screw straight to studs; spray foam seals every crack but costs the most and usually needs a pro with a rig.
Comfortable gym temperature sits between 65°F and 68°F, and insulation alone will not keep you there without airflow from windows, exhaust fans, or portable fans to control humidity.
Can a shed be used as a gym?
Yes, with the right preparation a shed can serve as a functional gym.
The structure needs to sit level on its foundation, the floor has to handle weight without bouncing, and you will want insulation for year-round use, proper electrical for equipment and lighting, and ventilation to keep the air moving.
Rubber matting over a cleaned subfloor, wall-mounted storage to keep gear off the floor, and compact or foldable equipment let you make real use of even a smaller footprint.
What size shed is best for a gym?
10×12 ft is the practical minimum for strength plus cardio together, and it is the size I would build if starting fresh.
An 8×8 ft shed works for yoga mats, bodyweight work, and a small dumbbell rack but walls close in fast once you add real equipment.
A 12×16 ft shed gives you multiple zones: lifting on one end, cardio on the other, maybe a corner for stretching. If you’re building something you’ll actually use, go with 10×12 ft or larger.
Is it cheaper to buy or DIY a shed?
DIY is cheaper if you have the skills and time. Kit sheds run $3,000 to $8,000 depending on size, while turnkey sheds assembled and delivered run $7,000 to $20,000 depending on materials and finishes.
Turnkey trades convenience for cost; kits let you customize and save money. On top of the shed itself, a DIY conversion for gym use adds $500 to $3,000 for insulation, flooring, and electrical, with equipment running $300 to $2,500 and beyond.
Can you put a home gym outside?
Yes, a shed is one of the better ways to do it since it gives you a dedicated, enclosed space that protects equipment from weather and keeps your workout separate from the house.
The shed needs to be level, reinforced for weight, insulated for the seasons you want to use it, and wired for power if you are running machines or lights.
A backyard gym shed also keeps the noise and clutter out of your living space, which matters if you are dropping plates or running a treadmill early in the morning.