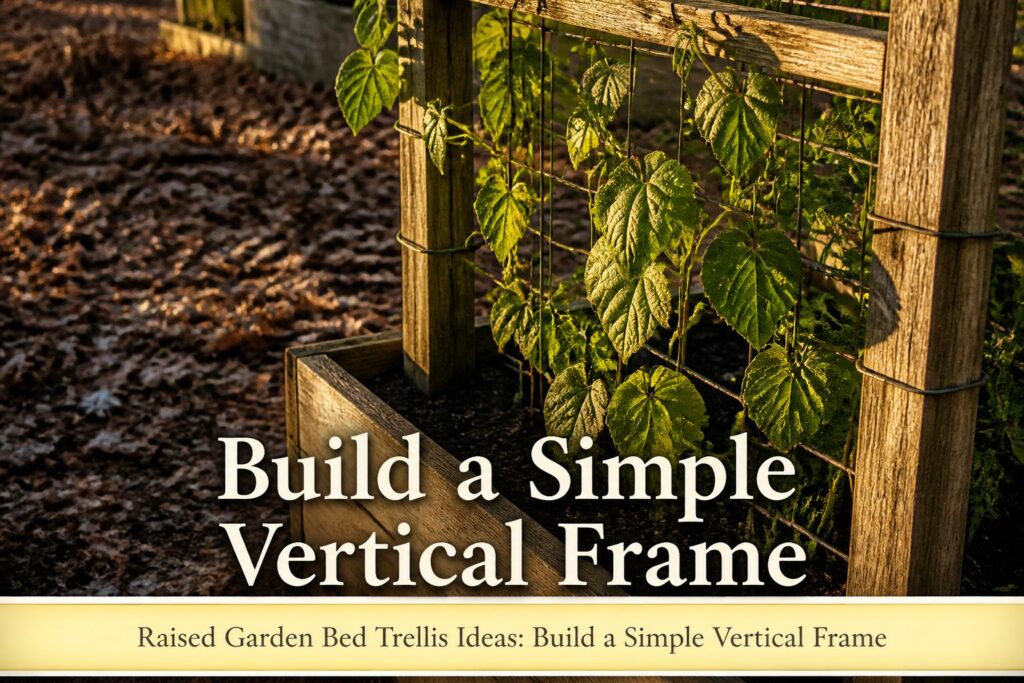
A vertical frame in a raised bed doubles your harvest from the same soil you already paid to fill, but only if the posts go twelve inches into native ground, not bed fill, and the panel is secured before a single seed breaks the surface.
T posts at four dollars each and a twenty-five-dollar cattle panel will outlast the wood it is tied to.
[link-whisper-related-posts]1. Install Support Posts
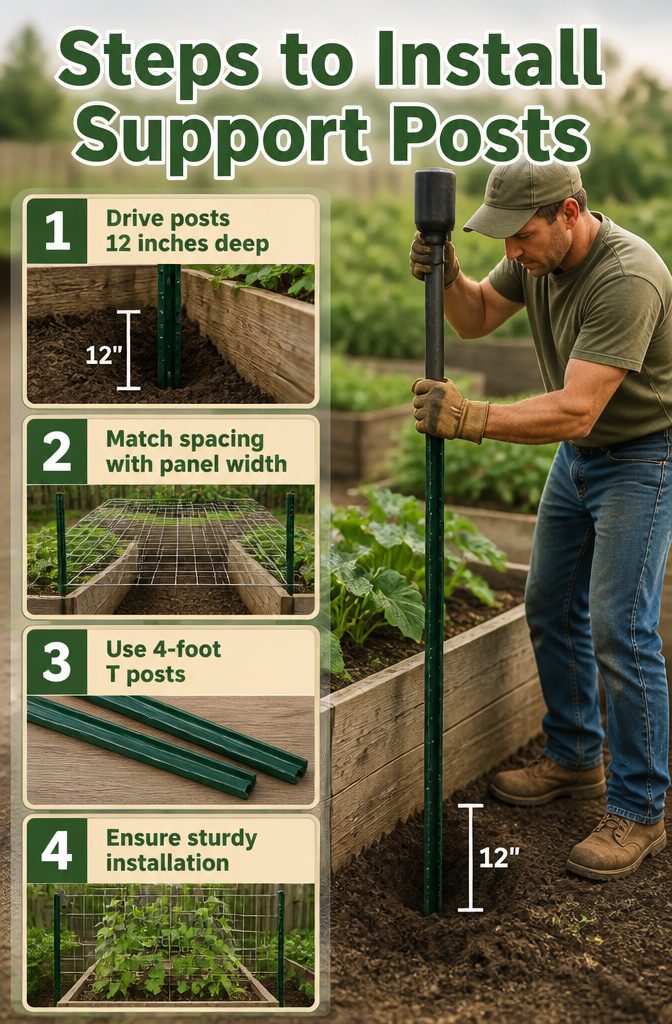
- Drive the posts at least 12 inches below ground, measured from the native soil line, not from the top of your raised bed fill. A post pounder saves your shoulders and keeps them vertical; leaning posts weaken the whole frame.
- Space the pair to match your cattle panel or mesh width exactly. Lay the panel across the beds before you pound anything; one long edge of a standard cattle panel has tighter wire spacing, so eyeballing it from the ground risks an off-center fit.
- Four-foot T posts run about $4 each and suit most beds. Star pickets work the same way and often show up second-hand. Either type needs to sit solid enough to take wind load once vines mature and the panel catches like a sail.
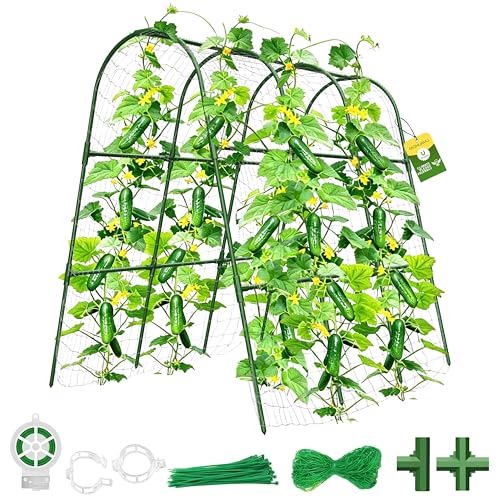
【U-Shape Stability Structure 】 U-frame trellis is more stable than A-frame trellis. Allowing you to plant a row on both sides. The arch design maximizes the garden space.

Adjustable Height Trellis (17" to 50") – Perfect for Raised Beds & Tall Vines, grow Any Climbing Plant! DIY from Compact Seedlings to Towering Vines! Match your raised bed cucumber trellis needs: Start at 17" for young plants, then extend to 50" as they grow! Customize height—ideal for beans, peas, and tall outdoor climbing plants.

【A-Frame Trellis】Our detachable Cucumber Trellis is widely used in gardens and backyards; It allows you to adjust the width as needed for compact storage; By utilizing vertical space, this Plant Grow Support elevates vines off the ground, maximizing sunlight exposure for better quality fruits and vegetables while boosting overall harvest and yield
2. Position the Trellis Panel
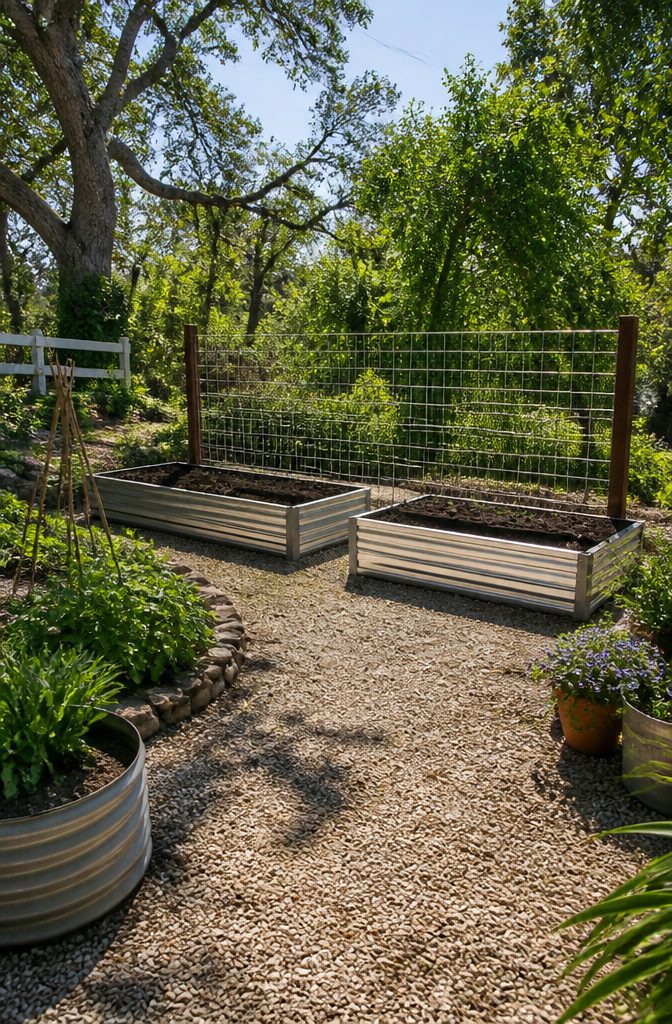
- A standard cattle panel runs 16 feet long and 34 inches wide, so one panel usually spans two beds or bends into an arch between them.
- Set the panel between your support posts and adjust height before you fasten anything; the bottom wire should sit near soil level so seedlings can actually reach it.
- Lay the panel on top of the beds first to check placement and spacing, especially since one long edge has narrower wire gaps that work better facing the plants.
- Bending the panel into an arch takes two people; the curve stiffens the metal and turns the same panel into a tunnel, but only if your beds are spaced to allow it.
- Once the height and position feel right, secure the panel to the posts with wire, then add fence staples where the frame meets the bed for extra stability against wind.
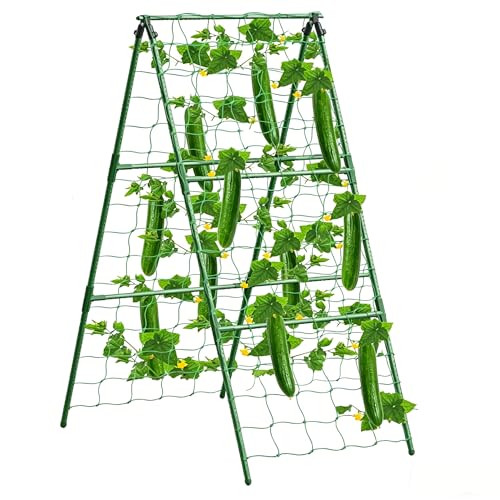
【Package included】:This Trellis for Climbing Plants Outdoor comes complete with everything you need to get started: 17pcs metal stakes, 8pcs T shape connect pipe, 2 A-shaped connectors, and a 0.9x1.8meter plant net.

Tired of replacing supports as your plants grow? Our indoor plant support stakes feature a removable, stackable design, with each support measuring 11 inches. Placing one stake on top of another allows you to extend their height as your plants grow, making them ideal for seedlings, monstera plant support, climbing vines, and tall stems. They provide strong stem support without bending or breaking.

Adjustable 3-Section Design:Each trellis can be easily assembled in 1, 2, or 3 sections, offering three height options: 18.4", 36", and an impressive 53.6". This adaptability supports your plants at every growth stage, from seedlings to mature vines.
3. Secure the Trellis
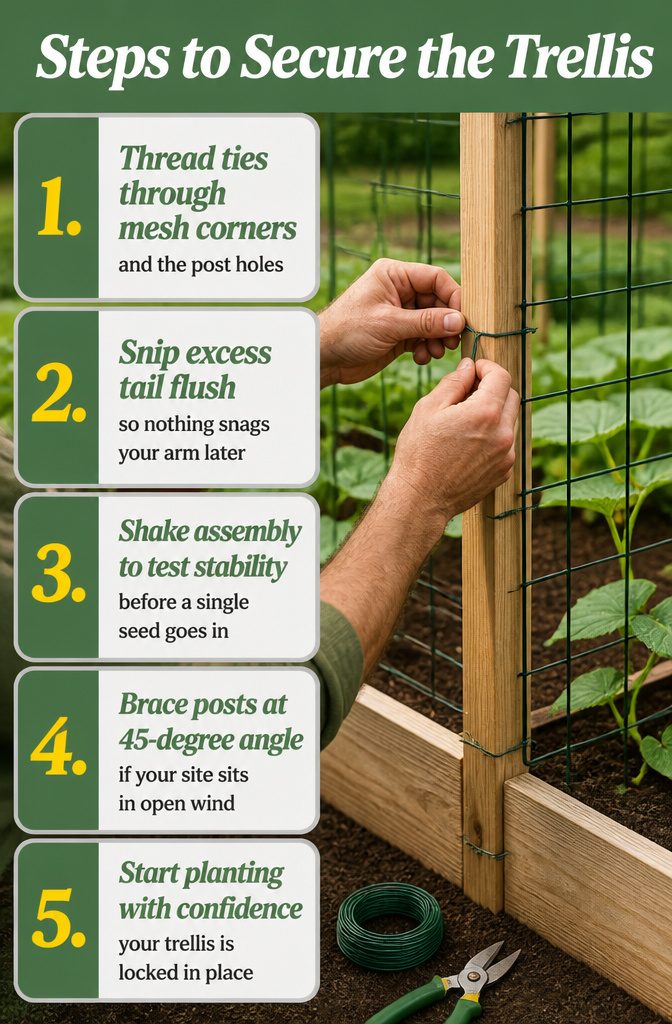
Zip ties or wire ties both work here; I would reach for wire ties if I had them. A bundle runs about $5, and they outlast plastic when the sun beats on them all season.
- Thread ties through the mesh corners and the post holes, spacing several along the full height so the panel cannot shift in wind or sag under a heavy squash vine.
- Snip the excess tail flush so nothing snags your arm later. A sharp end left behind will find your forearm every time you reach for a tomato.
- Grab the post at shoulder height and give the whole assembly a solid shake. If it wobbles even a little, add another tie or sink the post deeper before a single seed goes in. A trellis that moves after planting will snap stems and waste a season.
Mounting it to the side of the raised bed should provide enough support, not only against winds, but the weight of your vining veggies.
If your site sits in open wind, brace the posts at a 45-degree angle back to the bed frame. That extra strut takes ten minutes now and saves you from finding your cucumbers flattened after the first thunderstorm.

Complete Package for Convenience: the wire trellis kit Includes 61m trellis wire and 20 eye screws (diameter 2/10 inches); This package ensures you have all necessary components right at your fingertips, making set up a breeze and eliminating the need for additional purchases

Enough to Use: this package includes 2 wire trellis for climbing plants, doubling the support for your climbing plants; It's an ideal choice for garden hobbyists who tend to a variety of climbing plants on trellises or arbor

Realistic Natural Look: Artificial ivy wallscreen measures 98" long and 39" wide, this artificial ivy privacy fence screen is constructed with vein-detailed green faux ivy leaves. Adjustable leaf orientation lets you tweak the look for a fuller, more organic appearance. lifelike foliage builds an elegant green backdrop and elevates visual effect for your patio, garden and living area, bringing you immersive green scenery.
4. Plant at the Base
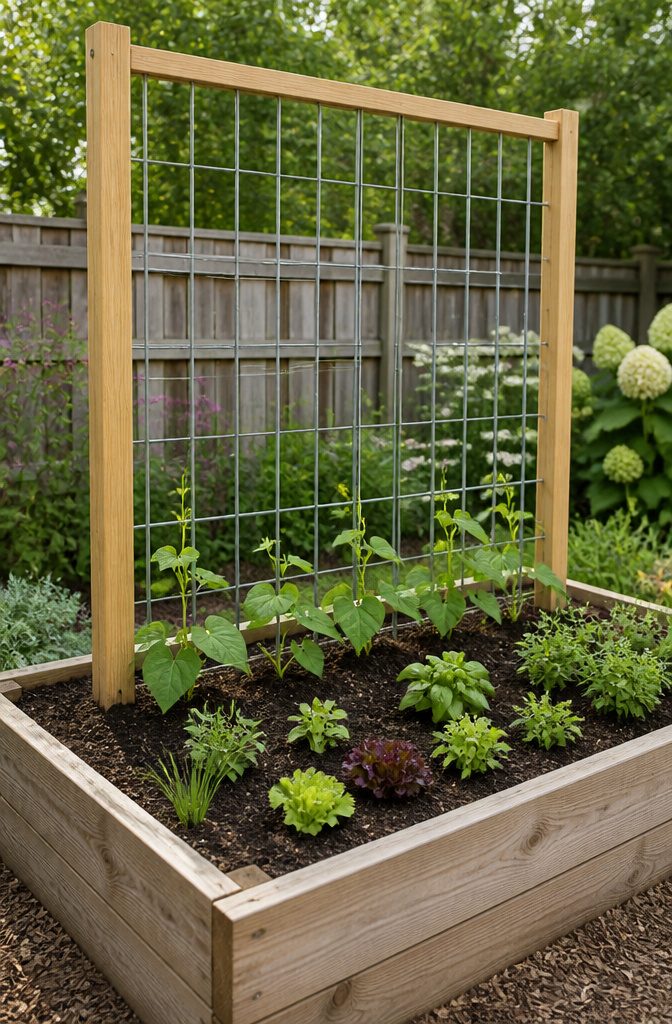
- Set seeds or seedlings right at the foot of the trellis, not off to the side where stems would have to bend and risk snapping. Pole beans, peas, cucumbers, and indeterminate tomatoes are the climbers worth dedicating the frame to; their tendrils or twining stems will find the supports on their own once they are close enough.
- For beans, I start them 2 inches apart and thin to 4–6 inches once the seedlings show which ones are strongest. That early crowding gives insurance against spotty germination without wasting the final spacing on duds.
- Planting before the trellis is up is a move I would skip. Young stems are brittle, and threading them under or around a panel you install later almost always costs you a few plants. The frame should be in place before anything breaks the soil surface.
- The open soil in front of the trellis does not have to sit empty. Lettuce, herbs, or carrots can fill that band while the climbers take the vertical space above. It is the same square footage, just layered.

Strong Hold for Fencing: Perfect for attaching wire fencing, chicken wire, mesh fencing, and garden fence panels to wood fence posts; Ideal for farms, chicken coops, gardens, and other outdoor fencing projects
EXTRA-GRIP FENCING HOLD: These longer 1-3/4 inch double-barbed staples fasten round wire fencing to wood posts, with barbed legs that reach deep and resist pull-out to keep wire tight and secure under tension. That delivers a reliable hold you can

Our garden bed corner brackets are about 12 inches in length and 4.5 inches in width, 4.5 inches in height, holding up to 2'' x 12'' planks; They are lightweight and portable, can be stacked for storage, will not take up much space
5. Guide and Maintain
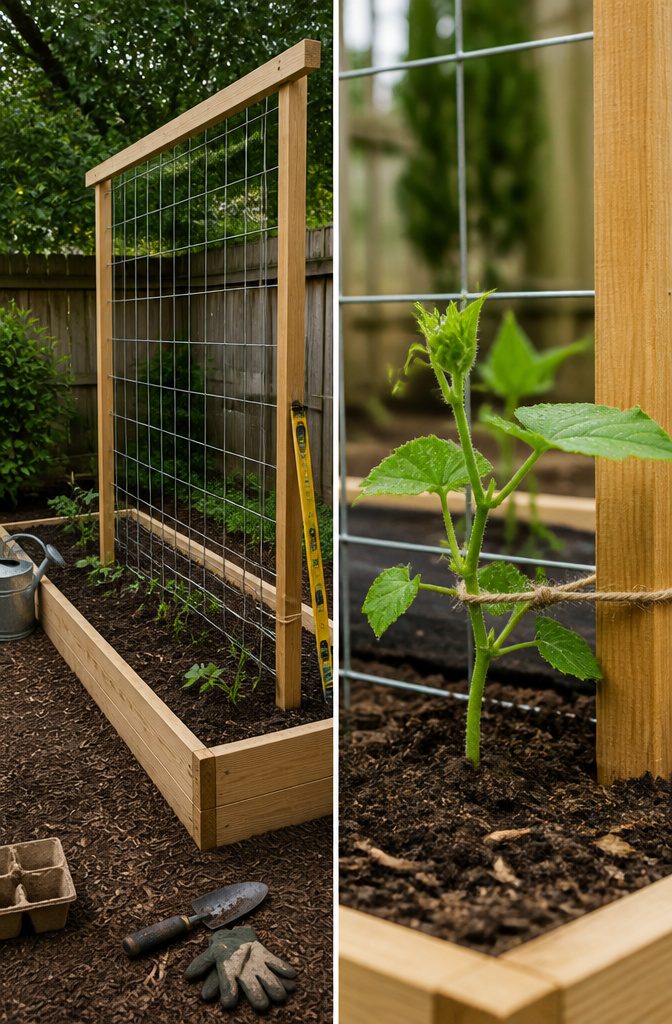
- Check the frame after every hard rain or wind. A post that has started to lean will pull the rest of the structure loose if you let it go another season. A 2-foot level held against each post tells you in seconds what the eye misses.
- Tie stems to the panel while they are still soft and pliable. Cucumber and pea vines harden within days of emerging, and once they set their own angle you are fighting the plant instead of guiding it. I use soft twine in a figure-eight loop around the stem and the wire, loose enough that the knot does not bite into the flesh as it thickens.
- Snip spent foliage before it mats against the mesh. Last year’s bean vines left dry will hold moisture against the panel and add weight you did not build for. The five minutes it takes now saves the rebuild you will face in spring.

LONG ENOUGH: This plant ties are 492 feet (150 m) per volume. Durable and long enough for your use.

Package Included: 100*cable tie bases, 100*8" zip ties, 100*tapping screw.
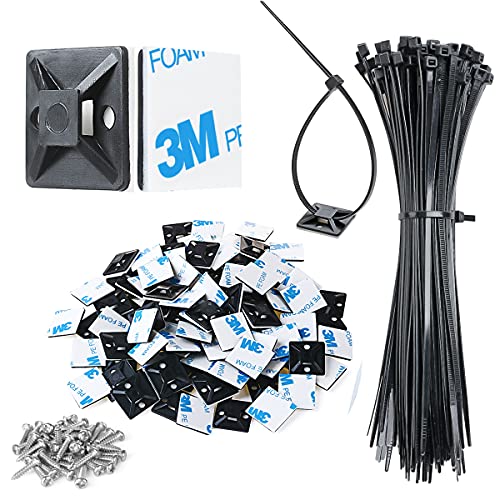
High quality material:XHF Adhesive Zip Tie Mounts are manufactured from 3M Strong Adhesive and PA66 nylon
6. Harvest Vertical
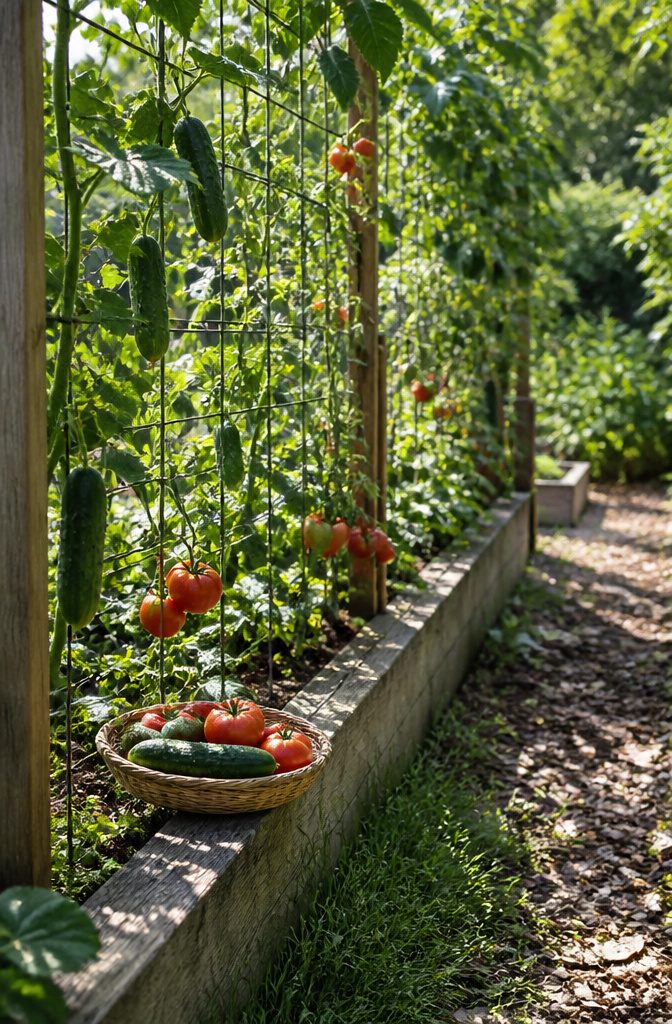
Once your vines climb past the second rung, you will feel the difference in your back. I stopped dreading the cucumber harvest once the fruit hung at chest height instead of forcing me to bend to the soil line.
- Check fruit daily at eye level instead of crouching to scan the ground. A tomato that has cracked or a pepper with blossom end rot shows against the trellis grid hours or days sooner than it would hidden under leaves at the base of the bed.
- Pick with two hands, one to steady the vine and one to twist the stem. The trellis takes the plant’s weight so the fruit separates cleanly without tearing the branch.
- Set a shallow basket on the bed rail or a nearby stool. Your harvest stays off the dirt, and you are not setting fruit directly on soil where slugs and snails travel.
- Inspect the back side of the trellis each time you pick. The air circulation that vertical growing gives also means pests find fewer damp hiding spots, but the ones that do settle cluster where you least expect them.
- Rinse fruit with a hose set to mist before you carry it inside. Vegetables growing off the ground start cleaner, and a quick rinse removes the little dust that does collect instead of the splashed soil ground-level harvests need.

Spacious Design: This garden trellis is different from traditional A-frame planters, we adopted a house-style design to maximize the use of vertical space, this garden arch is spacious enough to walk underneath and pick berries or vegetables, it makes efficient use of space, allowing you to grow a row of plants on both sides while ensuring your plants get plenty of sunlight.
7. Wire Panel Trellis
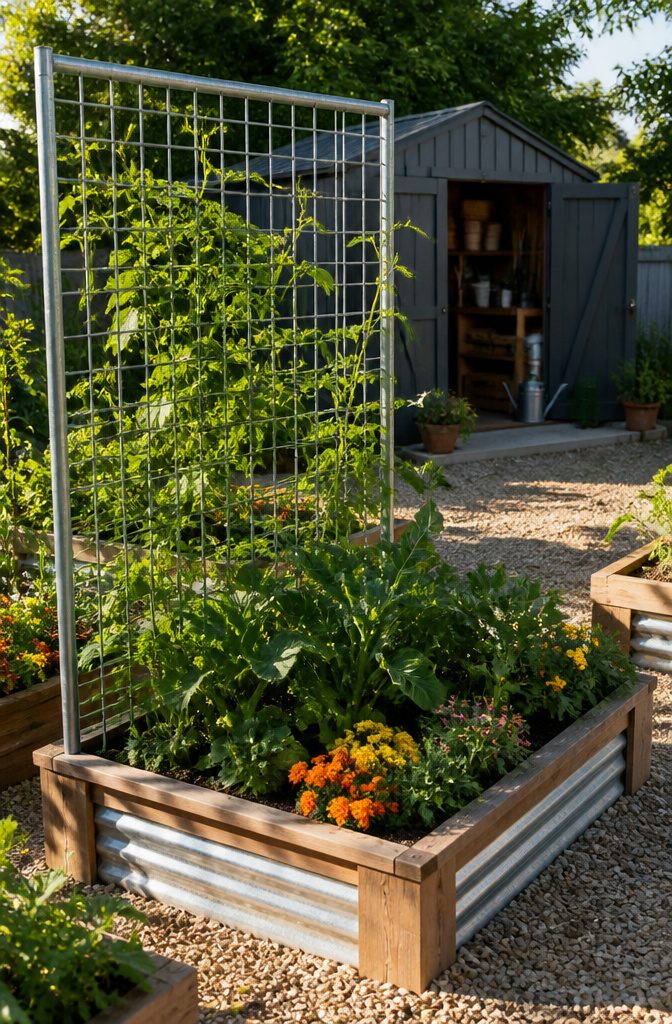
A flat rectangle of galvanized steel mesh or a repurposed cattle panel, braced by two posts at the back of the bed, is the default trellis for anyone growing something heavy.
The grid gives winter squash, luffa, or a sprawling tomato vine something solid to pull against, and the panel itself will outlast the wood it is tied to.
The 16-foot cattle panels run about $25 at farm supply stores; Grip & Grow panels cost roughly $36 if you buy instead of scavenge.
Two T or U posts, about $4 each, and a handful of zip ties or fence staples are the only other materials. Pound the posts into the ground behind your bed, lean the panel against them, and secure it.
For an 8-foot bed, three wooden supports lag-screwed to the back of the frame gives you something even sturdier to zip-tie the mesh to.
I would pick this setup for anything over ten pounds per vine. It is the cheapest of the permanent options, the strongest, and the one you are least likely to replace.
Looks are the downside: you are not hiding a cattle panel behind flowers, and the galvanized grid reads utilitarian against a painted bed or a tidy patio.
Function wins here, but only if you have the depth behind the bed to set the posts. On a narrow porch or a bed pushed against a fence, the panel needs somewhere to stand.

Support for Tall Plant: This trellis kit provides 7.87” support for your tomatoes, peppers and more

【New generation Plant Support Cage】Different from other tomato trellis, LOMNYIY tomato support cage have the newest plug-in connection, and unique double-layer metal tube built-in interface design to stay together tighter and more stable. And the poles are very hard with a metal core, yet are coated entirely in plastic to keep them from rusting, and the heat dissipation is good. It means strong durable performance can hold up in the wind with heavy tomato plants in them.

DURABLE HEAVY-DUTY GARDEN FENCE POST: Our garden fence posts are made of thickened galvanized steel and covered with a rust proof coating, which is not afraid of harsh weather or heavy snow pressure. The diameter of the thickened column of the heavy duty metal u-post reaches 3.6 inches, greatly improving its load-bearing strength and providing stable support for various courtyard partitions such as wire mesh and vine climbing frames.
8. Arch Trellis
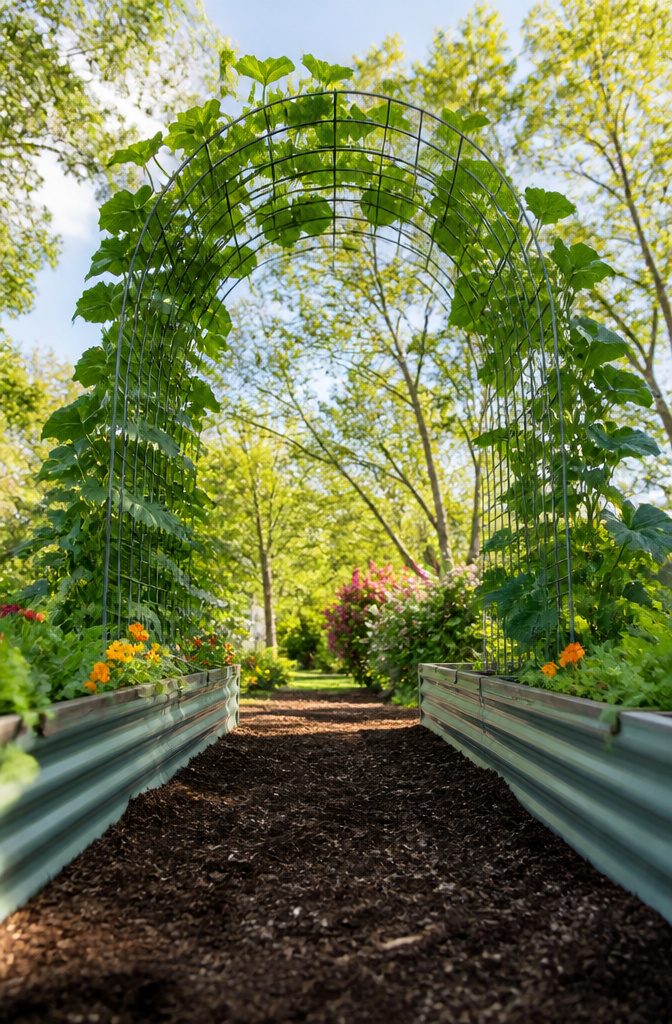
A single cattle panel bent between two raised beds gives you roughly 5 to 6.5 feet of headroom at the crown, enough to walk through without ducking once the vines fill in.
I would anchor the panel by screwing wood strapping to the bed boards rather than driving posts into the ground; it keeps the path clear and the structure removable if you are renting or reconfiguring next season.
At about $40 per arch, this is the cheapest way to add real drama to a vegetable garden. It demands two parallel beds spaced correctly or the panel will not tension right.
Pole beans and cucumbers climb it readily, though the sources split on grapes; one mentions them confidently, another sticks to annual vegetables. I would save grapes for a sturdier permanent frame.
What sells me is the footprint. No other trellis option turns the dead space between beds into productive growing area.
You walk through your harvest instead of alongside it, and the tunnel shapes the whole garden into something intentional. For a weekend build on a real budget, this is the one I would pick if I had the width.

HIGH QUALITY MATERIALS :The willow trellis plant support are made of 100% real willow wood, nature willow color, willow sticks is about 1/4” to 3/8” thick, nice and sturdy.

175 Feet. 20 Gauge galvanzied
9. A-Frame Trellis
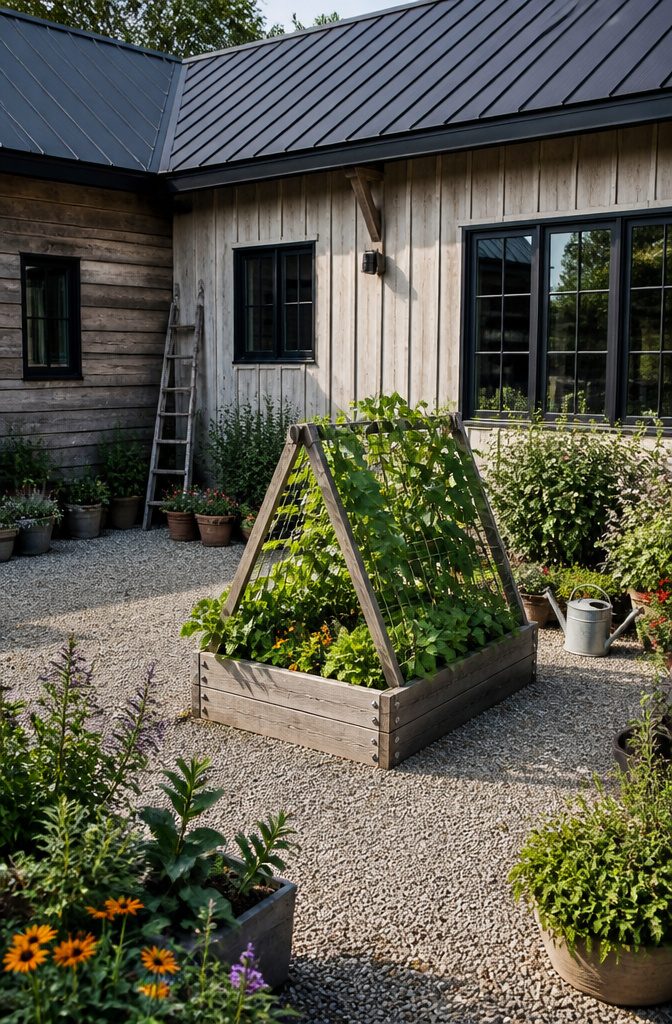
An A-frame trellis uses two panels hinged or lashed at the top to form a tent shape over the bed. The structure stands on its own, so you skip the work of driving posts deep enough to resist summer wind.
Material is the downside: two panels means roughly twice the lumber or cattle panel of a single flat trellis, plus a hinge or lashing at the ridge.
The angled sides give cucumbers or melons plenty of climbing surface, and the tent creates shade underneath that I would use for lettuce or spinach once summer heat arrives.
Because it is a temporary structure, you pull it at season’s end and store it flat. Before placing one, push the supports well down into the soil so the frame stays put.
10. String and Ladder Trellises
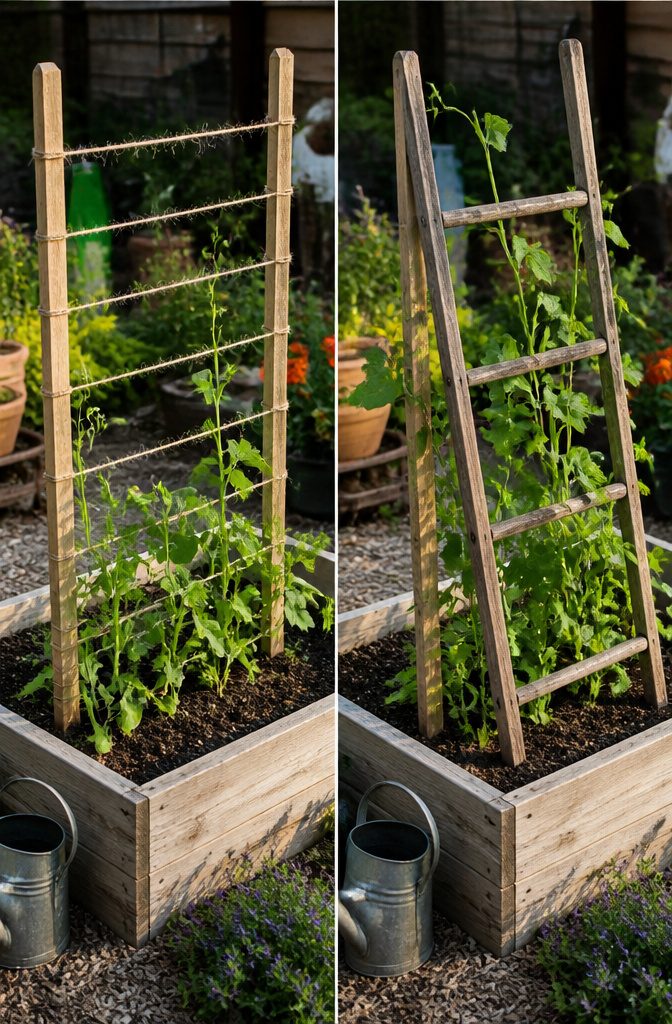
Twine stretched between a top and bottom bar makes a string trellis, the cheapest vertical frame you can build for a raised bed.
Peas and pole beans climb it fine, and when the season ends you cut the twine with the vines and start fresh in spring.
The wooden or metal frame lasts years, so your only yearly cost is a roll of garden twine.
A ladder trellis works the same light-duty territory, just in portable form.
Lean a small wood or metal ladder against a fence or stake it into the bed itself, and the horizontal rungs give cucumbers or miniature pumpkins something to weave through.
Move it each spring for crop rotation, though I would not trust either of these options with melons or full-size squash. The weight wins every time.
Between the two, the string method has my vote for most raised beds. It costs less, stores flat, and the annual replacement of twine is a feature, not a flaw: no mildewed netting, no weathered rope to untangle.
The ladder looks tidier if your bed sits against a house wall where guests see it, but for pure function on a real budget, twine and two bars is hard to beat.
11. Obelisk Trellis
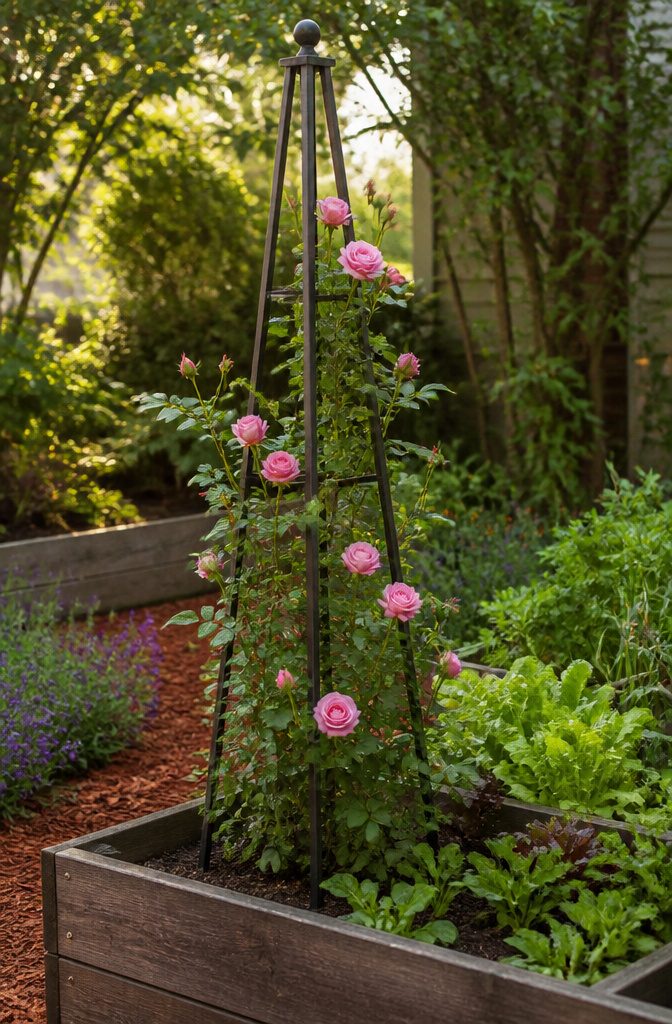
An obelisk trellis is a four-sided pyramid that sits freestanding in a raised bed or tucked into a corner, and it reads as ornament first, vegetable support second.
Wood or metal versions both exist, though the metal ones tend to outlast the wood by several seasons without treatment.
I would use this for a single indeterminate tomato, a climbing rose, or a pot of sweet peas, not for a row of snap beans that actually need a flat plane to produce.
The pyramid shape gives you four narrow faces, which means the plant wraps rather than spreads, and the footprint is small enough that you are not sacrificing a quarter of your bed to one crop.
Yield per square foot suffers. A single tomato on an obelisk looks lovely against a porch rail, but if you are growing to put food up, a panel or A-frame gives you more harvest in the same footprint.
For renters, the advantage is portability; the obelisk lifts out clean at the end of the season and stores flat if you buy the knockdown styles.
Why Vertical Gardening Pays Off in Raised Beds
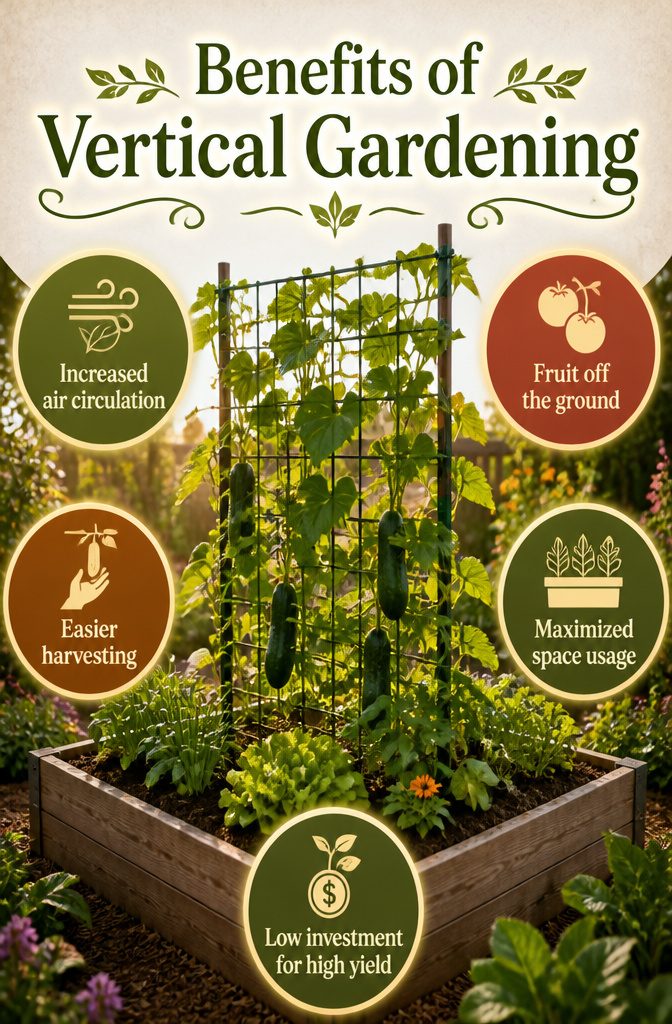
A trellis in a raised bed does what good design always does: it makes the money you already spent work harder.
Filling a raised bed runs somewhere between fifty and several hundred dollars depending on depth and soil mix. A vertical frame lets you harvest more from that same soil volume without expanding your footprint.
The usual benefits are real and worth naming. Vining plants trained upward get better air circulation, which keeps foliage drier after rain and cuts down on powdery mildew and other fungal issues.
Fruit stays off the ground, so slugs, rabbits, and soil-borne pests have a harder time reaching it. Harvesting means standing and reaching instead of crouching and hunting.
But the part that sold me is the production math.
A cucumber sprawled across the bed surface might occupy four square feet. On a trellis, that same plant climbs in two square feet of ground space, leaving the rest of the bed for lettuce, herbs, or a second crop.
In a small urban plot or a renter’s backyard where you cannot expand outward, upward is the only direction left.
The investment is minimal against the return.
A basic panel trellis built from metal mesh and two stakes costs little and lasts years. For anyone already committed to raised beds, vertical support is the obvious next step, not an extra.
What to Plant and What to Skip
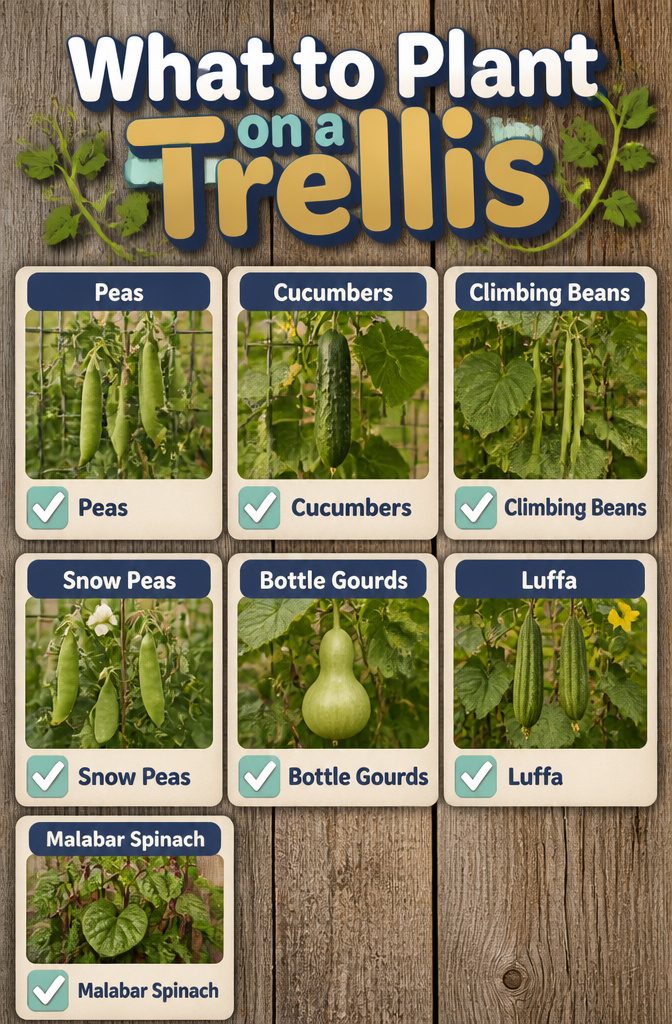
A trellis is only worth building if the plant knows what to do with it. Peas, cucumbers, climbing beans, snow peas, bottle gourds, luffa, and Malabar spinach all twine or send out tendrils that grab a grid and keep reaching.
Peas in particular are the easy win for cool-season beds, and they fix nitrogen while they climb.
- Bush beans mature at about 18 inches and will not climb; skip them and the trouble of tying up stems that want to fall over.
- Determinate tomatoes stop at a fixed height and set fruit all at once; they do not vine continuously and will not use a tall frame.
- Indeterminate tomatoes do climb, but they need more intervention than a simple grid: pinching, pruning, and regular tying to keep air moving and prevent fungus.
- Save the soil in front of the trellis for low growers like lettuce, herbs, or carrots. Layering this way doubles what one bed produces without expanding the footprint.
I would plant the climbers on the trellis side and keep anything that stays under knee height in the open ground.
Build or Buy: What the Numbers Look Like
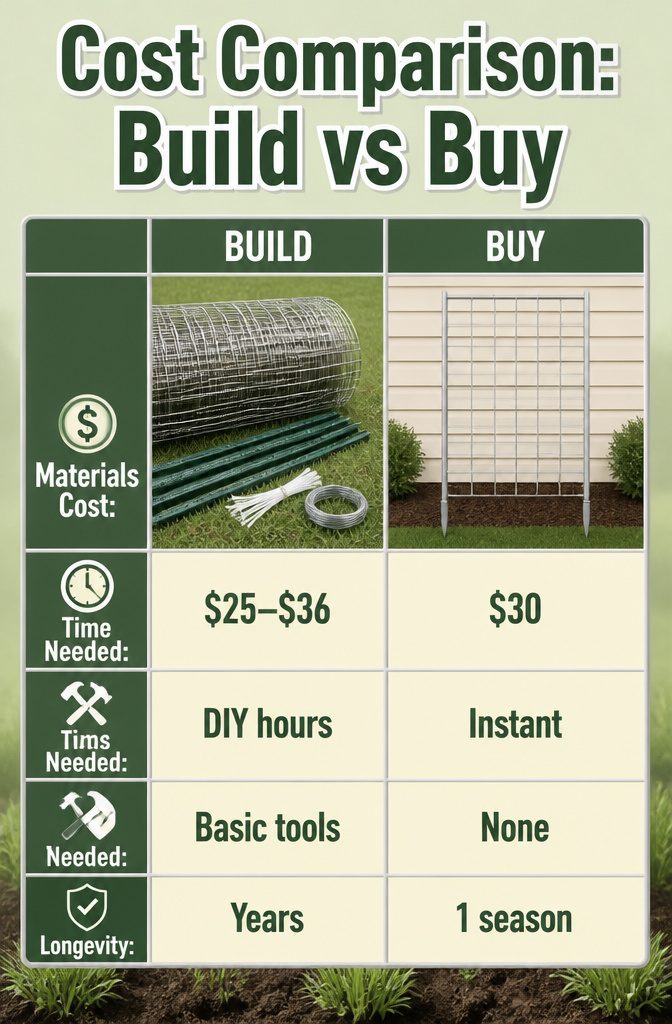
Used cattle panels from a farm sale or barn sale cut the DIY cost well below the $25–$36 range for new ones.
T posts run a few dollars each at a farm store or Home Depot, and a borrowed post pounder keeps the tool budget at zero. Zip ties or a short length of galvanized wire finish the job.
That puts a sturdy 16-foot panel trellis in the ground for roughly the price of a single pre-made Grip & Grow panel, with metal thick enough to stay put through winter.
Pre-made kits do have a case once you count time and the tools you do not own. A post pounder rental runs $25 or more for the hour, and not everyone has wire cutters and a hammer already.
If you are building one trellis on a Saturday morning, the kit saves the trip to the farm store and the borrowed equipment.
But for two or more trellises, or for a gardener who already keeps basic tools, the math flips fast.
I would buy the kit only if I were putting up a single trellis and valued the hour more than the thirty dollars.
Frequently Asked Questions
What is the best DIY garden trellis for raised beds?
A flat cattle panel or galvanized steel mesh braced by two T posts at the back of the bed is the strongest and cheapest permanent option.
The grid handles heavy vines like winter squash or luffa, and the metal outlasts the wood it is fastened to.
Two T posts at about $4 each plus a $25 panel puts a 16-foot trellis in the ground for roughly the price of one pre-made kit.
What vegetables grow best on a trellis?
Peas, cucumbers, climbing beans, snow peas, bottle gourds, luffa, and Malabar spinach all climb on their own with tendrils or twining stems.
Indeterminate tomatoes also work but need regular tying and pruning since they are not natural climbers. Skip bush beans and determinate tomatoes; they stay short and will not use a tall frame.
How tall should a vegetable trellis be?
Most climbing vegetables do well with 5 to 6.5 feet of headroom, which is what a standard cattle panel arch provides at its crown.
Flat wire panel trellises typically run 34 inches wide and stand several feet tall once the posts are sunk. Vigorous vines may grow higher, but going taller means longer posts driven deeper to resist wind.
Can I add a trellis to an existing raised bed?
Yes. Drive support posts at least 12 inches into the native soil behind or beside the bed, then secure the panel to them with wire or zip ties.
The bed itself does not need modification. Check that the bottom wire sits near soil level so seedlings can reach it, and shake the assembly hard before planting to confirm it will not shift.
What is the cheapest way to make a garden trellis?
Twine stretched between a top and bottom bar costs the least upfront and stores flat off-season.
The frame lasts years; you only replace the twine each spring. A ladder trellis works similarly for light vines, but twine beats it on cost and storage.
Neither handles melons or full-size squash. For heavy crops, a used cattle panel and two T posts still run under $35 total.
How do you stabilize a freestanding trellis?
Sink posts at least 12 inches into native soil, not bed fill, and space ties along the full height so the panel cannot shift.
Give the finished assembly a hard shake at shoulder height; any wobble means deeper posts or more ties before you plant. In open wind, add a 45-degree brace from each post back to the bed frame.