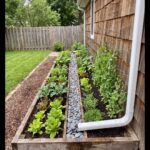
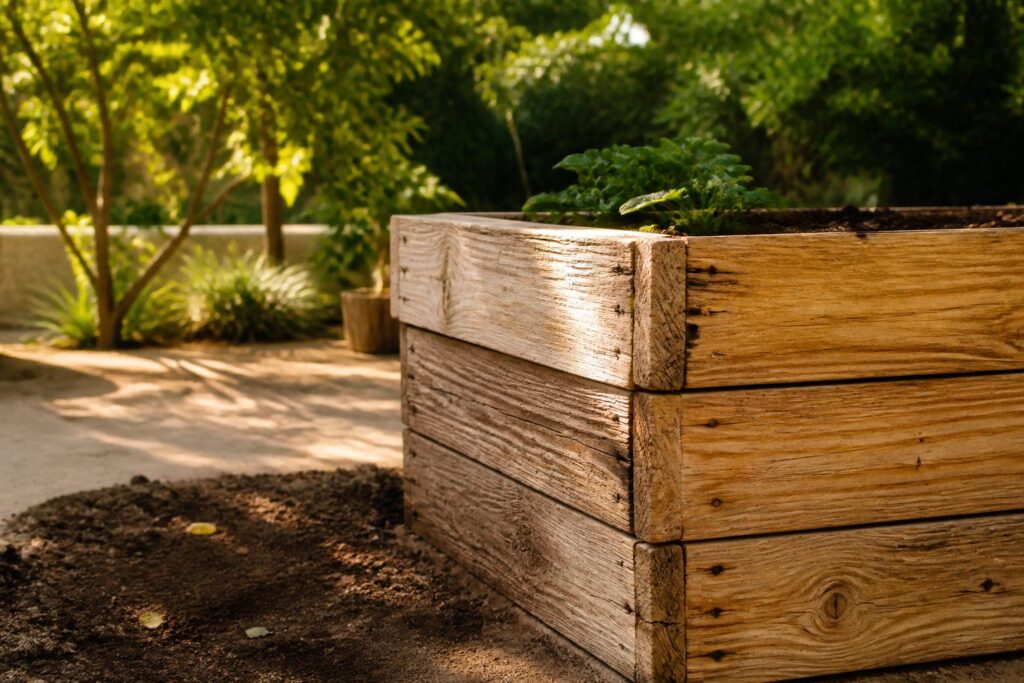
A finished 4-foot by 8-foot raised bed costs $100 to $250 and takes one weekend to build from lumber to planted soil.
The step most people skip is leveling the ground first, and an unlevel frame will twist enough by midsummer that you are shimming corners with bricks.
Cedar justifies the higher price if you plan to keep the bed in place for years; untreated pine works only if you are fine with rebuilding in three seasons.
[link-whisper-related-posts]1. Choose the Location
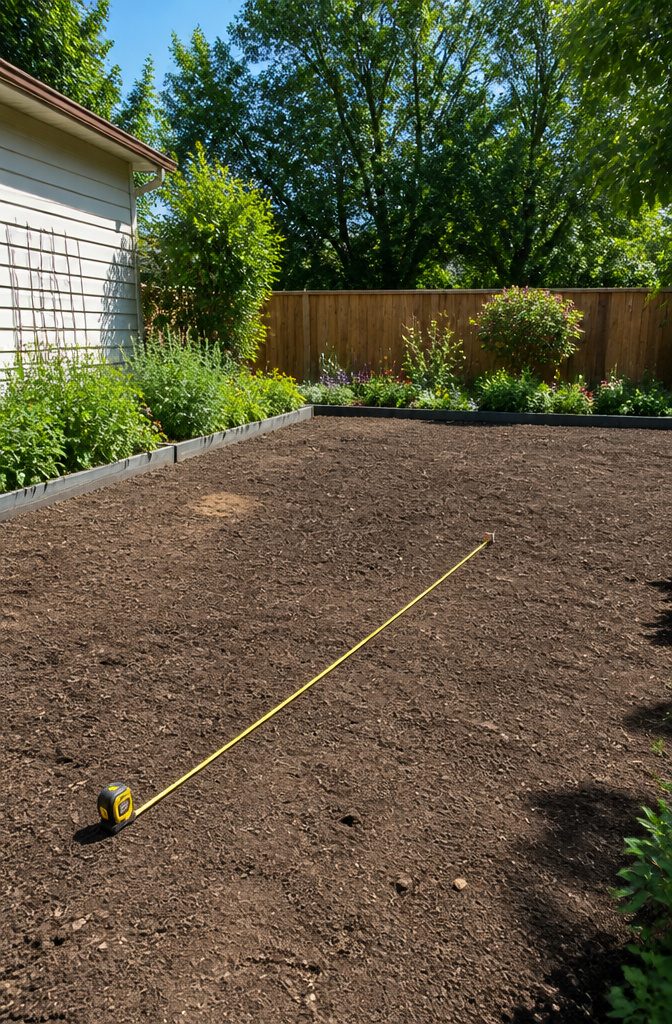
Six to eight hours of direct sun is the line where most vegetables produce well instead of just surviving.
Leafy herbs like mint or parsley will tolerate less, but tomatoes, peppers, and squash need that full stretch to fruit properly, so I start by tracking light across a full day with nothing fancier than a phone note.
A flat spot saves more trouble than it looks like it should.
My first boxes went onto ground I assumed was level enough; the low corner settled over a season and the whole frame twisted enough that I was shimming with bricks by July.
Dig out high spots or fill low ones with paver sand or gravel until a board sits flat without rocking.
Clear the grass now, roots and all, because any left under the box will find the loose soil and colonize it fast.

SPACIOUS GROWING SPACE WITH EXTRA PLANTING DEPTH:Measuring 91.5" L × 47.3" W × 22.06" H, this galvanized raised garden bed holds approximately 412 gallons of soil, providing generous planting space and extra depth for vegetables, herbs, flowers and fruits. The spacious design allows roots to grow naturally while supporting tomatoes, peppers, cucumbers, broccoli, beans, lettuce, carrots, potatoes and other popular garden plants. Ideal for backyard gardening, raised vegetable gardens and outdoor planter box projects.
2. Select Materials
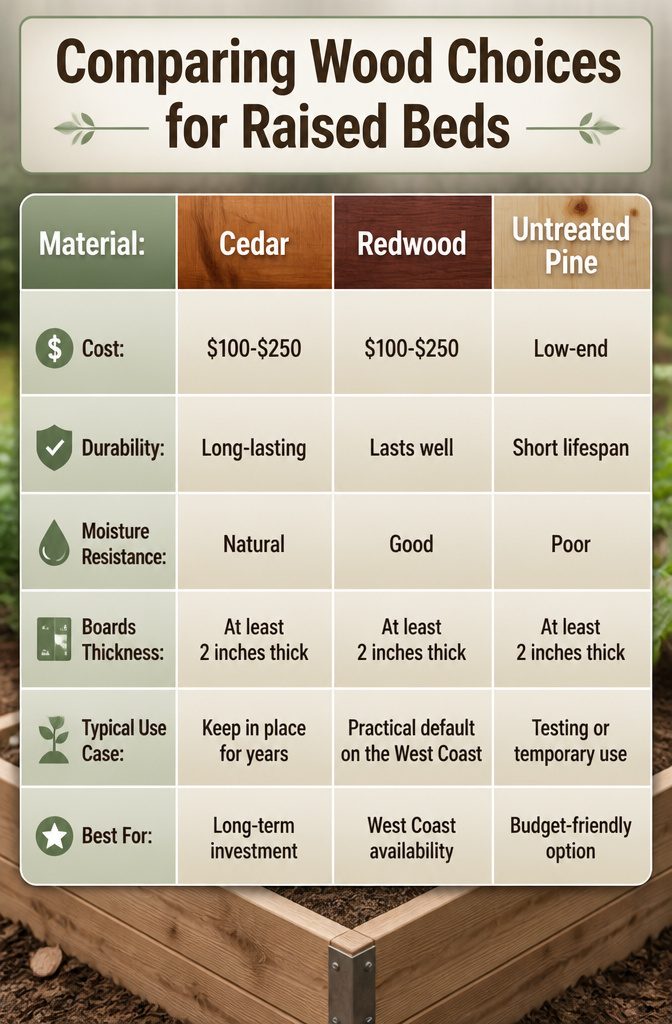
Cedar, redwood, and untreated pine are the three woods worth considering, and the choice between them comes down to how long you want the box to last versus what you are willing to spend.
Cedar offers natural moisture resistance and, in my view, is the material that justifies the cost for a bed you plan to keep in place for years.
Boards should be at least 2 inches thick; anything thinner warps faster and costs you a rebuild in two or three seasons.
Redwood performs similarly and is the practical default on the West Coast where it is more available. Construction-grade redwood with knots and imperfections still outlasts pine by a wide margin.
Untreated pine is the budget path.
It will rot, but it rots slowly enough that you get several growing seasons before you need to think about replacement. For a renter or someone testing whether raised beds suit their yard, that timeline is often enough.
I skip pressure-treated lumber entirely. The chemical treatment that keeps it from decaying also means it can leach into soil, and since I am growing vegetables I intend to eat, that trade-off is not one I am willing to make.
For a single 4-foot by 8-foot box, expect to spend $100 to $250 depending on the wood and your local pricing.
Cedar has climbed past the old $100 benchmark; redwood has done the same. Pine keeps you at the low end of that range.
3. Cut Lumber to Size
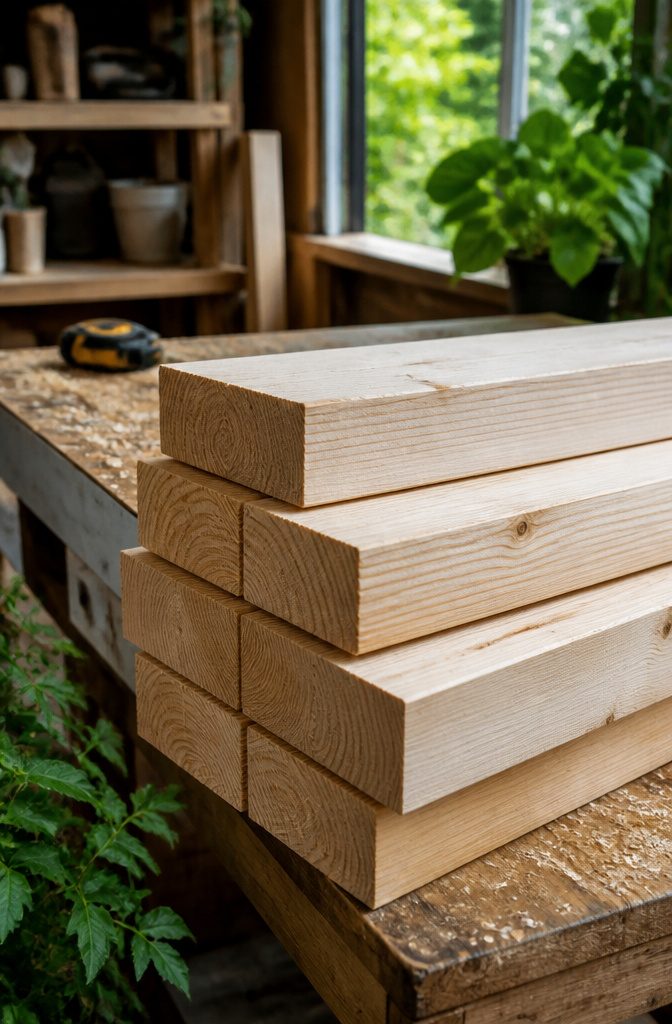
A 4-foot width is the dimension that matters most, because that is the span an average adult can reach across from either side.
Go wider and you will step into the bed to weed or harvest, compacting the soil you just paid to fill it.
The standard lengths are 8 feet or 4 feet, since construction lumber comes in 8-foot increments and less cutting means less waste.
For boards, 2x6s stacked three high give you 16½ inches of finished height, which lands right in the range of a typical chair seat.
That makes the edge comfortable to sit on while you work, and it gives roots plenty of room. A 1×4 build works if you want something lower and lighter, though you sacrifice both seating height and root run.
I would pick 4×8 over 2×4 every time. The 2×4 footprint saves a few dollars but the soil dries faster and you fit fewer plants per board foot of lumber.
The only reason I would go narrow is a balcony or a strip beside a driveway where 4 feet would block a path.
4. Assemble the Frame
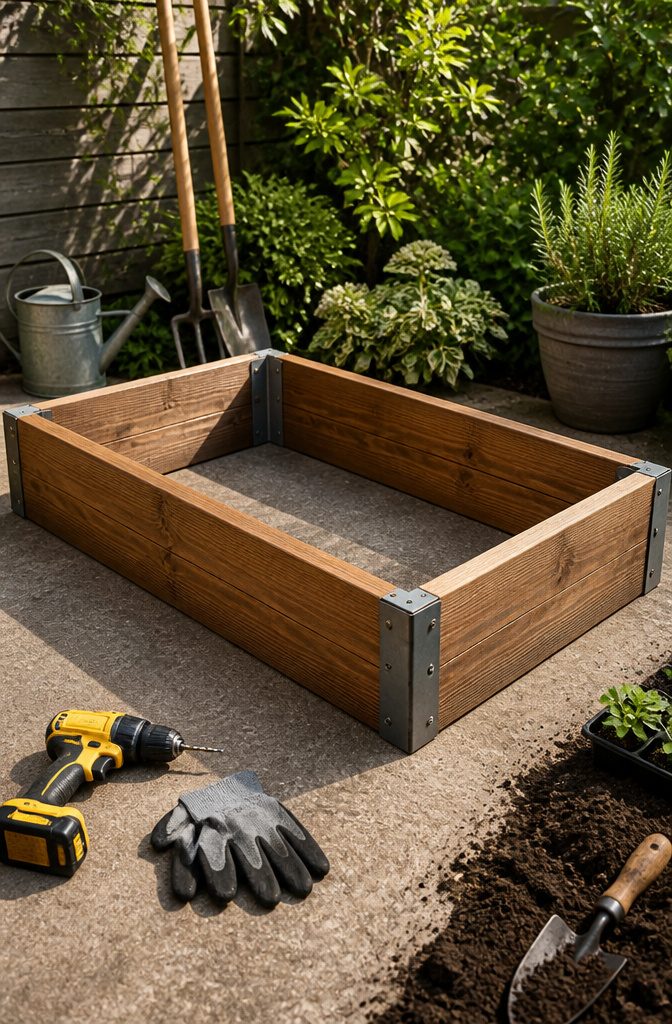
Corner brackets take the guesswork out of squaring up your frame, and I would grab them if this is your first build. The aluminum ones from Gardens Alive accept standard 2-inch boards and stack with extenders for extra depth.
If you prefer the cleaner look, Gardener’s Supply corners run thinner and come with caps that finish the edge neatly, though you will pay more for the profile.
Screwing through cleats at the inside corners works fine too, and it is what I would do if I already owned the drill.
Deck screws driven through the face into the end of the neighboring board hold well enough for a box that is not being moved.
A height between 16 and 33 inches is the range most people actually build. Stay on the low end and you are bending less, but the soil warms faster and you get to plant sooner.
Go taller, up to that 33-inch mark, and you cut down almost all the bending; the downside is you are buying a lot more dirt to fill it, and the thing becomes permanent furniture that does not get shifted.
For a first bed I would split the difference and land around 22 inches, enough to save my back without emptying the wallet on bagged soil.
5. Line the Bottom
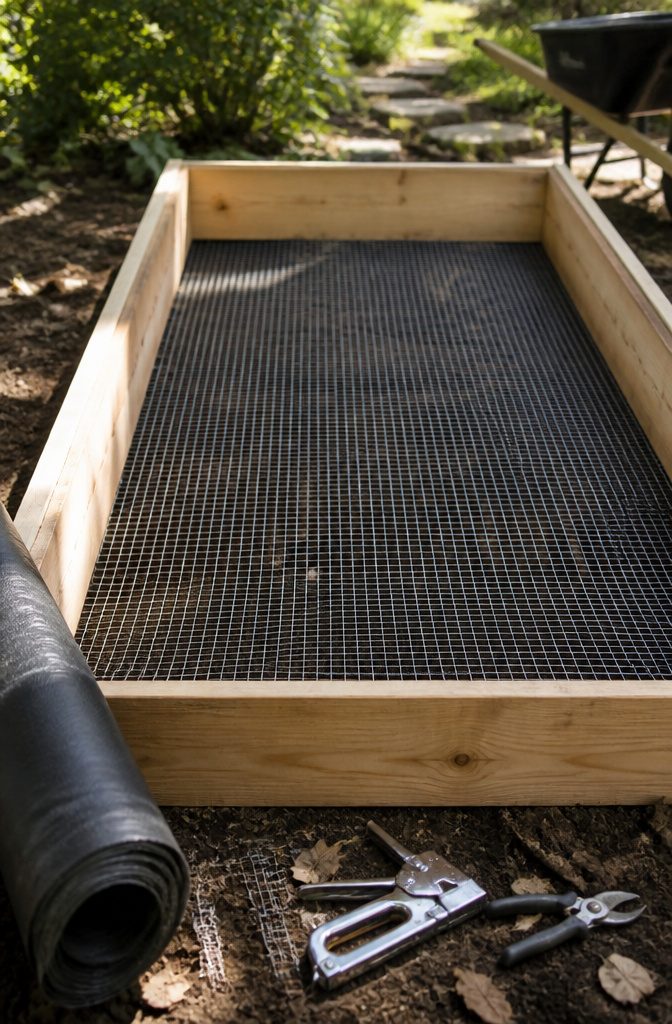
The open bottom of a raised bed is where two problems start: weeds creeping up from below, and burrowing animals treating your soil like a buffet.
Landscaping fabric blocks weeds and keeps soil from washing out after heavy rain, but it is not permanent.
Over a few seasons it breaks down, and roots eventually punch through anyway. Hardware cloth stops gophers, moles, and voles cold.
A ½-inch mesh, 4 feet by 8 feet, stapled across the bottom allows drainage and root growth while keeping critters out. It costs more than fabric, and for some yards that matters less than peace of mind.
I would use hardware cloth only where burrowers are an actual problem. Fabric is the cheaper call for weed control alone, though I would not expect it to last the life of the bed.
Chicken wire is a lighter option some builders reach for, but the openings are large enough that determined animals still get through. Staple whichever you choose firmly; gaps at the corners are where failures start.

【High-Quality Materials & Durable】 Made from 0.5mm metal panels with double-layer anti-corrosion, this outdoor raised garden bed features a robust oval-shaped design for added strength and durability. Resistant to rust and corrosion, it provides a long-lasting gardening solution that can be reused for many years, ensuring a sustainable and reliable space for your plants to thrive

Raised Garden Beds for Gardening Solution: INNO STAGE 6x3x1ft raised bed provide expanded planting area - perfect for organizing vegetables, herbs & flowers. Pair multiple beds for a tidy garden layout. Great gift for gardeners

🍅【PREMIUM MATERIAL】Fabric raised garden bed is made of premium quality thickened non-woven fabric, designed with reinforced stitching, which is reusable and durable for long time use. With the plant grow bags, your plants will grow well in your balconies, backyards, terrance or patios.
6. Fill With Soil
A nutrient-rich soil mix with proper drainage is where the money goes, and it is worth spending here even if you cut corners everywhere else.
A typical 4′ x 8′ bed takes about eight bags of gardening soil to fill, though a shallower build drops that by a bag or two.
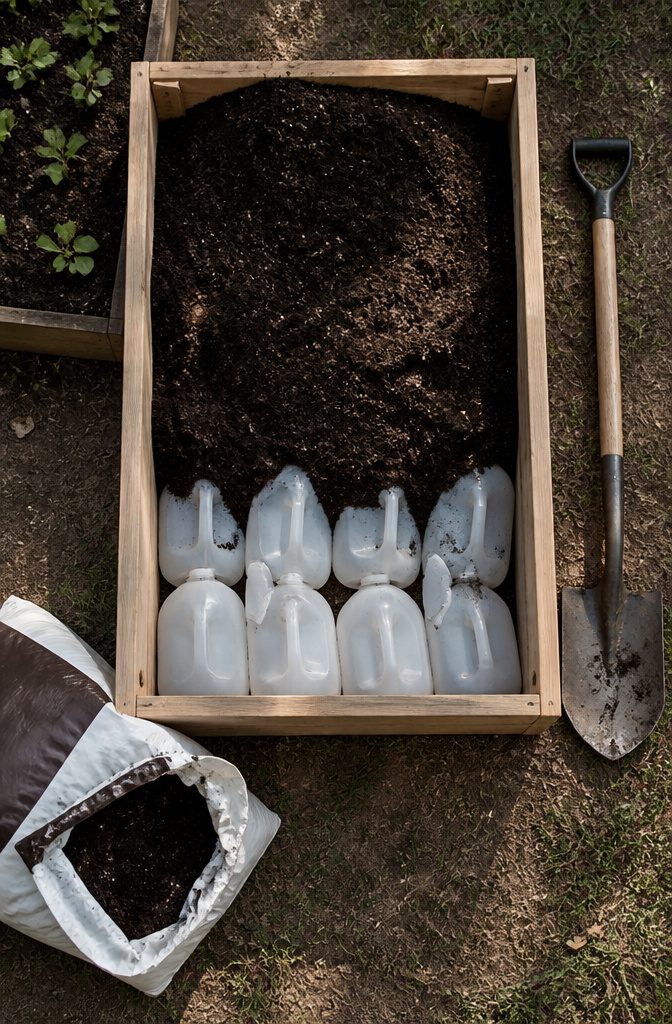
For deeper boxes, I would fill the bottom half with empty milk jugs or other clean plastic containers before adding soil.
The jugs create air space that improves drainage, and they cut both weight and cost in a bed that might otherwise need twice the dirt.
I skip this trick for shallow beds, one foot or less, because the savings are minimal and the roots need every usable inch from top to bottom.
Sandy loam garden soil that is organic and peat-free has worked well for the growers I follow; start fresh rather than trucking in whatever sits in your yard.

【Spacious and Versatile Design】: The CATMANOR raised garden beds outdoor provide ample growing space for a variety of vegetables, herbs, and flowers. The raised bed design maximizes planting capacity, making it an ideal solution for gardening enthusiasts who want to grow medium to deep-rooted plants such as broccoli, beans, and more.

Dimension: 96in.L x48in.W is ideal planter box when gardening at home. Side panels of 0.40mm,corner panels of 0.70mm, holds up to 31 cu. ft. of soil

Size: 96"(L) x 48"(W) x 24"(H),Planter raised bed provide outdoor sufficient space to grow vegetables,flowers,galvanized garden bed
7. Plant Your Garden
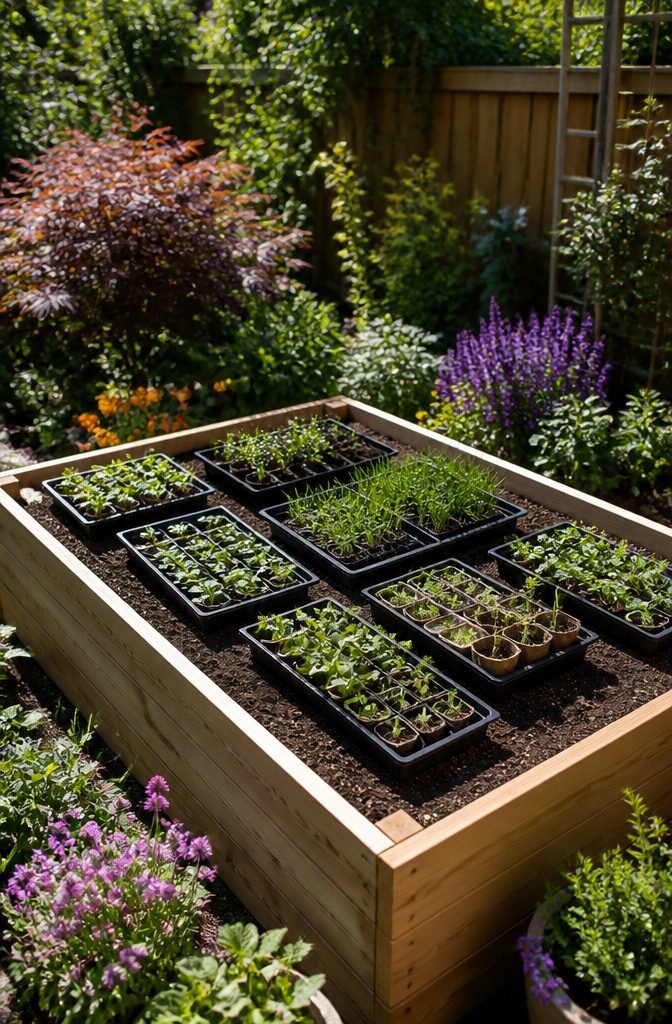
Plant spacing is the make-or-break detail I think about before anything goes in the soil.
Lay every pot and seed packet on top of the bed first, still in its container, so you can step back and see whether a tomato is crowding a pepper before the roots are stuck.
The seed packet directions for in-ground sowing are what I follow for raised beds too; the soil height changes, but the mature width does not.
For cool-weather crops like kale and lettuce, direct sowing into rows works fine.
I would transplant herbs and larger vegetables instead of starting from seed if the season is already underway; the build ate your weekend, and seedlings buy you the four to six weeks you just spent on lumber.
Save a little open soil for mid-season additions, which is what I would do if I were still deciding on cucumbers or basil. The planting itself, the full how-to of succession sowing and companion pairing, deserves its own post.
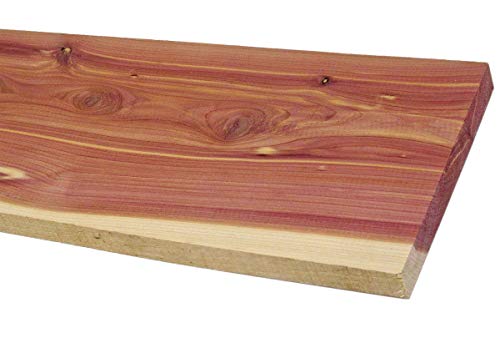
Select from several species above, then pick your size

High grade solid pine board with no holes or knots.

Pack of 2, Spanish Cedar Lumber Board - 3/4" x 6"
Design Options Beyond Wood
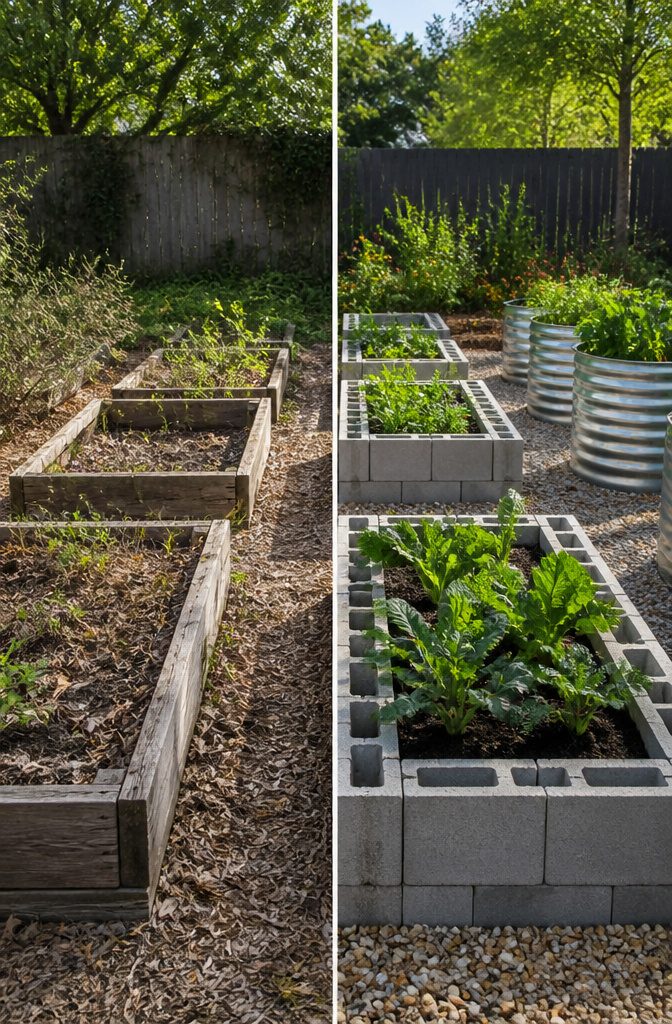
Cinder blocks stack fast and cost little, though their thick walls eat space in a small yard.
New concrete blocks are food-safe; older ones might carry chemicals you do not want near vegetables. Bricks from a fireplace hold creosote, and old mortar can leach toxins, so I would skip anything reclaimed for an edible bed.
Galvanized tubs and stock tanks look sharp and last years, but owners on Reddit note the price jumps fast and adding dividers or internal planks gets awkward.
They suit a permanent herb bed near the kitchen door, not a seasonal vegetable patch you might rethink.
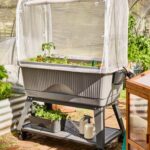
Elevated beds on legs spare your back and stop weeds cold, yet a drip irrigation system becomes harder to run when the soil sits off the ground.
I would build one only if bending is a real problem, and I would plan the watering before I cut any lumber.
Old bathtubs and pallets read charming on Pinterest, but the pallet wood must be heat-treated, not chemically treated, or it bleeds into the soil.
A clawfoot tub is heavy, drains poorly without modification, and reads more novelty than farm. For a temporary setup, I might use cinder blocks I could restack next year.
For something I want to stand in place for fifteen years, I would still choose lumber, or metal if the budget allowed, and spend the weekend building it right.
Maintenance I Actually Do
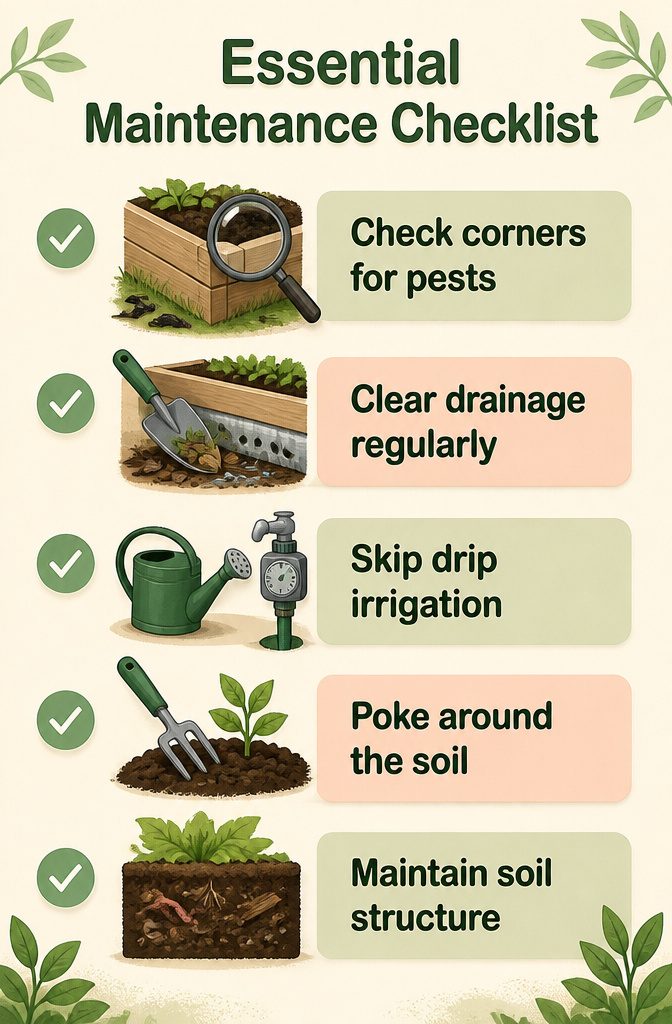
A raised bed only stays useful if the small stuff gets attention before it becomes a big problem. Here is what I actually do through the season.
- Check the corners and soil line every two weeks for pests. Slugs and ants show up first where the wood meets the ground. A five-minute look with a flashlight after dark catches them before they spread.
- Keep drainage clear. Leaves and soil wash into the gaps between boards or block the holes in a galvanized bottom. I lift the edge and scrape it out with a trowel; two minutes, done.
- Skip the drip irrigation for a weekend build. Owners on Reddit mention that filling the bed is already the biggest expense, and a watering system adds cost, tubing to store, and another thing to repair. A hose and a cheap timer on the spigot handle the same job for someone running one project a year.
The height discourages pests, especially rabbits.
That one advantage buys some margin, but only some. A bed that sits still for months still fills with debris, and the soil compacts where water pools.
Ten minutes of poking around every few weekends is the maintenance that actually happens, so I keep the task list short enough that I will do it.
【Dimensions of Bed Lifts】Extra 2" High. The external size: 4.7*4.7*2.8 inch. The internal size: 3*3*0.8 inch. Includes 4 furniture risers add a new level of comfort in your life.
What I Would Skip Next Time
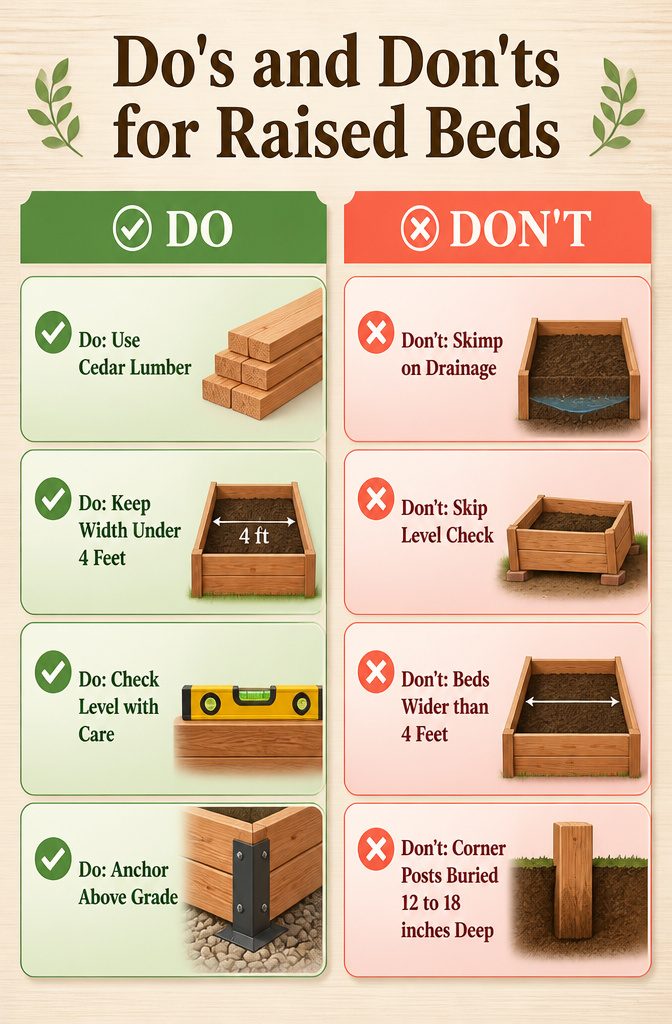
Pressure-treated lumber is the first thing I’d cross off the list.
The chemicals used to preserve it can leach into soil, and for a bed you’re building to grow food in, cedar’s natural resistance is worth the extra cost up front.
A few other missteps that waste a weekend:
- Beds wider than 4 feet mean you’re stepping into the box to reach the center, compacting soil and defeating the point of raised construction. Keep the span to 4 feet or less, or you’ll be leaning and stretching every time you weed.
- Skipping the level check. On my first beds I figured close enough was close enough, then spent an afternoon shimming corners with bricks once the frame started torquing. Dig down the high spots or spread paver sand under the low ones before you set a single board.
- Soil that drains poorly. One owner on Reddit hit rock and root-bound ground, built 2-foot walls, then filled the whole box with dense topsoil. Roots need air as much as water. Mix in coarse material, aim for roughly three parts rock-free dirt to one part compost or nutrient mix, and don’t line the bottom with solid weed barrier that traps water.
- Corner posts buried 12 to 18 inches deep. The Reddit plan of extending 4x4s into the ground sounds sturdy, but that wood-in-soil contact rots the posts from the inside out. Anchor above grade or use metal brackets instead.
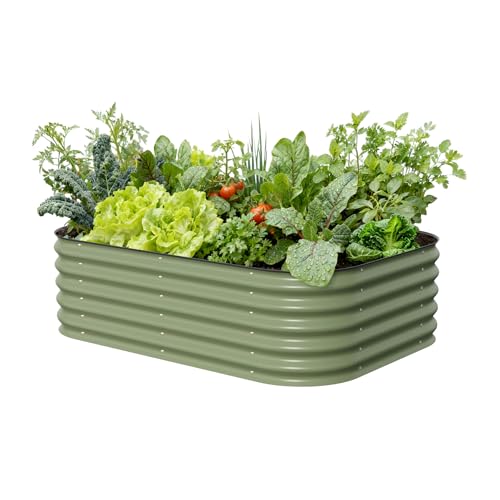
Modular Design: Vego Garden raised bed kits feature an innovative modular design, which means you can assemble a kit into various configurations that fit any backyard or garden space in a 6-in-1 kit, you can build one of 6 possible configurations to fit your garden plans
Cost Breakdown for One 4′ x 8′ Bed
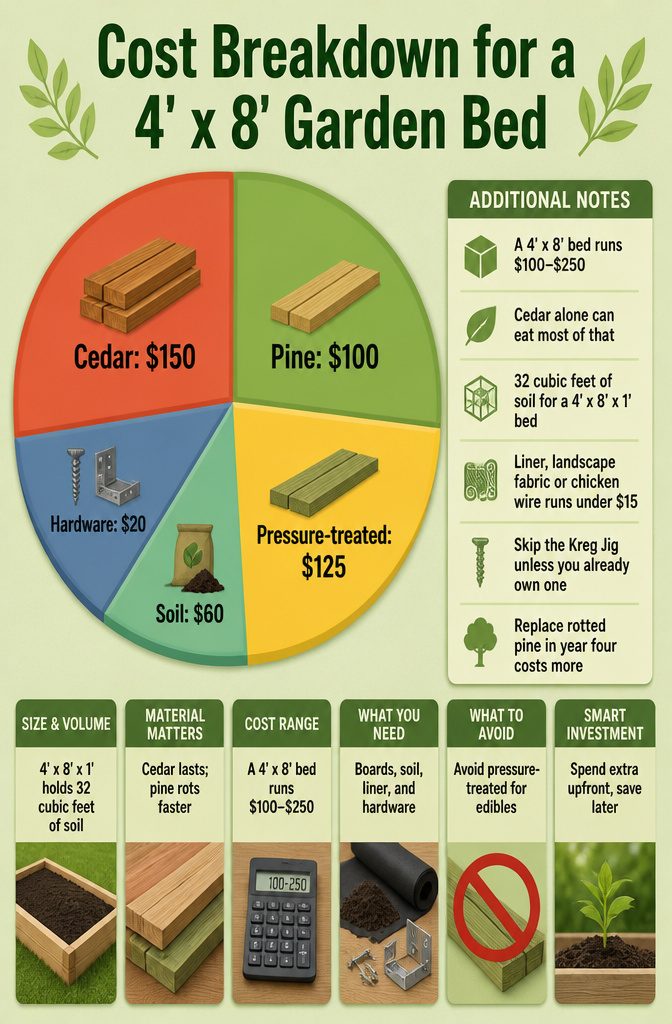
A 4′ x 8′ bed runs $100–$250, and the lumber choice decides where you land.
Cedar boards that are 8 feet long and stacked two high for each side will push you toward the top of that range, while pine keeps you closer to the bottom but rots faster.
A single 4′ x 8′ bed runs $101–250 to build, and cedar alone can eat most of that.
| Material | Relative Cost | Rot Resistance | Notes |
|---|---|---|---|
| Cedar | High | Excellent | Natural moisture resistance, no chemical leaching |
| Pine | Low | Poor | Budget-friendly, replace sooner |
| Pressure-treated | Mid | Good | Avoid for edibles; copper compounds can leach |
Soil fills the biggest volume. One calculator I checked puts a 4′ x 8′ x 1′ bed at 32 cubic feet, and bagged garden soil adds up fast.
A liner, landscape fabric or chicken wire, runs under $15 if you want it. Screws and corner hardware round out the list; skip the Kreg Jig unless you already own one.
I would pick cedar and spend the extra $60–80 upfront. Replacing a rotted pine frame in year four costs more than doing it once.
Frequently Asked Questions
What type of wood is best for a raised garden bed?
Cedar is the best choice because it resists moisture naturally and lasts for years without chemicals.
Redwood works similarly, especially on the West Coast where it is easier to find. Untreated pine is the budget option, but plan on replacing it after a few seasons.
How deep should a raised garden bed be?
Most builders land somewhere between 16 and 33 inches. A 16-inch bed warms up faster in spring and costs less to fill.
At 33 inches you are barely bending, but you are buying a lot more soil. For a first build, 22 inches splits the difference nicely.
How do I prevent weeds in my raised garden bed?
Landscaping fabric blocks weeds from below and keeps soil from washing out, though it breaks down over time.
Hardware cloth costs more but stops burrowing animals while still letting roots and water through. Staple either one firmly so gaps do not form at the corners.
What is the cheapest way to make raised garden beds?
Untreated pine keeps lumber costs at the bottom of the $100 to $250 range, and shallow beds need fewer bags of soil. One Redditor built 3 by 6 foot cedar beds for about $50 each using fence pickets and simple 2 by 3 corner posts.
What do you put in the bottom of a raised garden box?
For deep beds, clean empty milk jugs or plastic containers fill the bottom half and cut both weight and soil cost while improving drainage.
Skip this for beds under a foot tall, since roots need every usable inch and the savings are minimal. Either way, lay landscaping fabric or hardware cloth first to block weeds and pests.
Is it cheaper to make or buy raised garden beds?
Building your own is usually cheaper and lets you pick the exact size and wood.
A store-bought 4 by 8 foot bed in cedar or redwood often runs more than the $100 to $250 you would spend doing it yourself, and you still have to fill it with soil either way.
What is the best material to use to build a raised planter box?
Wood remains the most practical material for a bed you can move or modify later. Cedar and redwood last longest without chemicals.
Metal stock tanks look sharp and hold up, but cost jumps fast and they are harder to adapt. Cinder blocks stack cheap and quick, yet their thick walls steal space in a small yard.