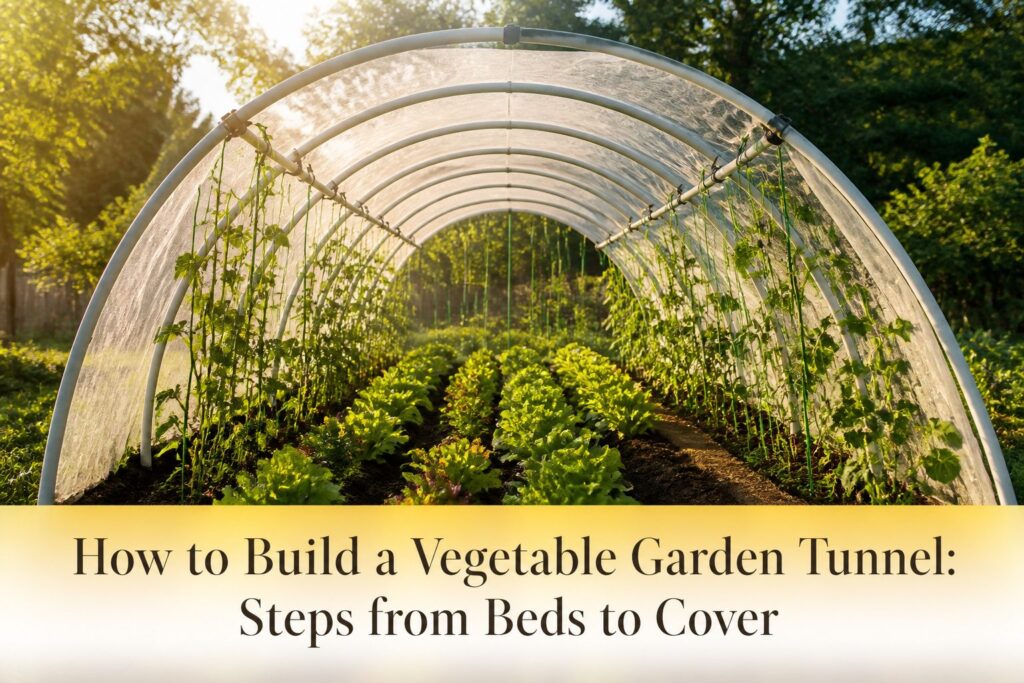
A vegetable garden tunnel built right gives you five tools in one frame: frost protection, shade, insect barrier, trellis, and season extension.
The whole build runs a few hundred dollars and a single weekend, with PVC hoops and rebar stakes doing the heavy lifting if your budget is tight.
The stage most first-timers botch is not the arches or the cover. It is the planting layout underneath, where tall climbers planted too far from the edges shade everything below and turn the tunnel into a mildew trap.
[link-whisper-related-posts]What a Vegetable Garden Tunnel Is and What It Does
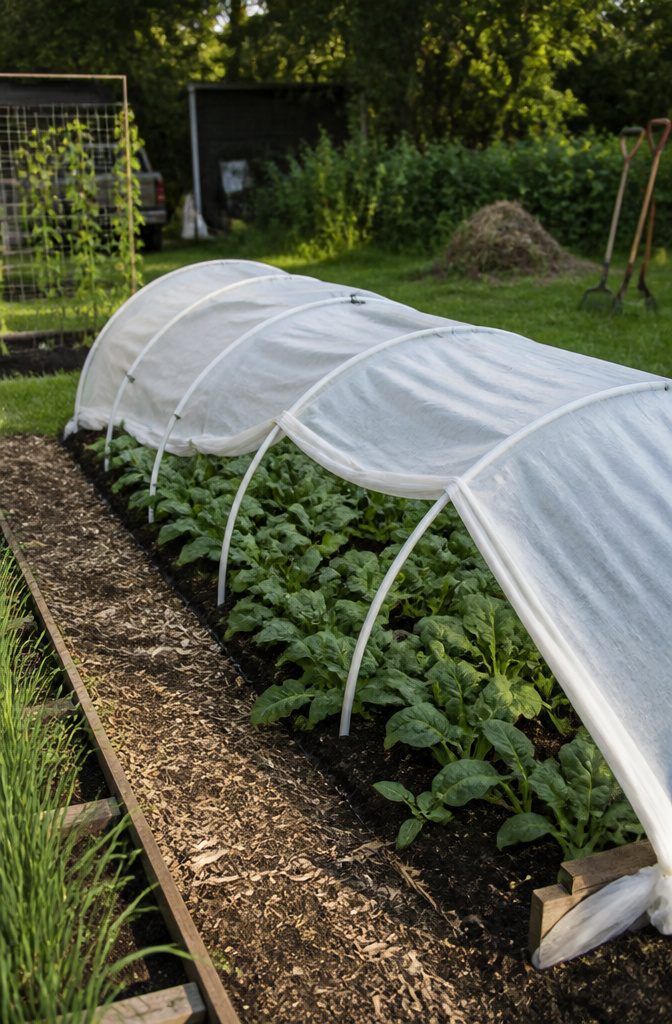
A vegetable garden tunnel is nothing more than hoops or arches covered with material, stretched over your beds to support plants while it shields them from what would otherwise stop them growing.
The frame carries the load, the cover blocks the threat, and the space underneath becomes workable ground for a longer season than open beds allow.
I think of it as five tools in one frame. The same structure that holds frost cloth in March can carry shade cloth in July, keeping lettuce from bolting when the heat arrives.
Row cover clipped to those same hoops blocks flea beetles and cabbage moths without a single spray. In late fall, plastic sheeting turns the tunnel into a cold frame that keeps kale and carrots harvestable past the first hard freeze.
Peas and beans climb the hoops themselves if you string line across them, giving you vertical growth where ground space is scarce.
The fifth use is the one I see beginners miss: the tunnel trains you into a maintenance rhythm, since you are already lifting the cover to water, check growth, and swap materials as the year turns.
The parts stay consistent even as the jobs change.
A framework of hoops or PVC, a cover chosen for the season, stakes or sandbags to hold it down, a planting layout that respects the arc height, and a routine of checking tension and venting on warm days.
None of this is complicated, but each piece has to be there for the tunnel to earn its keep.

60 PCS Garden hoops for Raised Beds Netting: Greenhouse Hoops frame widely used indoors and outdoors, great for the yard, vegetable garden, and garden raised beds. DIY Garden Hoops Grow Tunnel Kit works well to protect your plants, seedlings, herbs flowers,strawberry in any season gardening plant.Plant support for climbing plants,plant stakes for outdoor plants,Tomato support garden stakes
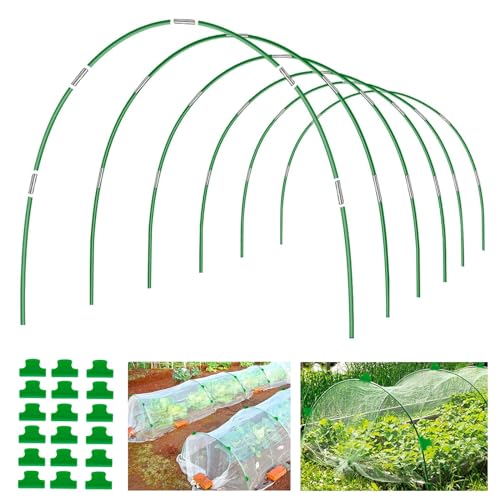
PVC-coated for all-weather durability: Protective coating resists rust, corrosion, and UV damage; Withstands sun, rain, and humidity with no cracking or peeling; Ideal for year-round outdoor use

36 PCS Garden hoops for Raised Bed : Greenhouse Hoops frame widely used indoors and outdoors, great for the yard, vegetable garden, and garden raised beds. DIY Garden Hoops Grow Tunnel Kit works well to protect your plants, seedlings, herbs flowers,strawberry in any season gardening plant.Plant support for climbing plants,plant stakes for outdoor plants,Tomato support garden stakes.
Pick Your Hoop Material
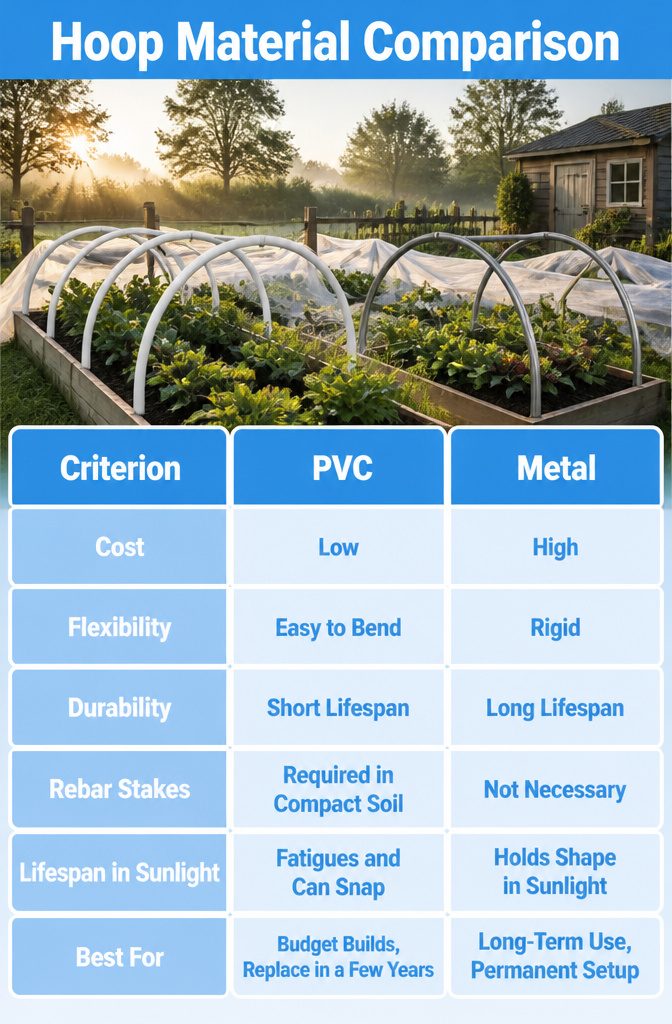
PVC hoops bend easily by hand and cost less up front, but they fatigue in sunlight and can snap after a season or two of heavy cover.
Metal or wire arches run higher at checkout yet hold their shape through snow load and repeated handling; for a tunnel you plan to rebuild each spring, the extra money earns itself back in frustration avoided.
Rebar stakes matter most where soil is packed tight. In a raised bed you can usually push hoops 9–12 inches deep by leaning your weight in, but in-ground gardens with compacted dirt fight back.
A 12-inch rebar stake pounded flush gives the hoop something to grip, and slipping PVC over the top takes thirty seconds.
Space the arches 3–4 feet apart along the bed. Wider spacing lets the cover sag and collect rain; closer spacing burns material for no real gain.
For a weekend build on a real budget, I would take PVC with rebar anchors and replace the hoops in year three when they start to whiten and crack.
The metal upgrade is smarter if you already know this tunnel is staying put, but most first-time builders want proof the habit sticks before they spend for permanence.

Garden Hoops for Raised Beds Row Cover: Note: There is NO netting included. You are no strangers to voracious critters, disease-ridden bugs and winter harsh weather conditions. Fiberglass garden tunnel hoops helped to provide the protection your veggies needed, improving the quality of your harvests big time! You will have a lot fewer problems with insects eating your crop as well as the sun scorching the tender leaves.

36 PCS Garden hoops for Raised Beds : PVC Greenhouse Hoops frame widely used indoors and outdoors, great for the yard, vegetable garden, and garden raised beds. DIY 36pcs Garden Hoops Grow Tunnel Kit works well to protect your plants, seedlings, herbs flowers,strawberry in any season gardening plant.Plant support for climbing plants,plant stakes for outdoor plants,Tomato support garden stakes

24pcs Garden Hoops Kits: Rifny Garden Hoops Kits with 17 inch Lenth 0.28 inch Diameter fiberglass rods, Rust-Free aluminum connectors and 12 pcs stainless steel clips, Never Rusts, Anti-Oxidation. Wide use for all size of your garden raised bed
1. Build the Raised Beds
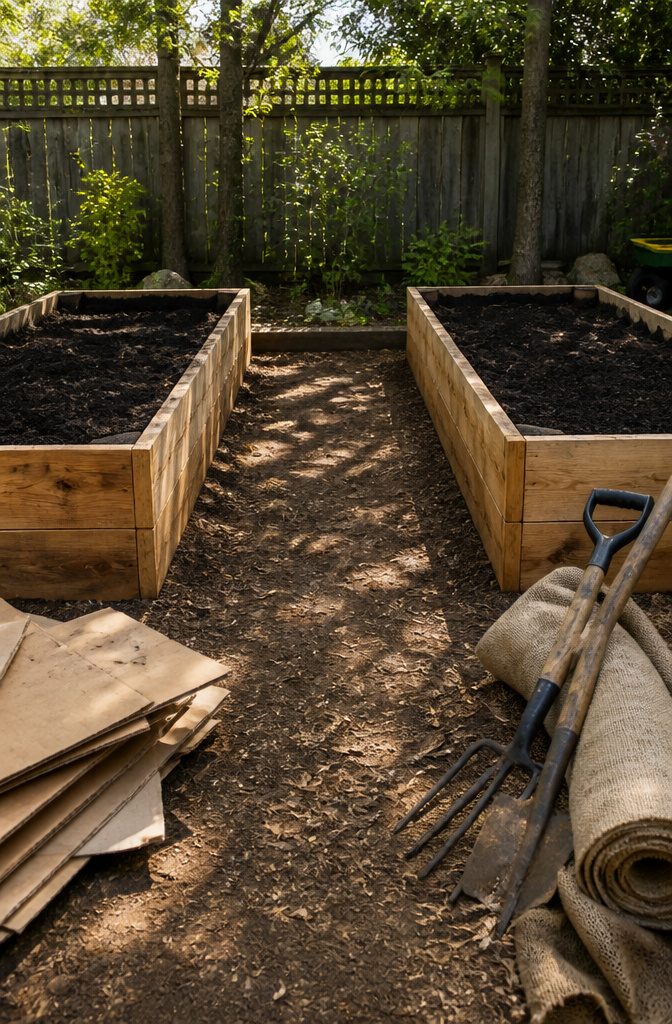
- Pick a spot that gets 6–8+ hours of direct sun each day. The tunnel runs north-south or east-west depending on where your light comes from, so walk the yard in the morning and afternoon before committing.
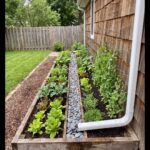
- Build two parallel raised beds with a 3–4 foot path between them. I keep each bed about 4 feet wide; that is the reach most people have from one side without stepping into the soil and compacting it.
- Choose your bed material based on what you can haul and how long you want it to last. Stacked logs give a rustic look, but cedar boards, landscape timbers, metal garden beds, stone, brick, or a raised-bed kit from the hardware store all work. The logs in the source photo are purely aesthetic; functionally, the soil depth matters more than the sides.
- Fill the beds with garden soil and compost. The beds form the fixed base that everything else sits on, so level them now. Wobbly beds make crooked arches later.
- Leave the path bare dirt for now, or lay down cardboard to kill weeds. You will mulch or hardscape that walking strip after the arches go in, not before.

Comprehensive Winter Protection for Your Garden: Our outdoor plant covers provide complete freeze protection for strawberries, vegetables, tomatoes, fruit trees, citrus plants, shrubs, and potted plants throughout the winter. This frost cloth plant freeze protection shields delicate plants from sudden temperature drops, frost, and strong winds, ensuring they survive harsh winter conditions. Ideal for those looking for frost blankets for outdoor plants and reliable plant freeze protection covers.

[1.5oz/yd² Frost Cloth for Plant Freeze Protection]Made with 1.5oz/yd² per sq yd garden fabric, this frost cloth helps protect plants from frost, cold wind, and sudden temperature drops while allowing sunlight, air, and moisture to pass through.
2. Insert the Hoops
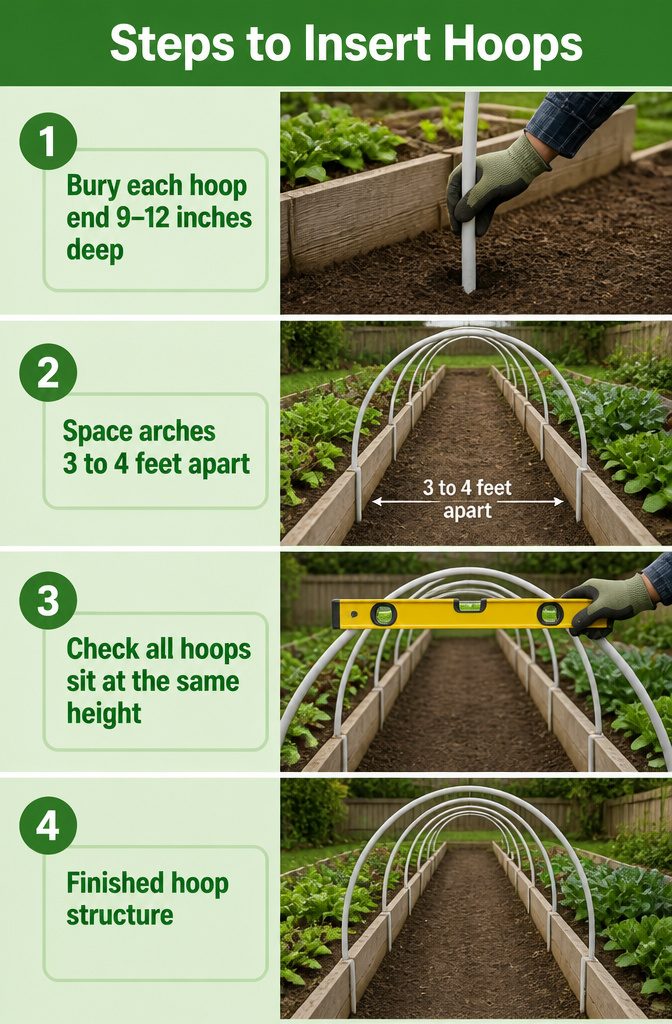
- Bury each hoop end 9 to 12 inches deep so the arch holds tension without wobbling in wind. In raised beds the soil is usually loose enough to push straight in; in compacted ground, pound a 1-foot rebar stake first and slip the hoop over it.
- Space the arches 3 to 4 feet apart down the center of the path between beds. Closer spacing handles snow load better but costs more in material; wider spacing works fine in mild climates where the cover is mostly for insects or light frost.
- Check that all hoops sit at the same height before moving on. A low arch snags the cover, a high one gaps at the edge. I eyeball it against the bed rails, then adjust by pulling one end and reseating it.

Defend Against Unwanted Visitors: Gardening is a rewarding and fulfilling endeavor, and you'll watch your plants grow from nothing to maturity before you finally harvest them. Once the plants begin to flower and bear fruit, these unwelcome visitors visit your garden and often leave a trail of destruction. Garden netting is the best choice for protecting your plants

Ultra-Fine Mesh Netting: Large Size 2pack 10x33 Feet provide more security, Ultra Fine Garden Netting has a 0.04in ultra-fine mesh, It also allows sunlight | artificial light as well as air and rain to pass through. Light material, no burden for plant buds. Provide healthy growth environment for plants. Tip:(Not two packages, it's one package with two 10*33FT garden nets inside)
3. Add Trellis Support
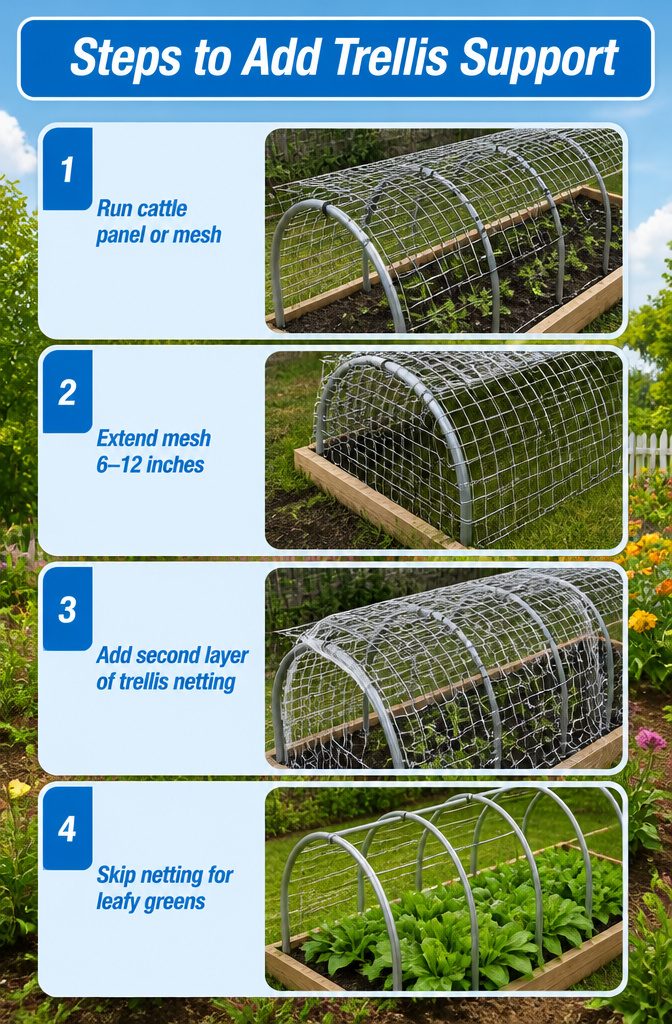
- Run cattle panel or concrete reinforcing mesh lengthwise over the top of your arches, securing it with zip ties or baling wire every 12–18 inches where the mesh meets the hoop. This is the grid your climbing vegetables will actually grab.
- Let the mesh extend 6–12 inches past each end hoop and bend it down toward the ground. That overlap gives you a short vertical wall for tendrils to find before they reach the main span.
- Add a second layer of trellis netting if you’re growing heavier fruiting vines like indeterminate tomatoes or pole beans. The netting catches stems the mesh spacing might miss, and it costs under $10 to replace when it frays after a season or two.
- Skip the netting entirely if your tunnel is only for leafy greens or low bush crops. The extra material blocks light and traps moisture you don’t need. A bare hoop cover with no trellis still works fine; it just stays a shelter instead of becoming vertical growing space.
4. Plant Climbing Vegetables
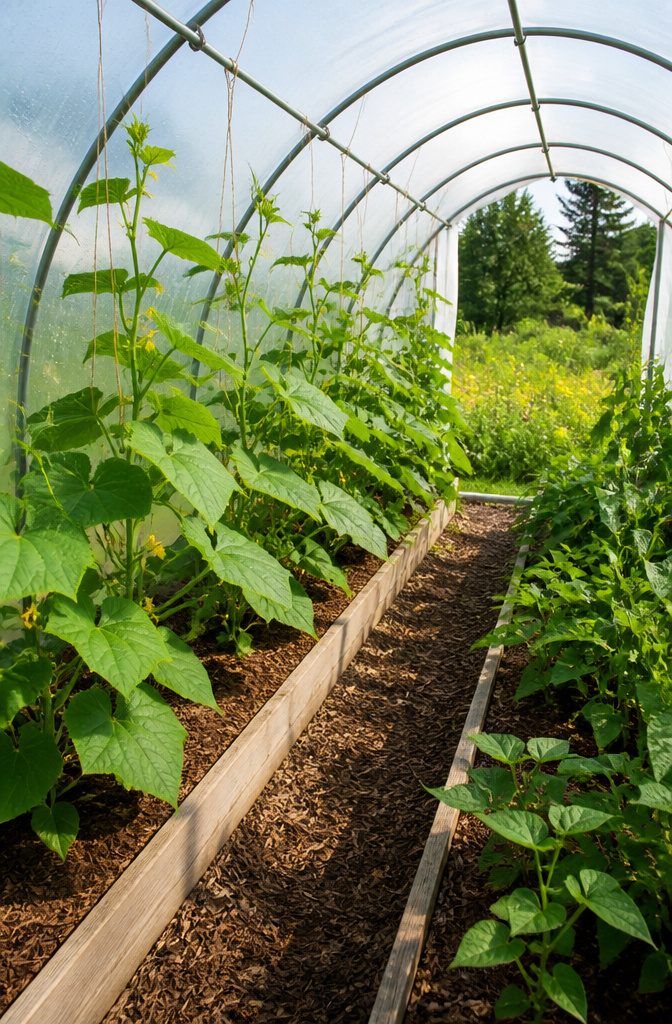
- Plant tall climbers at the inside edges of your raised beds, where they can grow up and over the tunnel arches without shading shorter crops underneath. Cucumbers belong here; training them vertically keeps fruit off the ground and makes spotting ripe ones much easier.
- Add pole beans in the same edge zone. They climb fast and eventually form a leafy canopy overhead, which is the look most people picture for a tunnel but only get if they plan for it.
- Small squash varieties can climb too, though heavy fruit needs slings for support. Skip large pumpkins, melons, and heavy winter squash unless you’ve built an especially strong structure.
- Set indeterminate tomatoes beside their own sturdy stakes, cages, or trellises rather than relying on lightweight overhead netting alone. Keep them vertical to improve airflow and keep fruit away from soil.
- As vines grow, gently guide new growth toward the trellis. Most climbers will grab on themselves once they find it, but early directing prevents tangles you can’t reach through later.
- Check openings are large enough to reach through for harvest before growth fills in. Overcrowding at the edges defeats the tunnel’s whole purpose.
5. Drape and Secure the Cover
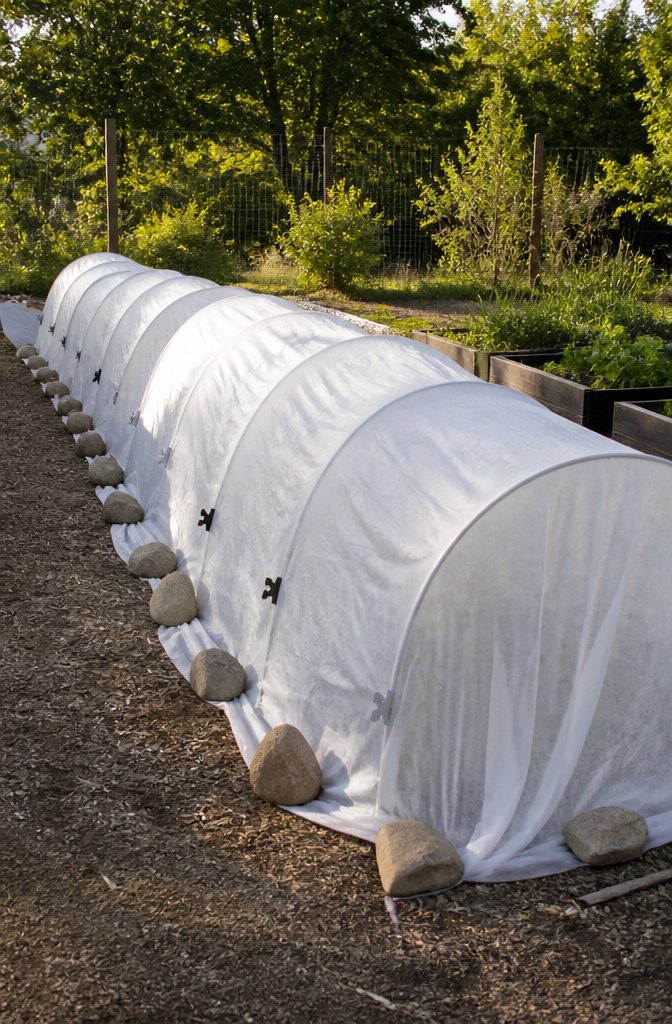
- Drape your cover over the hoops and pull it past both ends so it reaches the ground. That extra length at the ends is what keeps frost from creeping in overnight, so the cover needs to run the full tunnel length plus enough to close the ends.
- For metal or PVC hoops, snap clamps hold the cover tight against the tube without tearing the fabric. Binder clips work on wire hoops, though they grip less evenly and can pop loose if the wind gusts hard enough.
- Weigh down the bottom edges with rocks or lumber if you do not have clamps. A frost cover rated to 41°F only hits that number when the seal is tight; any gap where wind lifts the skirt drops the protection fast.
- Space your clamps every 2–3 feet along the sides, more often if your site catches afternoon gusts. I would rather buy a few extra clamps than lose a row of seedlings to one storm.
6. Set Up Irrigation
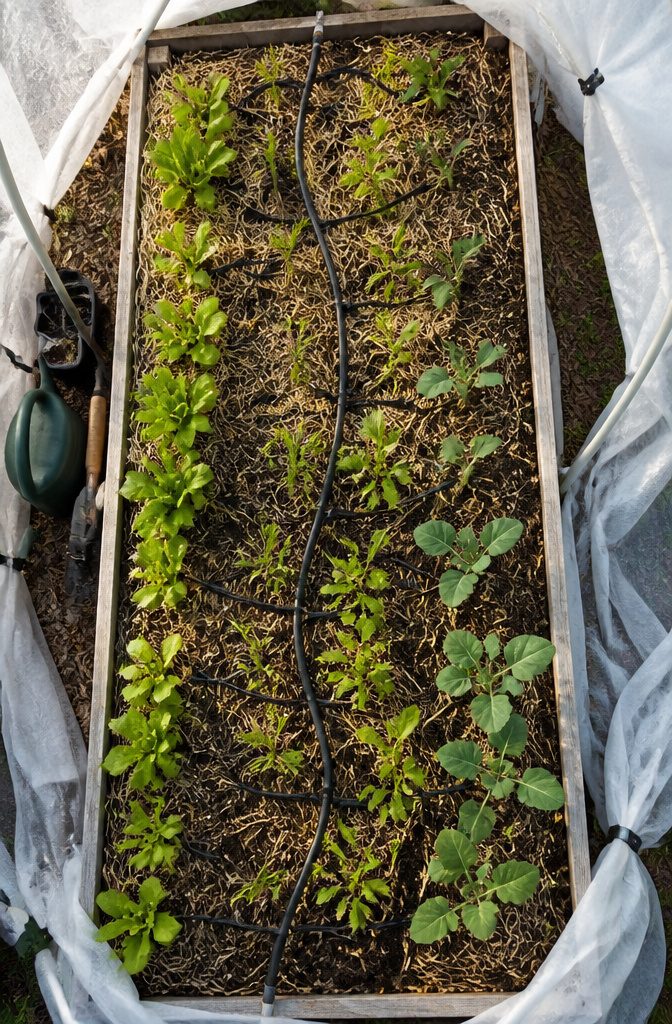
Drip irrigation or soaker hoses belong under the cover where hand-watering misses the mark.
A tunnel this densely planted drinks more than it looks, and the plastic or fabric roof blocks rainfall from reaching evenly even when the sky opens up.
- Run either drip line or a soaker hose down the center of each raised bed, snaking between rows so every root zone sits within a few inches of an emitter or the porous wall.
- Set the timer for morning watering. Wet foliage overnight in an enclosed tunnel invites the mold and mildew that dry leaves avoid.
- Lay 2–3 inches of straw, shredded leaves, or untreated grass clippings over the lines once plants are established. The mulch hides the hose, slows evaporation, and keeps soil temperature steadier through hot afternoons.
Overhead sprayers are what I’d skip here. They soak leaves that never see direct sun to dry them, and in a tunnel that shade factor is built in.
What you pay upfront is the catch: drip parts run maybe $30–$50 per bed against a single soaker hose at half that.
For a weekend build on a few hundred dollars total, one soaker per bed and a Y-splitter on the spigot gets the job done.
7. Mulch and Maintain the Path
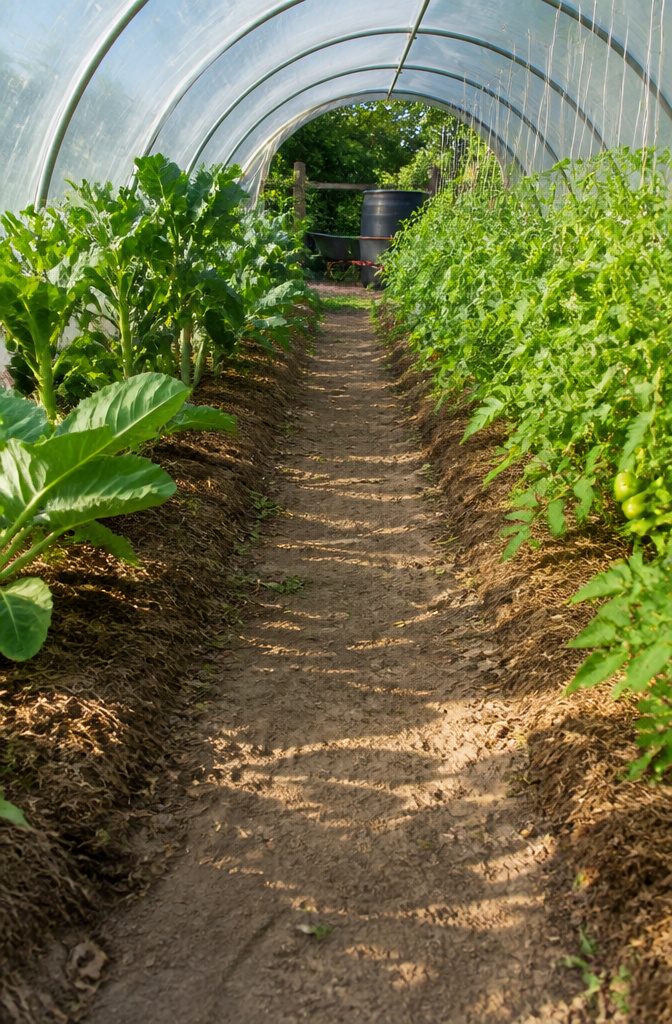
- Mulch around your plants with a 2–3 inch layer, keeping it a couple inches back from stems to prevent rot. Leave the center path completely bare so you can walk through without compacting the soil or tracking mulch into your beds.
- Check your climbers every few days once they hit the trellis. I train new growth upward by hand the first week or two, then let the plants take over. Cucumbers especially will try to wander sideways; tucking them back in saves you from a tangled mess later.
- Snip off lower leaves that yellow or touch the ground, and thin any branches that crowd the interior. Air needs to move through that tunnel or you will fight mildew all season. The same spacing that makes harvesting easy keeps the plants healthy too.
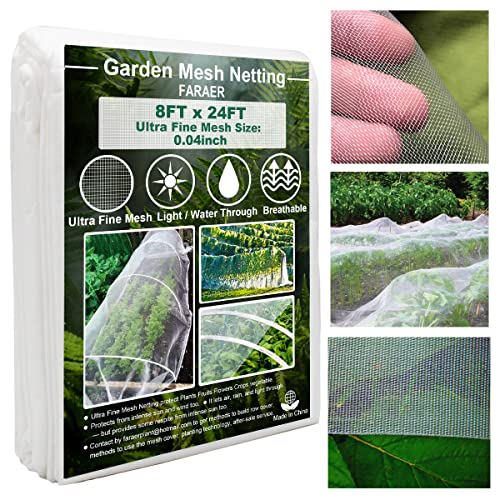
【Ultra-Fine Mesh Netting】Ultra Fine Garden Netting has a 0.8mm x 1mm ultra fine mesh, effective protect vegetable plants fruits flowers crops and so on.

Ideal Garden Protection Netting - Widely used for raised beds, vegetable gardens, greenhouses, fruit trees, nursery plants, flowers, ponds and patio plants. Helps protect plants from insects, birds and small animals.
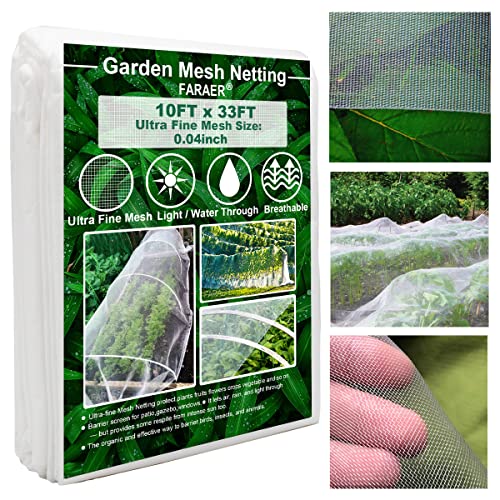
【Ultra-Fine Mesh Netting】Large Size 10x33 Feet provide more security, Ultra Fine Garden Netting has a 0.8mm x 1mm ultra-fine mesh, effective protect vegetable plants fruits flowers crops.
Switch Covers by Season
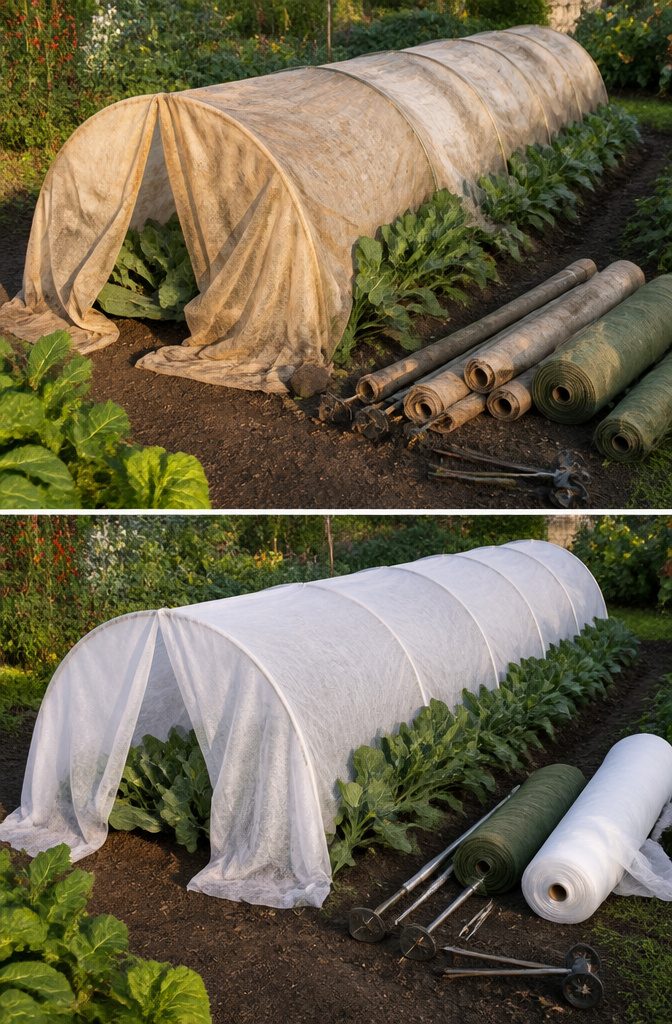
The same hoops that carry frost protection in March can hold insect netting by June and shade cloth by July. I would not build three separate structures when one frame swapped seasonally covers every threat the year throws at it.
Frost fabric clips on tightest in spring and fall, when cold air pools low and tender seedlings need every degree of trapped warmth.
That same fabric comes off the moment nights stay reliably above 50°F, usually around the time squash vine borers start flying.
Insect netting goes up immediately after, fine enough to block moths and beetles but open enough that bees still pollinate tomatoes and cucumbers underneath.
By mid-July, when soil temperatures climb past 85°F and lettuce bolts before it fills out, the netting comes down for 30–50 percent shade cloth.
I have seen gardeners try to layer all three at once, and the result is always a wind-catching sail that warps the hoops.
The hardware stays simple: spring clamps or lengths of PVC snap-clips that grip the tubing without tearing fabric. Each cover rolls to a labeled tube in the shed, maybe 8 inches in diameter, ready for the next rotation.

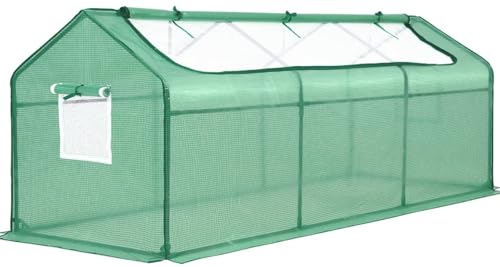
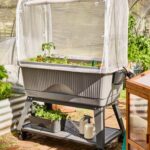
[Optimal Small Greenhouse] - Designed for a variety of creative uses, this mini greenhouse works perfectly indoors and outdoors—ideal for plant protection or as a dry, visible potty house for small dogs like Chihuahuas. Consisting of a powder-coated steel frame and transparent PE cover (80% high transmission, waterproof & reinforced), this setup provides a durable sanctuary for both your garden starts and your small pets.

Convenient access and ventilation:This mini greenhouse, a key gardening supply, features 2 semi - circular front windows for quick plant access. Open and roll them up for better airflow and light, fostering plant growth
Choose Vegetables That Pay Off in a Tunnel
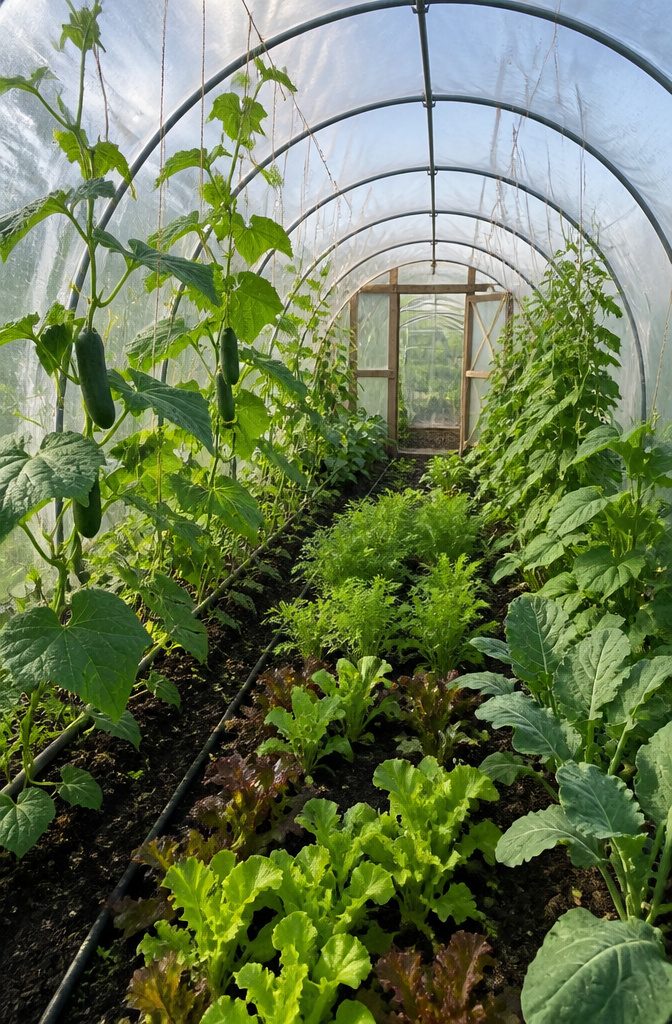
Cucumbers, pole beans, small squash, and tomatoes earn their place in a vegetable garden tunnel because they all want to climb, and a tunnel’s curved frame practically begs for vertical growth.
These plants reach for the light, stay tidy against the sides, and free the ground below for walking or a second row of lower crops.
Beans in particular shoot up fast and grab twine with no help from you, which matters on a Saturday morning when you would rather not fuss with ties.
Tomatoes need a bit more attention, and I would only put indeterminate varieties inside a tunnel; the bush types sprawl outward and fight the shape.
For squash, stick to compact cultivars. A full-size zucchini leaf can block airflow across half the structure, and damp still air brings mildew faster than you would think.
Cold-hardy crops like spinach, kale, and arugula sit at the other end of the calendar.
With a heavier cover or a layer of frost cloth, they keep producing well after the first freeze, and the tunnel buys you harvests that open beds simply cannot.
What I would skip: carrots, beets, and radishes.
They do not climb, they do not need the warmth, and digging them out means stepping inside and compacting the soil you just loosened. Sprawling melons are worse.
A single cantaloupe vine will swallow a small frame, break a lightweight hoop, and leave you wrestling thorny stems just to swap covers. Save the tunnel for plants that use height, not width.
Frequently Asked Questions
What vegetables can I grow in a tunnel?
Cucumbers, pole beans, small squash, and tomatoes are the best fit because they climb naturally and stay tidy against the frame.
Cold-hardy crops like spinach, kale, and arugula also work well under heavier covers for late-season harvests. Skip carrots, beets, radishes, and sprawling melons, since they either do not need the structure or will overwhelm it.
How do I build a vegetable garden tunnel?
Start with two parallel raised beds and a 3–4 foot path between them, then insert hoops or arches every 3–4 feet along that center path.
Cover the hoops with season-appropriate material and secure the edges with clamps or weights. Add trellis netting if you want climbing vegetables, and put drip irrigation or soaker hoses beneath the cover before planting.