You will have full-sized bulbs by late summer, but the six-month commitment from clove to pantry trips up most growers right at the first step.
Heavy clay that holds winter water rots cloves before spring; only loose, compost-amended soil with a pH between 6.0 and 7.0 lets the bulbs expand. Test yours in fall, because lime needs weeks to shift acidity before you plant.
[link-whisper-related-posts]1. Prepare the Soil
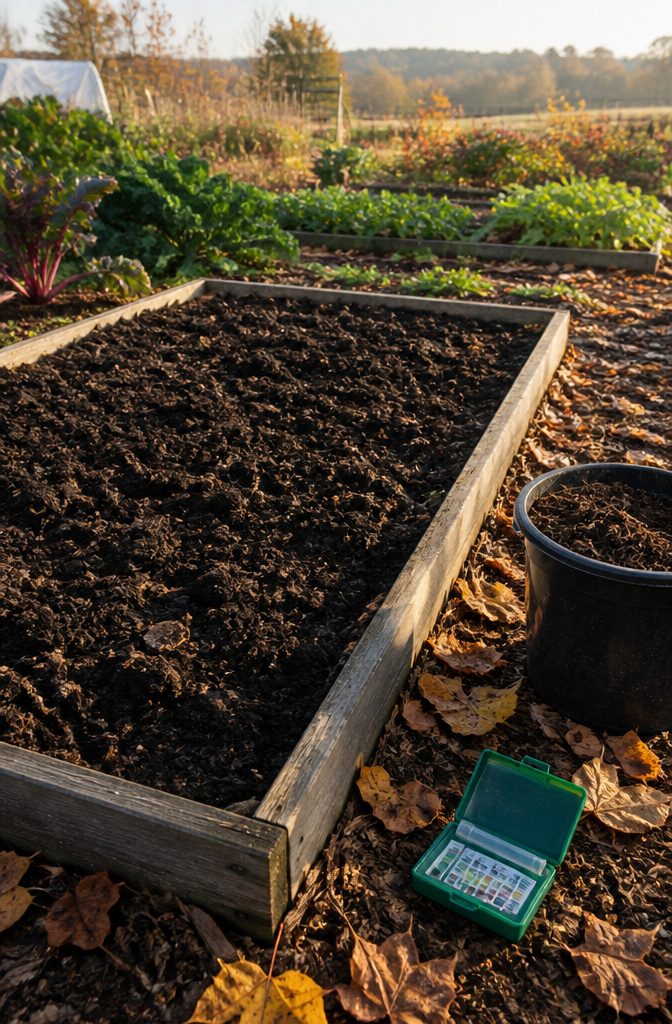
Loose soil lets garlic bulbs expand without resistance, and heavy clay is where things go wrong. The cloves sit through wet winters in ground that stays soggy, and that is when rot sets in or bulbs emerge misshapen and small.
I would dig or till the bed to break up compaction, then work in several inches of compost or a balanced slow-release fertilizer. Aged manure, alfalfa meal, or bone meal all qualify if you have them on hand.
Garlic feeds heavily through its long season, so the initial fertility boost matters more than for a quick spring crop.
The target is well-drained, fertile soil with a pH between 6.0 and 7.0. If your yard holds water after rain, a raised bed buys you the drainage garlic needs without moving earth by the truckload.
Testing pH is worth the ten dollars if you have never checked.
Most county extension offices still process soil samples for a small fee, or a home kit from the garden center gets you close enough. Too far below 6.0, and bulbs stay stunted no matter how much you feed them.
Add lime in fall if you need to shift upward; sulfur if you are running alkaline. Either way, give the amendment time to work before you push cloves into the ground.

Quick, at home results for Soil pH, Nitrogen, Phosphorous and Potash Innovative and inexpensive soil test kit features an easy-to-use capsule system and patented color comparators

Comprehensive Soil Analysis: Liquid soil test kits offer a comprehensive analysis of essential soil parameters, including pH, ammonia, nitrogen, phosphorus, and potassium. Having all these measurements in one kit provides a holistic understanding of the soil's fertility and health.

KNOW BEFORE YOU GROW | Grow the healthiest, sustainable lawn and garden with the most accurate and easy to use professional soil test kit on the market
2. Choose Hardneck or Softneck
The neck of the garlic, that stiff central stem running up through the bulb, is what separates the two types.
Hardneck varieties grow that stem rigid and true, producing fewer but larger cloves with stronger, more complex flavor and those edible spring scapes that make gardeners wait all winter.
They suit colder climates better and peel more easily, though their storage life runs shorter, often shriveling within four to six months.
Softneck garlic bends where hardneck stands straight. More cloves per bulb, smaller and more numerous, wrapped in thicker skins that let them store longer.
The flavor stays milder, closer to supermarket garlic, and the flexible stems braid neatly for kitchen hanging. Warmer climates favor them, though some cultivars handle cold well enough.
I would pick hardneck for my own garden every time. The scapes alone justify it, and I prefer the bold flavor, the easy peeling, the way cloves release cleanly from that stiff center stem.
The shorter storage window is a real limit, not a dealbreaker: use the largest bulbs first, save the smaller for last, and plan to replant your own stock each fall.
Elephant garlic sits outside this choice entirely.
Not true garlic at all but closer to leek, it grows bulbs three to four times larger with a much milder taste. Fine for roasting whole, but it will not give you the garlic bite you are planting for.

【Premium Metal Construction for All-Weather Durability】: Crafted with heavy-duty rust-resistant metal, this elevated raised garden bed outdoor is built to withstand rain, sun, and outdoor elements for years of use. Unlike flimsy plastic planters, the sturdy frame ensures stability even when filled with soil and plants—perfect for growing vegetables, herbs, and flowers. Ideal as a metal raised garden bed for patio or balcony, it combines durability with a sleek design that complements any outdoor space.
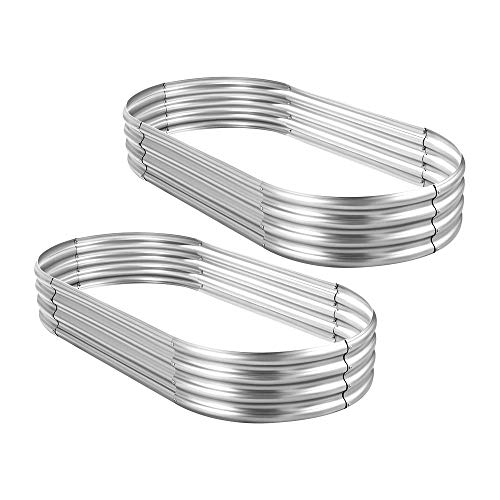
Each raised metal garden bed size: 4×2×1ft , 7Cu

Pack of 2 Raised Garden Bed- Add a new level of convenience to your gardening experience with the Galvanized Raised Garden Bed. Enjoy expanded yield and a more assembled garden layout with this garden accessory, each sized at 48 Inches x 24 Inches x 12 Inches.
3. Plant the Cloves
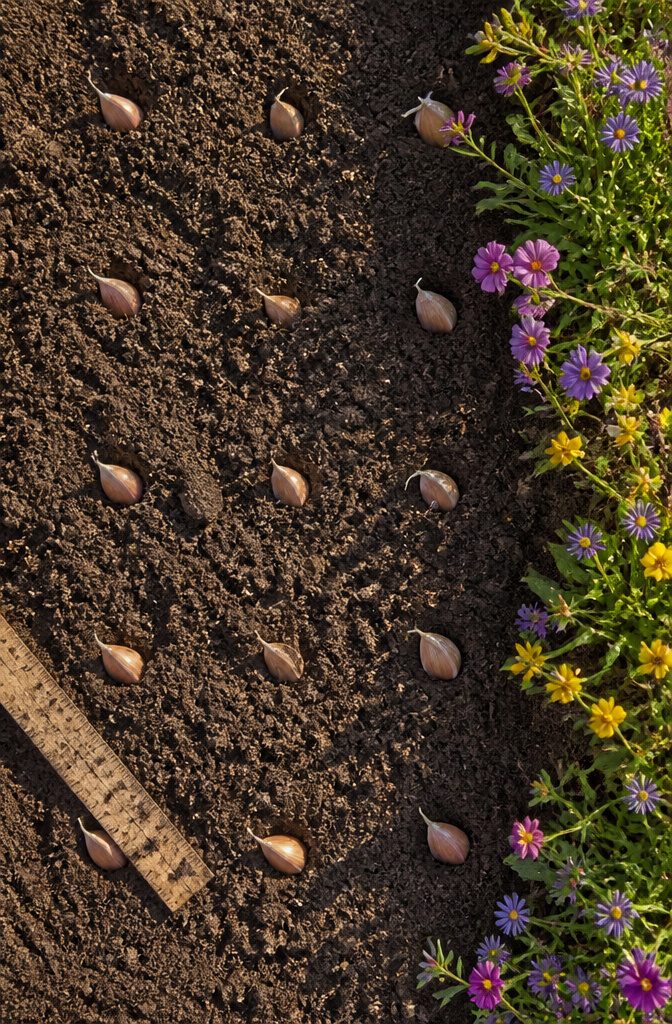
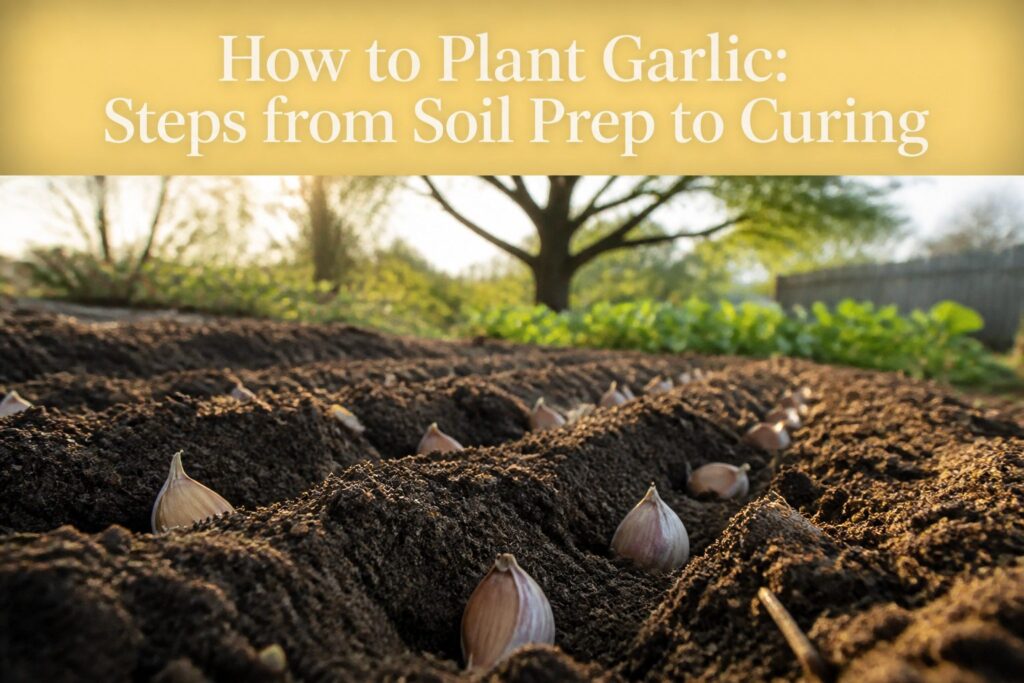
Individual cloves go in pointy side up, 2–3 inches deep and 4–6 inches apart, with rows spaced 18–24 inches so you can still move between them come spring.
The tip wants at least an inch of soil over it; in zones where freeze-thaw cycles heave the ground, I’d sink them toward the deeper end of that range so the cloves stay put through winter.
Fall timing matters more than exact calendar date.
Late September to early November is the window that lets roots establish before the ground locks up without giving shoots time to break the surface. Plant too early and green growth starts, too late and the root system never anchors.
Minnesota and North Carolina want different timing, but I aim for roughly four to six weeks before hard frost. Cloves planted in that window settle in silently and wait out the cold underground.

High-nitrogen organic fertilizer (12-0-0) ideal for promoting vigorous leafy growth in vegetables, flowers, and lawns
Supports Bulb Development & Growth – This onion plant food helps promote strong roots, healthy foliage, and proper bulb formation.

4. Mulch for Winter Protection
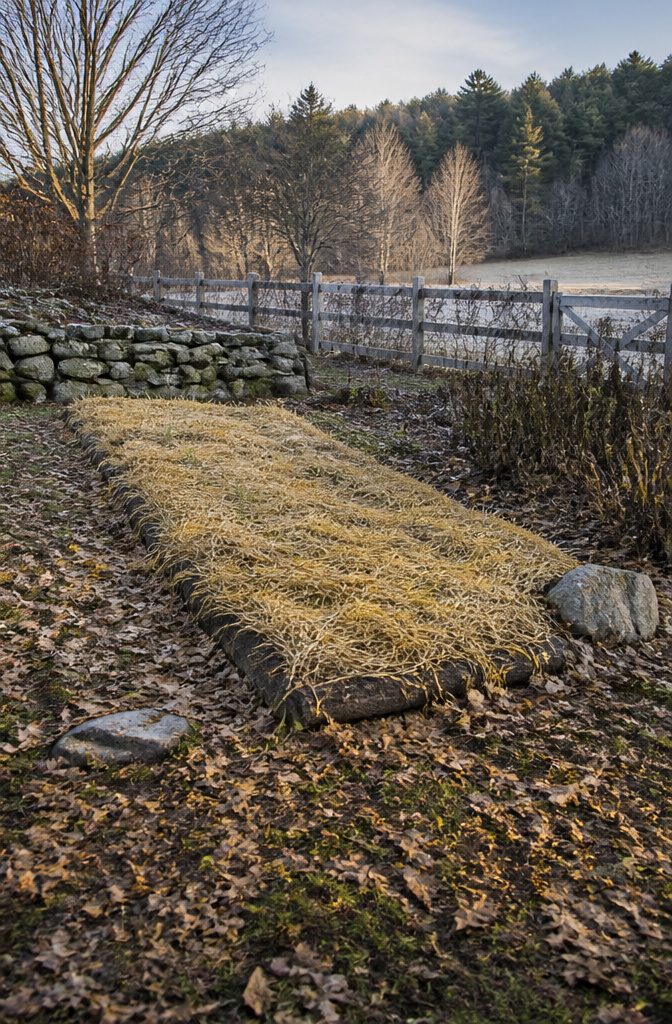
A 2- to 3-inch layer of straw or grass clippings over the planted bed locks in moisture through winter and buffers the soil against freeze-thaw cycles that can heave cloves out of ground.
I would skip anything finer than straw, like shredded leaves, since it mats down too wet and risks rot against the neck of the bulb.
If you get a mid-winter warm spell and green shoots poke up in January or February, the foliage can handle temperatures down into the 20s °F without real damage.
A return of cold weather usually pauses growth again, especially if snow cover follows. Where snow is thin or missing and temperatures are heading into the teens, I would lay on another loose layer of mulch as backup insurance.
Even if foliage gets nipped off below 20 °F, the garlic typically regrows from the bulb, though the setback costs energy and the final heads run smaller.
Pull the mulch back in mid-March to early April once temperatures stay reliably warmer and spring emergence is underway.
I shift that straw between the rows at the same time, since it still has weed suppression work left to do through the season.
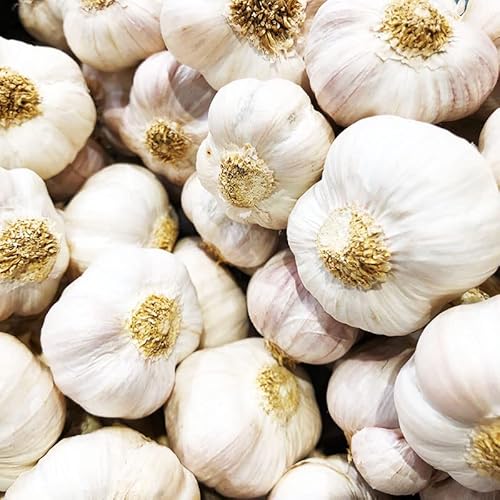
Bold, Rich Flavor: Known for their robust, spicy taste that intensifies when cooked—perfect for roasting, sautés, and garlic-infused oils.

Large, Firm Garlic Cloves for Planting. Each bulb produces thick, well-formed garlic cloves that separate cleanly. Customers consistently mention the firm texture and size, making these garlic seeds for planting easy to handle and space evenly.

A great tasting healthy. Heirloom, Non-GMO
5. Water Through the Season
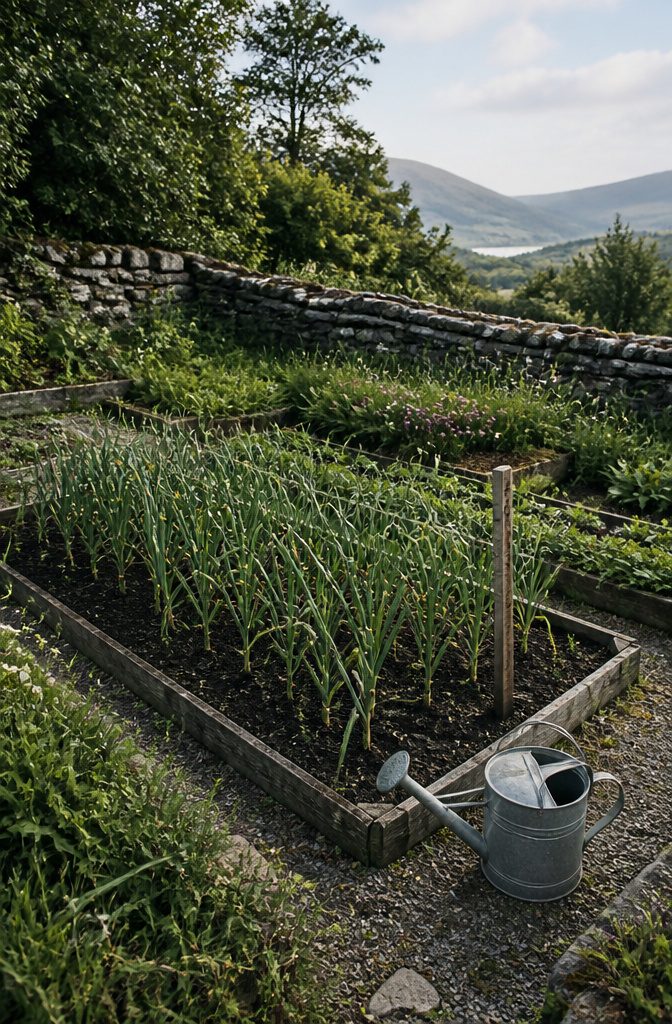
Garlic needs about 1 inch of water per week once active growth starts, and that weekly target matters most during dry stretches when rain is not doing the work for you.
In wetter climates where fall rains are steady, you might not need to supplement at all until spring.
I would rather underwater slightly than keep the soil soggy; garlic rots easily, and consistent moisture without a break is where trouble begins.
The timing of that last drink is what separates firm bulbs from soft ones. Taper watering two to three weeks before you plan to pull the bulbs.
Dry soil forces the plant to pull energy down into the cloves and tightens the wrapper, while late watering leaves you with loose heads that do not store.
I stop entirely once the lower leaves start yellowing, even if the top still looks green. That dry-down period is not optional if you want garlic that lasts through winter in the pantry.

Fast Acting Sulfur: Earth Science Fast Acting Sulfur granules start working immediately to lower the pH of your soil. Help your hydrangeas, azaleas, and blueberries absorb more food and improve fertilizer effectiveness.

Raise Soil pH: If your soil pH is too low, plants are unable to absorb nutrients effectively. Earth Science Fast Acting Lime naturally raises soil pH to help plants.

Fast Acting Lime – Fast Acting Lime starts working immediately to raise the pH of your soil, helping grass and other plants absorb nutrients more efficiently, and get your lawn back to looking its best.
6. Harvest and Cure
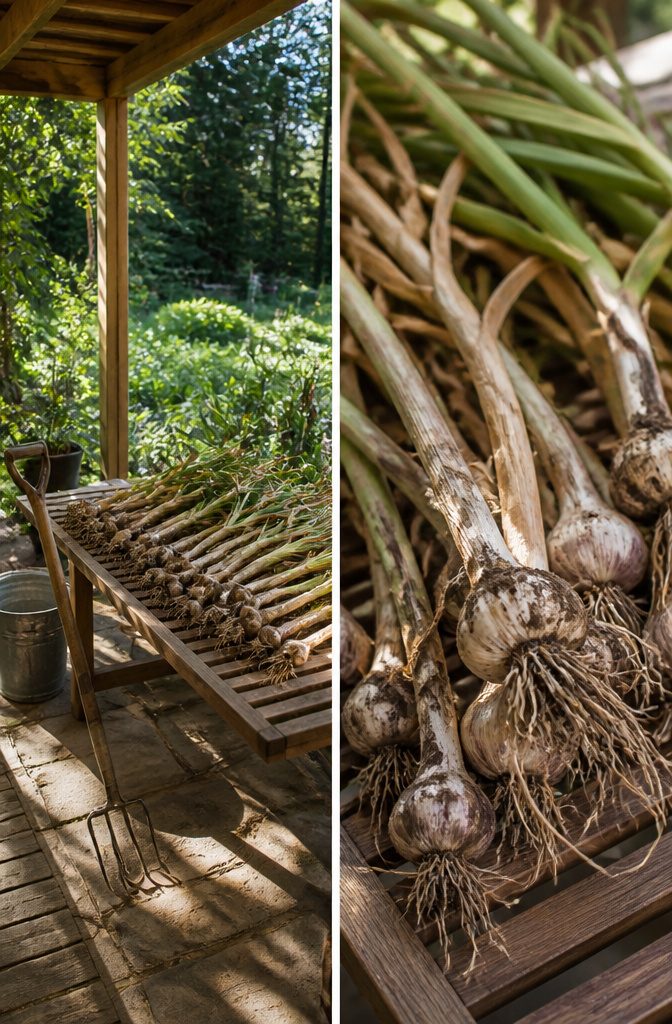
The right moment to pull garlic comes when the bottom three to five leaves have turned brown, leaving three or four green ones still standing.
That usually lands in late June through August, depending on where you garden. Dig carefully with a fork; bruised bulbs spoil faster and won’t keep.
Curing takes two to four weeks in a spot with good air movement. An elevated wire screen or slotted tray works better than a flat surface, since air needs to reach every side.
I hang mine in bunches under a covered porch; the stems dry in place, and I pull bulbs down as I need them through fall and winter.
Once the tops are fully dry, trim the foliage to about an inch above the bulb, cut off the roots, and brush away loose soil.
Store in a mesh bag or open crate somewhere cool and dry, around 32 to 40°F with 65 to 70 percent humidity. Properly cured garlic keeps three to six months.

Accurate Soil pH Testing: Dewildetradingco Soil pH Test Strips offer measurements of soil pH levels (pH 3.5-9). As an essential tool for every gardener and grower, these test strips help determine the optimal pH for various plants, such as outdoor plants, indoor plants, gardens, grass lawns, fruit trees, flowers, vegetables, and forest shrubs.

Kindly NOTE: This soil tester can not be applied to test pH value of any other liquid. If the soil is too dry the indicator will not move, and water it before testing.
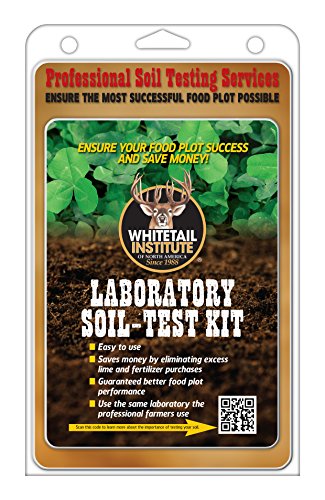
ENSURE the most SUCCESSFUL food plot possible
Hardneck vs. Softneck: What Each Offers
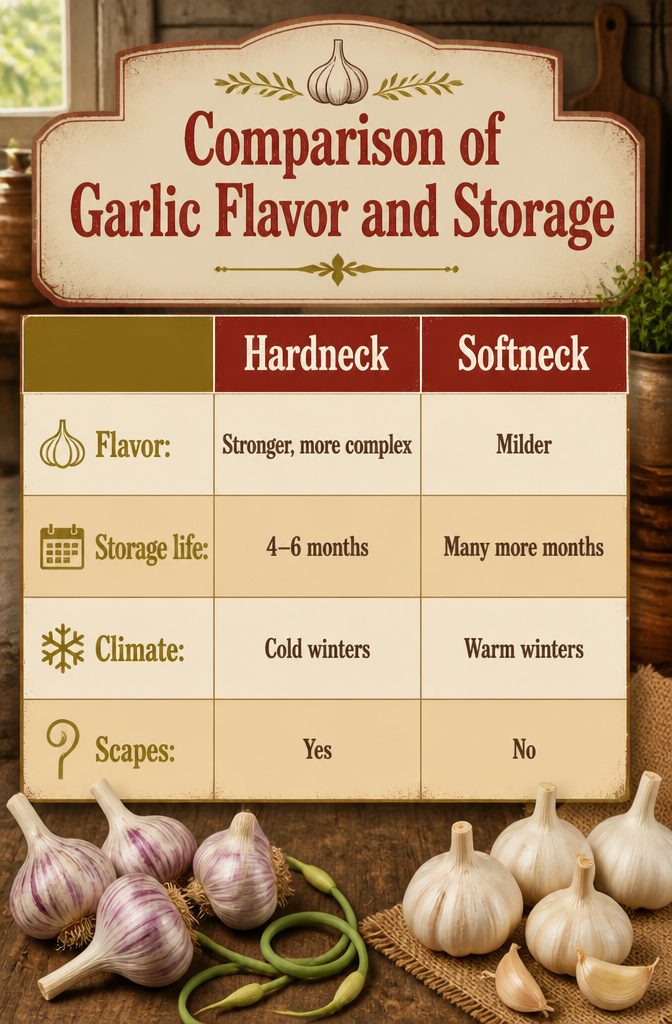
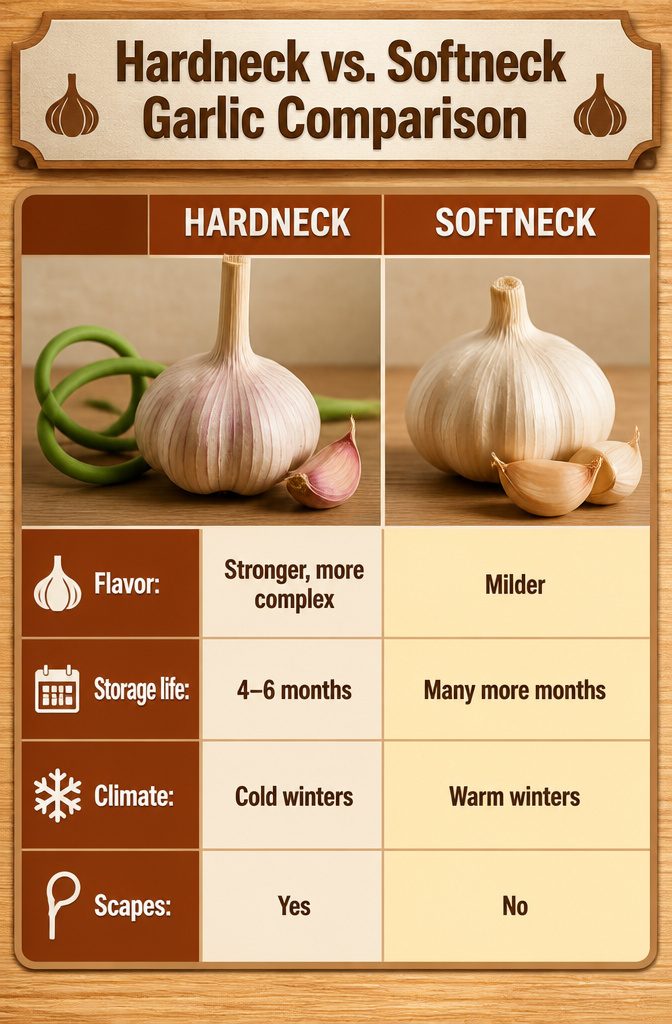
Hardneck garlic carries a stronger, more complex flavor that I reach for in most cooking, while softneck stays milder and closer to what you see at the grocery store.
The real split comes down to climate and patience with storage: hardneck tolerates cold winters and gives you those edible scapes in spring, but the bulbs typically shrivel within 4–6 months.
Softneck lasts many more months in storage and handles warmer zones, though you get smaller cloves and less intensity.
| Hardneck | Softneck | |
|---|---|---|
| Flavor | Stronger, more complex | Milder |
| Storage life | 4–6 months | Many more months |
| Climate | Cold winters | Warm winters |
| Scapes | Yes | No |
I plant hardneck varieties like Music or Chesnok Red because the flavor matters more to me than shelf life, and the cloves peel easier too.
If your winters are mild and you want garlic that lasts through next summer without sprouting, softneck is the practical choice.
Either way, match the type to your actual winter lows, not your preference on a seed catalog page, or you will waste a season finding out the hard way.
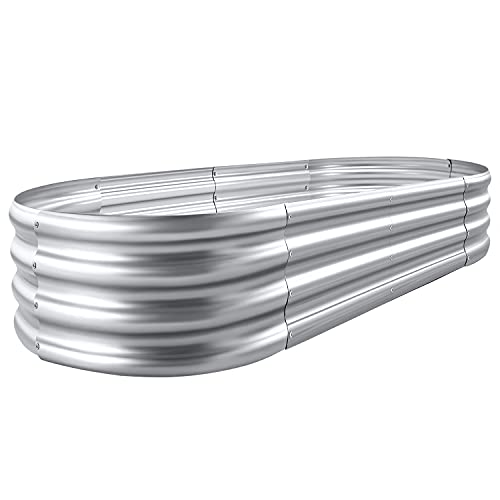
Each raised metal garden bed size: 4×2×1ft ,7.14Cu

HEAVY DUTY GALVANIZED STEEL: Made from galvanized steel panels designed for outdoor gardening use. This metal raised garden bed provides a sturdy structure that helps resist rust and everyday weather exposure for vegetables, herbs, and flowers in backyard gardens.
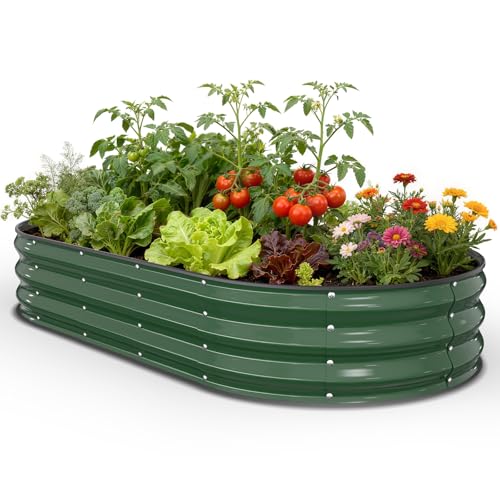
HEAVY DUTY GALVANIZED STEEL: Made from galvanized steel panels designed for outdoor gardening use. This metal raised garden bed provides a sturdy structure that helps resist rust and everyday weather exposure for vegetables, herbs, and flowers in backyard gardens.
Garlic Scapes
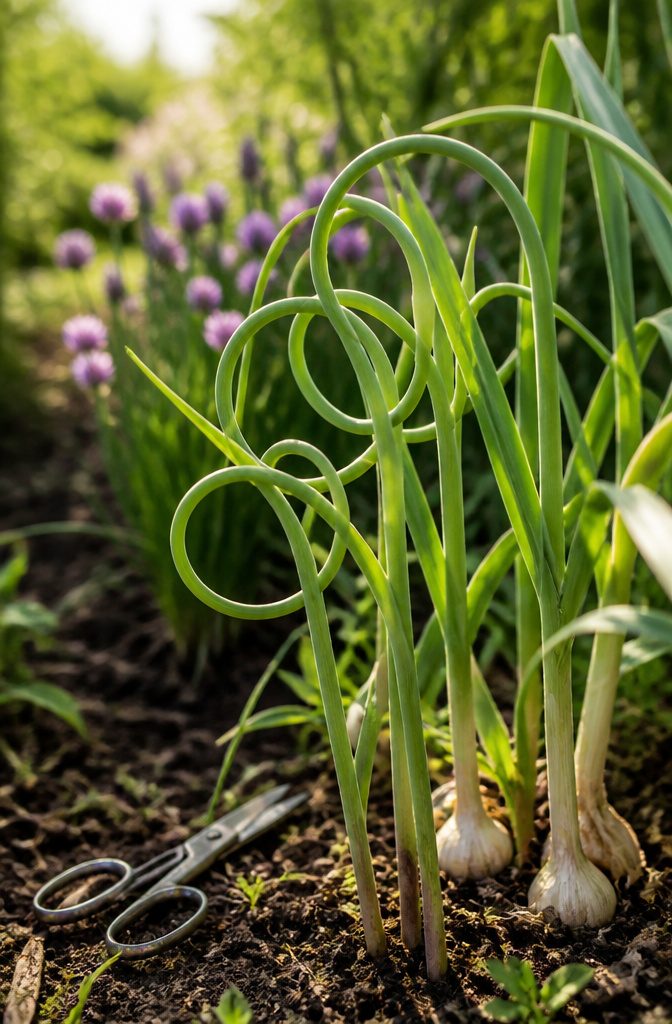
Hardneck garlic sends up a flower stalk in mid-to-late May, a month or two after the first leaves appear.
That stalk is the scape, and it is edible, but harvest it when the curl is still loose, roughly half to fully curled, before it straightens and the bulbous tip starts to open.
Cut it as low as you can without nicking the leaves.
I use scapes anywhere I would use garlic, just with a lighter hand.
They chop easily into eggs, stir-fries, or pesto, and they pickle well. The flavor is milder than a clove, so they are a good entry point if you find raw garlic aggressive.
Removing the scape is not just about the kitchen. The plant will keep trying to build a flower and bulbils unless you stop it, and that energy comes from the same reserves meant for the bulb below ground.
Cut the scape, and the plant pushes those carbohydrates back toward bulb size.
Some growers leave a few to naturalize, which is fine if you have space to spare. In a small raised bed or a renter’s narrow garden plot, I would cut every one I saw.

🧄 ENGINEERED FOR STRONG, FLAVORFUL GARLIC BULBS – Gardenera LIQUID POWER Garlic Fertilizer is specially designed to support vigorous root development, large clove formation, and pungent flavor across all garlic varieties including hardneck, softneck, and elephant garlic.


Supports Bulb Development & Plant Strength – Helps promote strong roots and consistent bulb formation throughout the season.
Growing from Bulbils
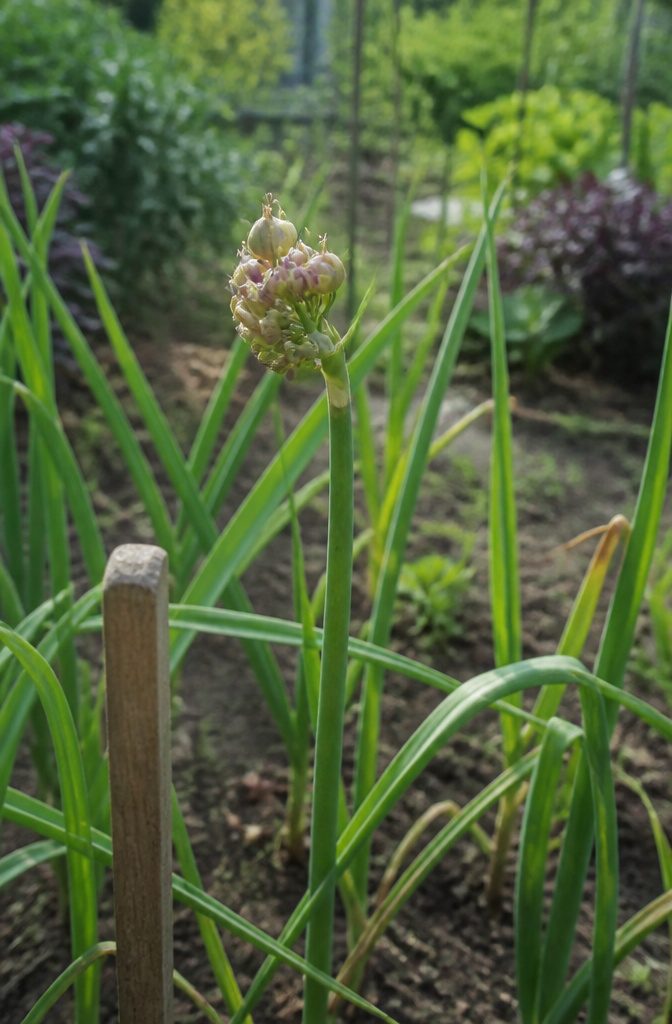
Hardneck garlic sends up a hollow seed stalk in summer, and at the tip sits a globe-shaped sheath that eventually splits to reveal pea-size bulbils.
These tiny bulblets look like miniature cloves clustered together, and technically they can grow into new plants.
It just takes longer. Plant a bulbil and the first year produces only a single clove, the second a small bulb, and a full-sized head waits until the third season.
Most growers, myself included, skip the wait and plant individual cloves instead. A clove is already a mature storage organ ready to develop into a full bulb by the following summer, which fits the annual rhythm most garden beds follow.
Bulbils make sense only if you want to multiply a favorite hardneck variety without buying more seed stock, or if you have space to dedicate to a multi-year project with no harvest in between.
For a weekend gardener working a small plot, the math is simple: cloves give you garlic in one growing season, bulbils in three.

Bold Flavor: Enjoy the rich, spicy taste that garlic is renowned for—perfect for enhancing your culinary creations.

Hardneck Garlic Bulbs for planting grow into flavorful homegrown garlic with firm bulbs, large individual cloves and distinctive curling scapes, making them an excellent choice for vegetable gardens, raised beds and kitchen gardens

Garlic Seeds (100+ Count): Botanical garlic seeds (not cloves) for gardeners who want to grow garlic from seed and raise plants from the start.
Companion Planting with Garlic
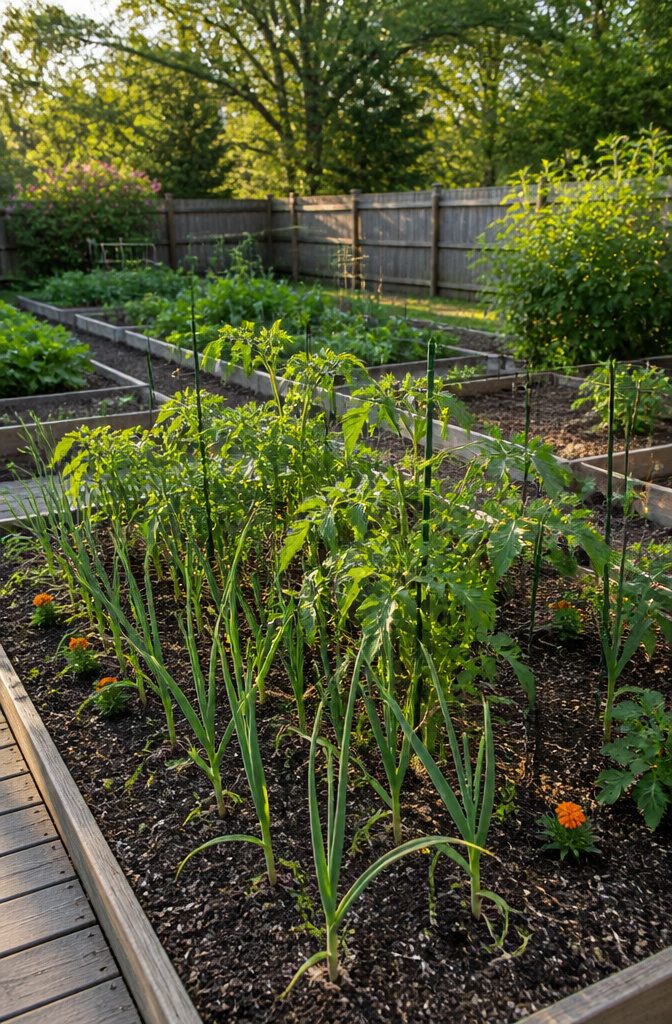
Garlic’s sulfur compounds make it one of the more useful pest deterrents in a vegetable bed. I would not plant a whole garden around it, but tucked in at the edges or between rows, it earns its keep.
- Garlic repels aphids from roses and brassicas, including cabbage and broccoli.
- Tomatoes gain some protection from common pests when garlic grows nearby.
- Pepper plants may see less fungal pressure with garlic as a neighbor.
- The sulfur compounds can also help against whiteflies, Japanese beetles, root maggots, and carrot rust fly.
Good companions to pair with garlic: beets, celery, lettuce, potatoes, strawberries, and tomatoes.
Skip peas and beans entirely. Garlic does not get along with legumes.
If pests are already a problem, garlic tea sprayed on foliage acts as a systemic draw, taking the sulfur compounds up into the plant cells.
I would try that only after the companion planting is already in place; it is a backup, not a replacement.

Package contains 6 pounds organic soil de-acidifier grains and is produced to avoid wasteful runoff, mess, hazards and smells

Raises Soil pH: True Organic Garden Lime helps reduce soil acidity by raising the pH level, creating a more balanced environment for your plants.

FOR USE ON: For all Acid-loving plants; Use Espoma Organic Soil Acidifier for azaleas, hydrangeas, rhododendrons, blueberries, evergreens, strawberries, camellias, and all plants that thrive in acidic soils.
Curing Methods That Work
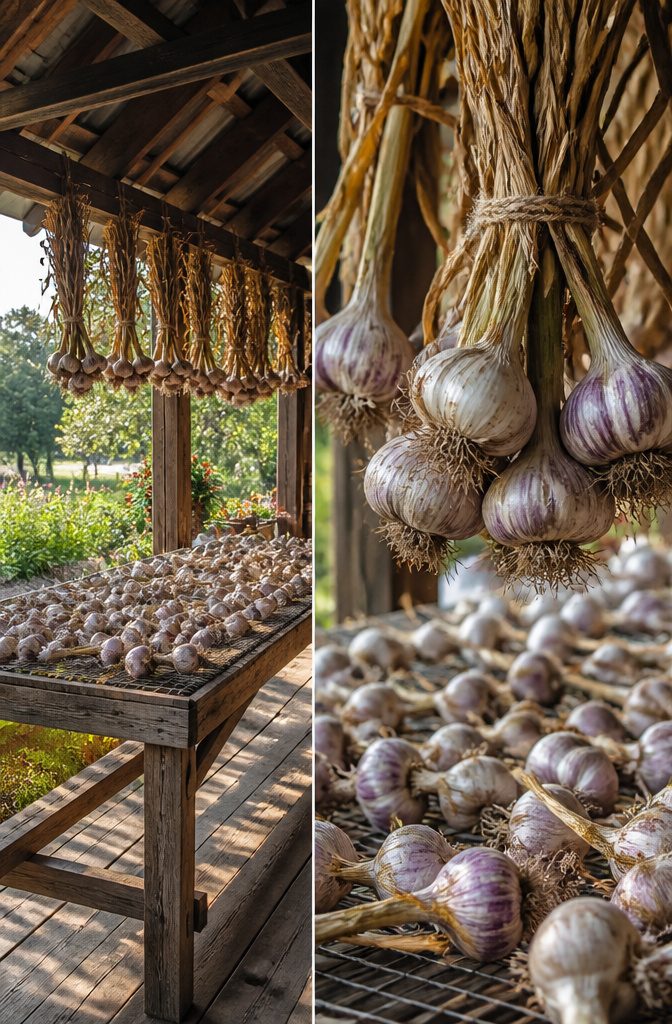
Curing garlic is where the work pays off or falls apart, and the deciding factor is always air. Hang the bulbs in small bunches of five to ten, stems tied, in a warm, shady spot with gentle airflow moving through.
A covered porch, barn, or garage works. Direct sun at peak late-summer heat damages the outer skins, and a fan pointed straight at the bulbs dries them unevenly.
If hanging is not an option, lay the garlic in a single layer on elevated screens or wire racks so air circulates underneath. Sawhorses with hardware cloth stretched between them do the job without spending much.
The neck tells you when curing is done. It turns dry and papery, and the outer wrappers rustle instead of feeling moist.
Allow two to three weeks, sometimes four if the season was wet. Once cured, trim the tops to about one inch above the bulb, cut the roots, and brush off loose soil.
Store the bulbs in a mesh bag, open crate, or braided and hung in a cool, dry place. The range that works is roughly 45 to 55°F with 50 to 60% relative humidity.
I would skip the refrigerator entirely; cold storage tricks garlic into thinking spring has arrived, and the cloves sprout early. Properly cured and stored, garlic holds for three to six months.
Frequently Asked Questions
When is the best time to plant garlic?
Fall, from late September to early November, is the right window.
Cloves need four to six weeks before hard frost to establish roots without sending up shoots. The exact date shifts by climate, but you want roots established before winter dormancy sets in.
How deep should I plant garlic?
Set cloves 2–3 inches deep with the pointy side up. In areas with heavy freeze-thaw cycles, aim toward the deeper end so cloves stay anchored through winter.
How far apart should garlic cloves be planted?
Space cloves 4–6 inches apart within rows, with rows 18–24 inches apart. Wider spacing gives you room to move between rows in spring; closer spacing works if your soil is already rich and well-built.
How do I know when to harvest garlic?
Pull bulbs when the bottom three to five leaves have browned and three or four green ones still stand. That timing usually falls from late June through August depending on your zone.
Can I grow garlic from bulbils?
Yes, but it takes three full seasons to reach a normal-sized bulb.
The first year yields a single clove, the second a small bulb, and the third a full head. Most growers plant cloves instead for a harvest the following summer.
How long does it take to grow a bulb of garlic?
From fall planting to summer harvest runs roughly 7–9 months. The plant roots through winter, resumes growth in spring, and bulbs mature by late June to August.
What cannot be planted near garlic?
Keep peas and beans away from garlic entirely; the two do not get along. Good neighbors include tomatoes, beets, lettuce, potatoes, strawberries, and brassicas like cabbage and broccoli.
What is the best soil amendment for growing garlic?
Compost or a balanced slow-release fertilizer worked several inches into loosened soil gives garlic the fertility it needs for its long season. Aged manure, alfalfa meal, or bone meal also work if you have them.
What is the recommended spacing for planting garlic seeds?
Garlic is planted from cloves, not seeds, and those cloves go 4–6 inches apart in rows 18–24 inches apart. Individual cloves are the mature storage organs that develop into full bulbs by the next summer.