The ideas below run from a weekend of staining and trim work to multi-level builds with pergolas and engineered footings, with tips on lighting, fire pits, and how to plan the transition.
A flush threshold between deck and patio needs only drainage math, while any drop over a few inches forces you into stairs, landings, and code-checking rail heights.
I would test stain samples on both deck boards and concrete before I committed to any color-matching scheme; the same grey can shift in UV until it clashes.
[link-whisper-related-posts]1. Wide, Gradual Steps
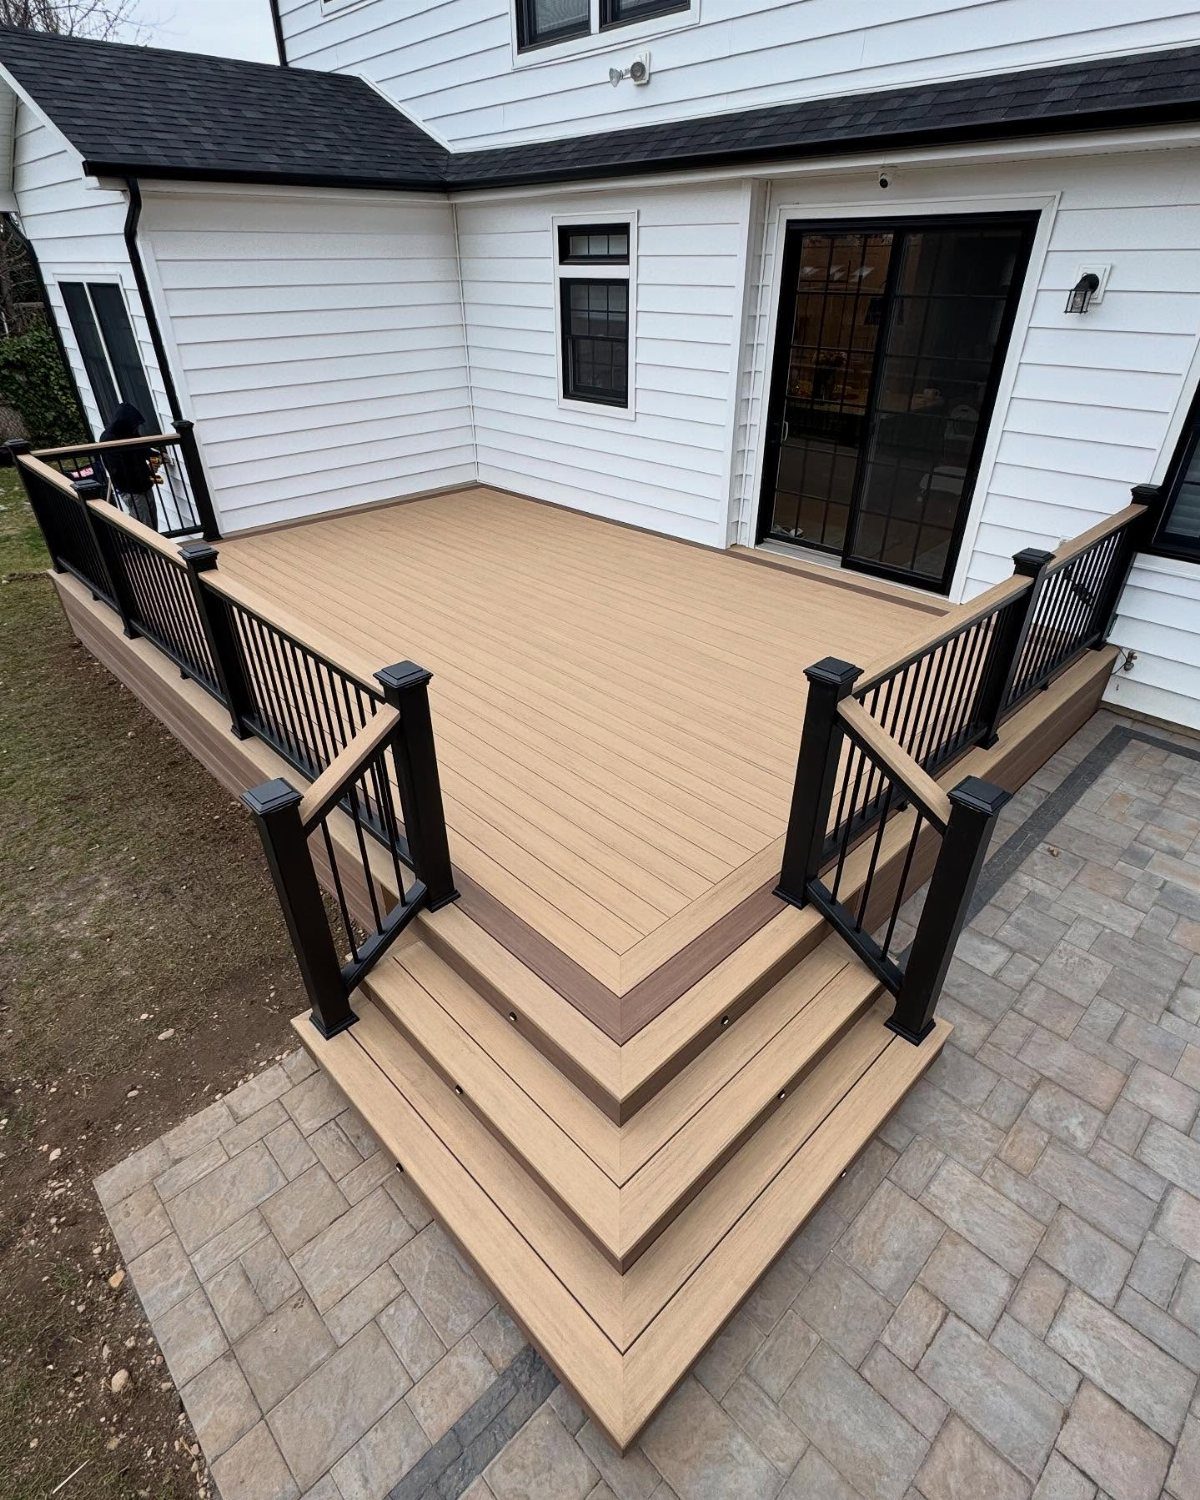
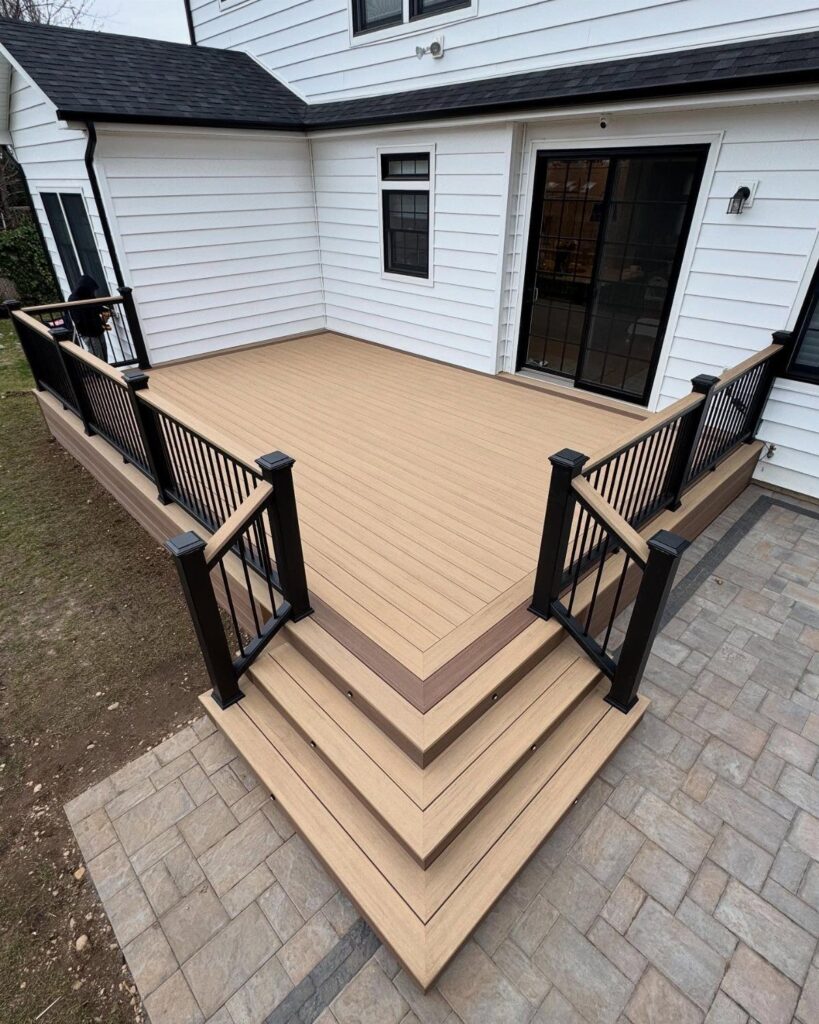
Wide steps make the drop from deck to patio feel like an invitation, not a climb. I look for treads at least 48 inches across, deep enough that two people can pass without turning sideways.
Turning the steps at a corner lets you descend toward the patio instead of facing a wall. Composite risers with stone landings save you the maintenance of all-wood construction.

【30 Degree Tilt on LED Board】The 1 Inch Recessed Step Light is a clean, modern lighting solution for stair and deck lighting applications, with no unwanted glare. A 30° tilt to the internal LED board creates a natural downward beam that eliminates the need for a visor and allows for a sleek, flat design.

【WARM LED LIGHT】Warm white deck light, just the right amount of warm glow which is safer for the whole family to go downstairs at night
2. Fire Pits
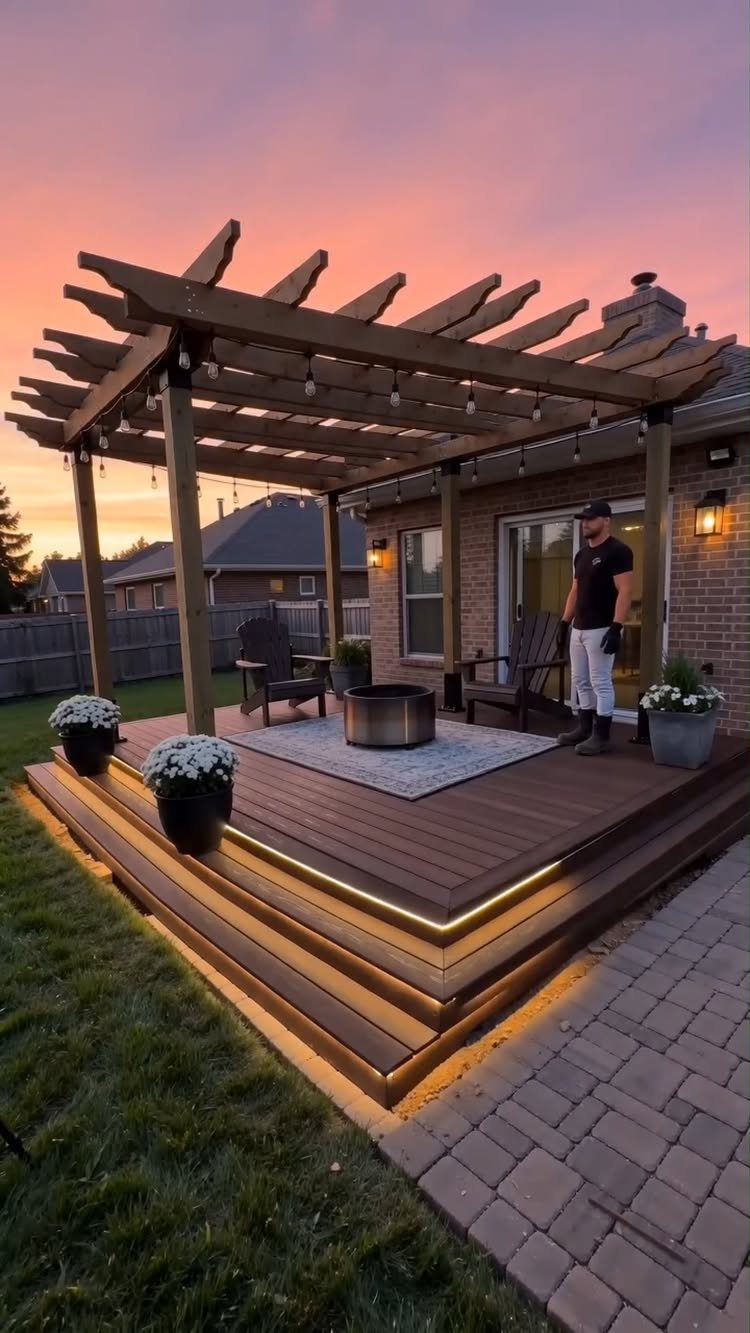
A fire pit at the transition gives people a reason to linger between the 2 levels.
I would place it on the patio, not the deck; most jurisdictions require ample clearance from combustible structures, and ember holes in decking are expensive regrets.
A basic steel ring for wood burning runs cheap; gas lines run much higher if you hire out. I would check wind patterns first, smoke drifting up to a pergola-covered deck ruins the evening fast.
3. Step Lights
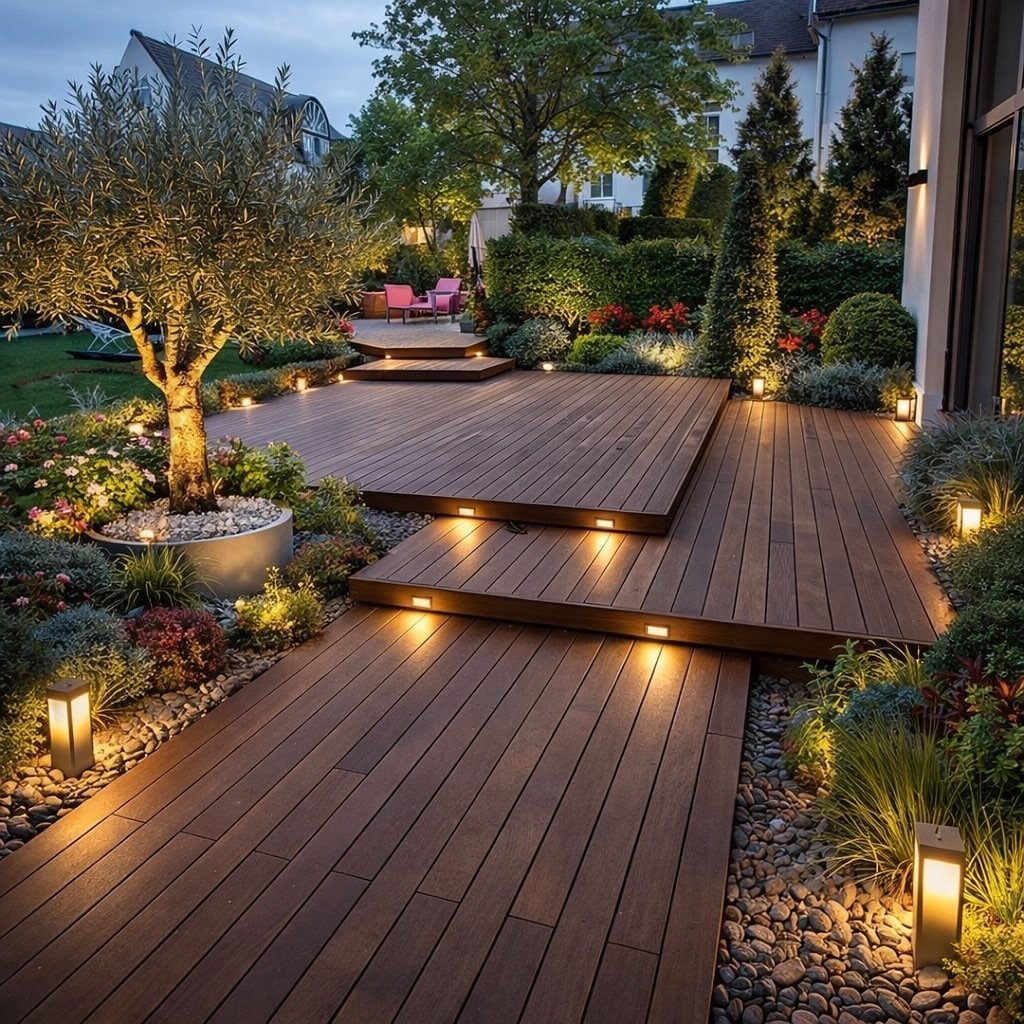
Recessed step lights on risers do one job I find essential: they show where the step ends when your eyes are adjusted to darkness.
I would budget per fixture for cable and the transformer box, and I would put them on every riser in a run, not every other one.
The gaps look cheap and trip someone eventually. Solar versions exist; I skip them, the light is too weak and the batteries fail in 2 seasons.
4. Deck to Patio Multi-level Design
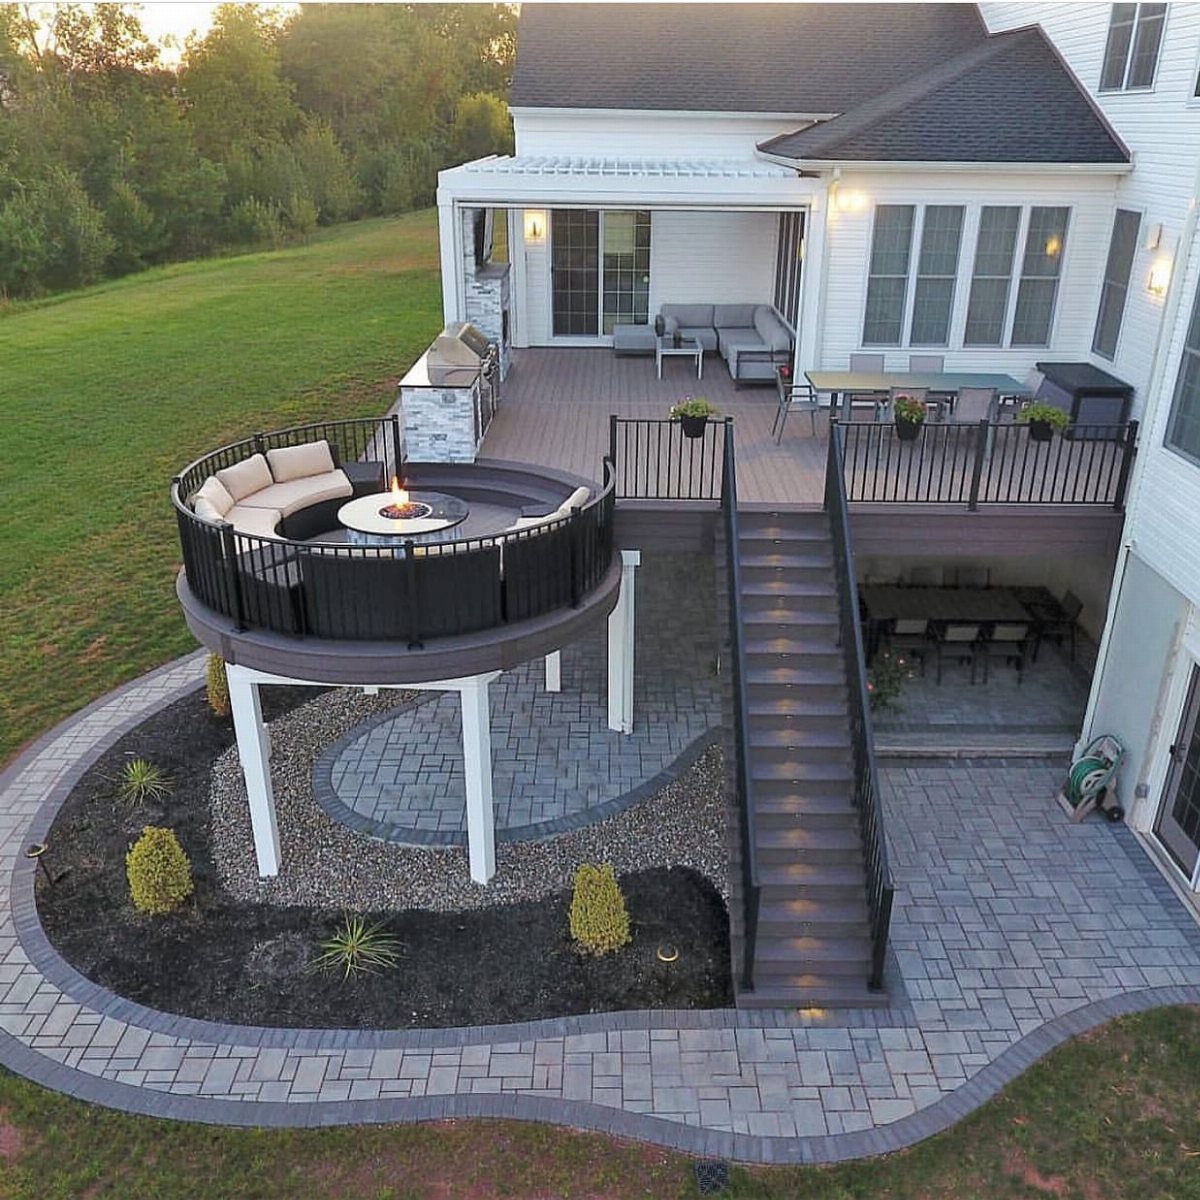
Multi-level design separates functions without building walls. The photo spreads cooking, dining, and fire seating across the upper deck, then drops a long staircase to open patio below.
I would resist filling every level; the circulation space, those stairs and landings, need room to breathe. A rule of thumb I follow: the footprint of your vertical circulation should take up a noticeable slice of the total deck area.
The circular fire pit seating visible here eats more space than a standard rectangular layout, so plan that radius early or your dining chairs end up cramped.
5. Pergolas
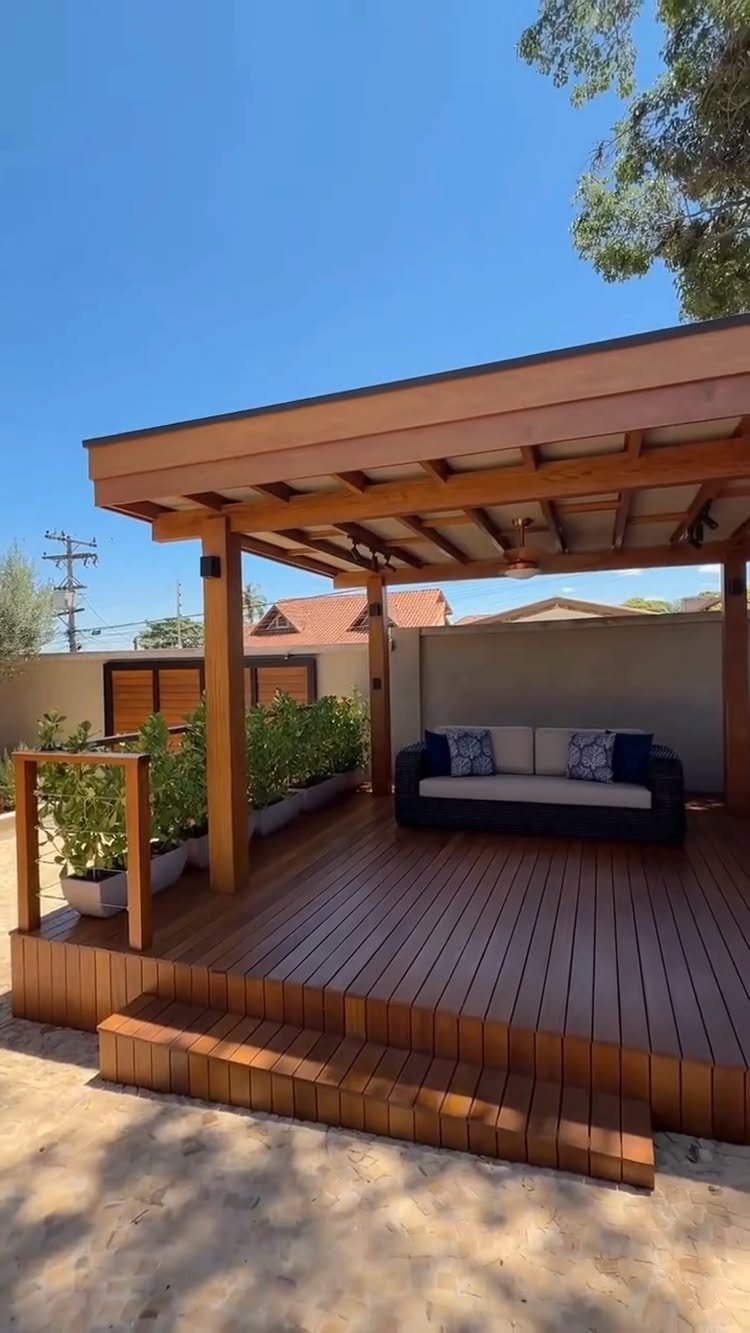
A pergola over the transition marks the change in elevation without blocking light. This one is substantial, posts set on the deck frame with a beam system carrying the rafters.
I would check whether my deck structure can handle that load; a pergola this size adds significant weight, and retrofitting footings is not a weekend job.
The built-in planter boxes at the edges are a detail I would copy, they soften the posts and give you seasonal color for little cost.
Cedar or pressure-treated lumber adds up fast, materials only, and that is per square foot of roof area.
6. Seamless Transitions
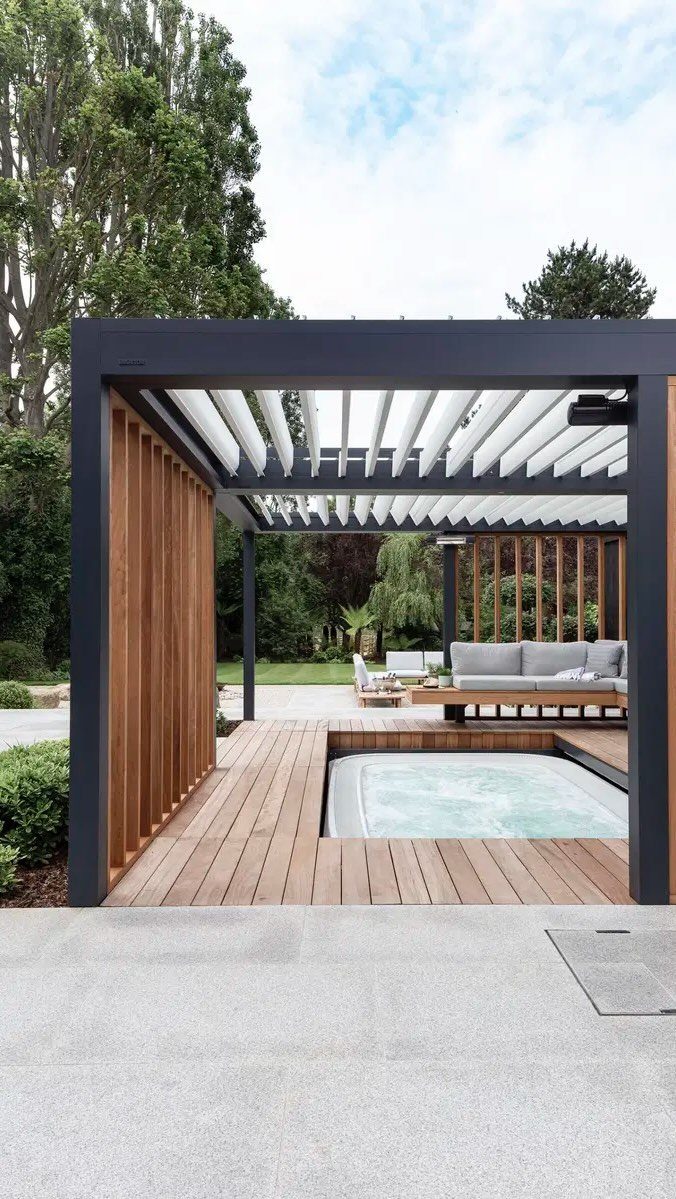
Flush transitions work when the deck and patio sit at the same grade, the stone meeting the wood with no step at all.
The challenge is drainage; water needs somewhere to go or it pools at the seam. I would pitch both surfaces slightly away from the house and leave an expansion gap filled with flexible joint material.
The visible hot tub surround complicates this, the deck framing there carries extra load and the coping must overhang properly to shed splashes. I would hire the spa rough-in, the electrical and structural checks are not worth guessing.
7. Deck to Patio Matching Colors
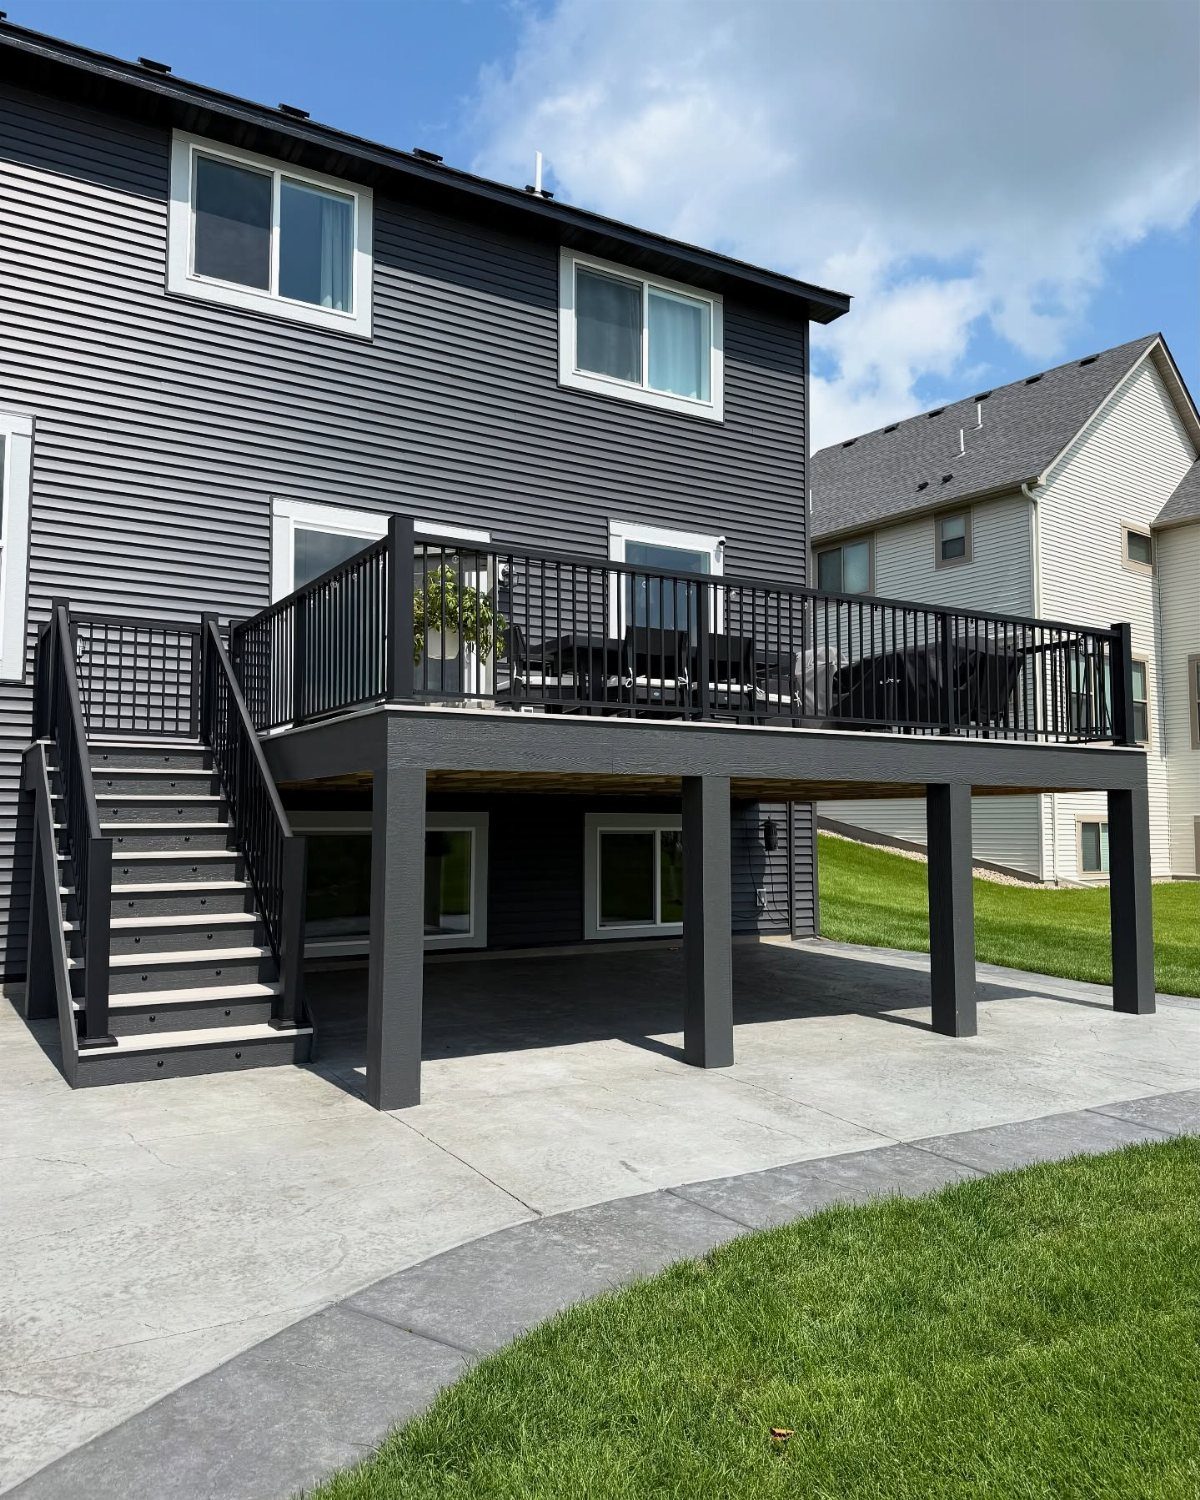
Matching the deck stain to the patio tone erases the visual break between levels.
Here the dark grey deck boards and their black railings pick up the charcoal border of the stamped concrete below, so the eye reads one connected plane rather than two competing surfaces.
I would test samples on both materials before committing; concrete stain and deck stain age differently in UV, and a match in the can can shift to a clash once the season turns.
Pressure-wash both surfaces first so you are judging against clean substrate, not dirt.
The stairs lead straight down to the patio, and that shared grey tone on both levels is what lets them read as one idea rather than two separate spaces.
A deck and patio can be a perfect match, but first, you should know what differentiates the two.
8. Contrasting Deck Borders and Trim
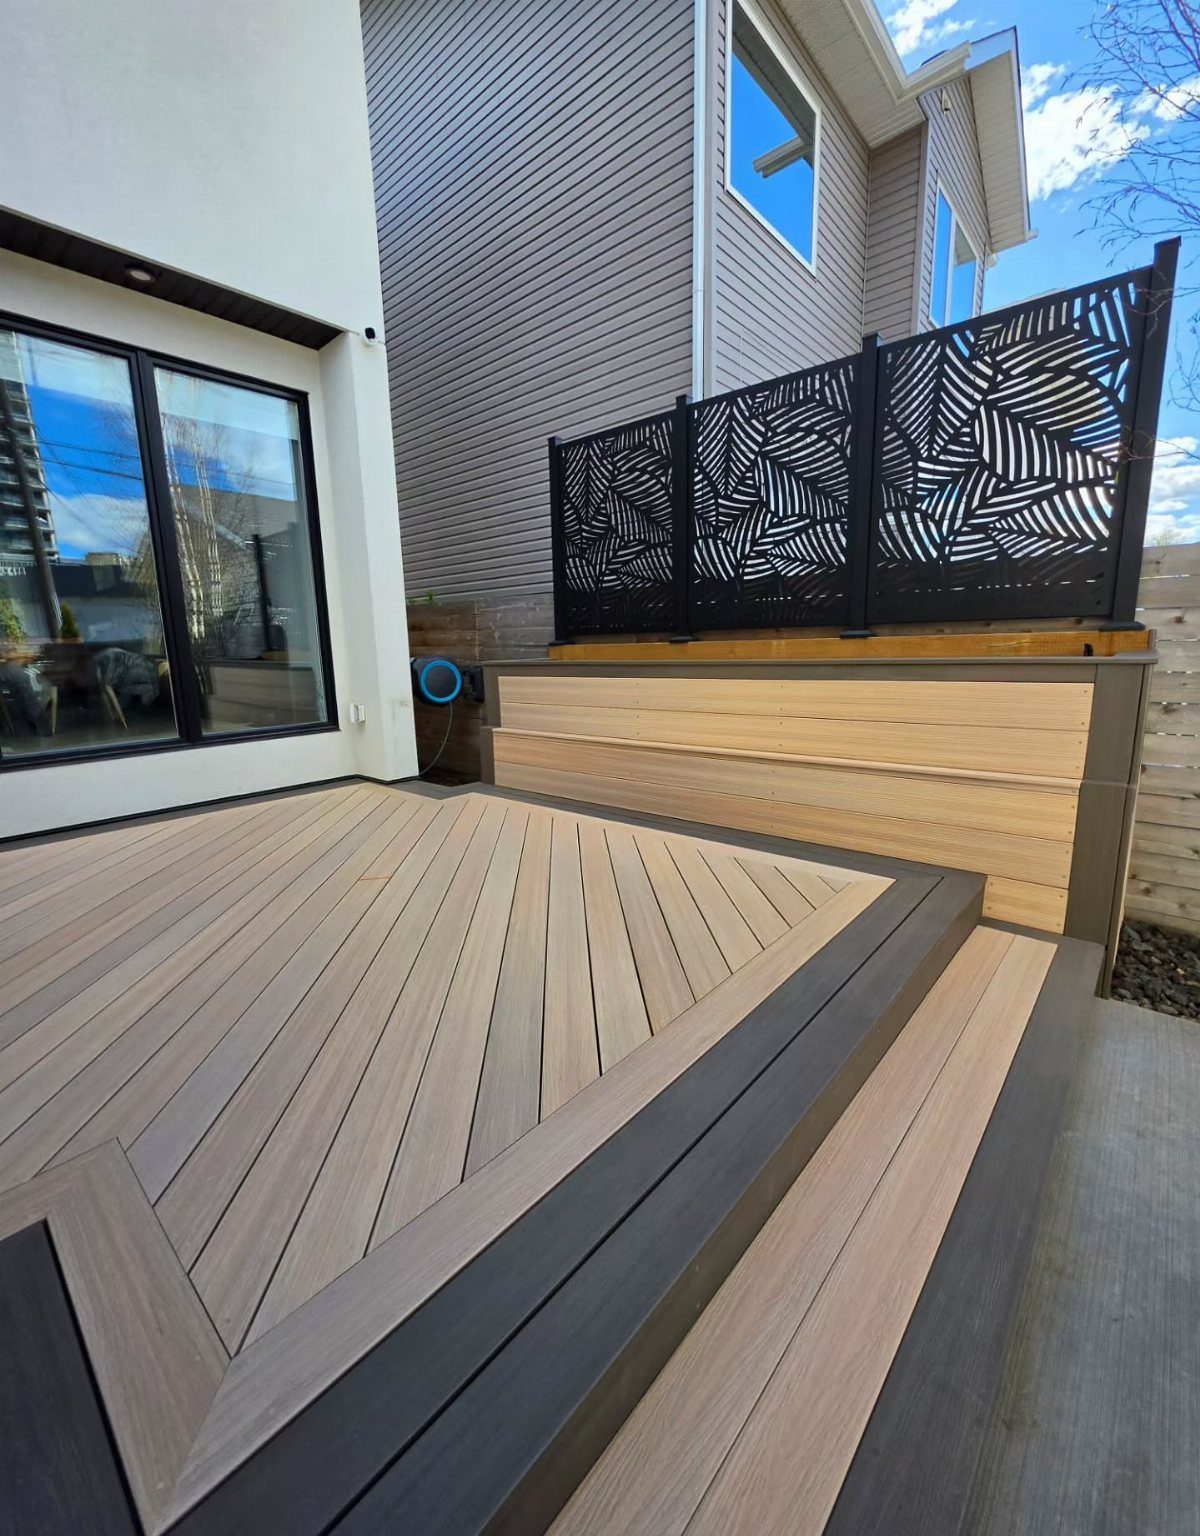
A dark border frame turns the deck into a deliberate shape and draws the eye toward the patio descent. The diagonal plank pattern here needs that frame; without it, the angled boards read as busy and the edges look unfinished.
I would build the field first, then cut border boards to fit the actual perimeter, walls are never perfectly square.
Composite trim at the edge resists the water that pools where wood meets concrete. The privacy screen in dark metal repeats the border tone, which is the move that makes this feel designed rather than assembled.
I would keep the border width to about a hand span; narrower looks like a mistake, wider competes with the field.

Non-Slip Stair Mat: Because of its sturdy anti-slip rubber backing, you don't need to purchase another tape or adhesive. It can stick to wooden, tile, and marble surfaces tightly, stay put and stay in place.

NON-SLIP STAIR RUG: Multi-purpose Stair mats to use the TPE Non-Skid backing on dry floor, helping it to stay in place on your floor, it won't slip or scuff floors. Low profile design so doors won't get stuck.Perfect for homes with pets (dogs or cats) or kids.
Planning Considerations
I would start every deck-to-patio project by measuring what I actually have, not what I wish I had.
A long, narrow yard pushes you toward a straight run of steps; a wide lot gives room for turning landings and side-by-side zones. My budget sets the material choice before I fall in love with a photo I cannot afford.
Composite decking with stone landings costs more than pressure-treated wood, and gas line rough-ins for a fire pit run higher if I hire out.
I would list my non-negotiables first: do I need shade, cooking space, or a fire feature? Then I check which wishlist items eat the budget and which I can phase in later.
A clear vision of how I will live in the space, not how it will look in a single photograph, keeps the design from drifting toward something that impresses visitors and frustrates me every Saturday.

Premium Solid Cedar & Weather-Resistant Finish: Crafted from premium solid cedar with rich natural wood grain, this wood pergola brings timeless beauty to any backyard. Naturally resistant to decay, insects, and moisture, the cedar features a weather-resistant finish that helps repel water, resist decay, and reduce maintenance for lasting outdoor durability

Excellent Load-Bearing:With the impressive and great load-bearing of 55lbs/㎡, this pergola is able to endure heavy snow or rain, and challenge other bad weather conditions. You have to fasten it securely on the wall and ground so it can better work

INDOOR & OUTDOOR VERSATILITY: Designed for seamless use in both interior spaces and covered outdoor areas like patios, decks, and gazebos, making it a flexible flooring solution for any setup
Enhancing Property Value
A deck-and-patio combination is one of the few outdoor projects where I can recover most of my cost at resale, but only if the design makes sense to a buyer walking through.
Multi-level spaces with distinct zones, a deck for grilling near the kitchen and a patio for fire seating below, read as finished living area rather than leftover yard.
Outdoor features rank high on buyer wish lists, which tells me this is not a trend I am chasing alone.
I watch my material math closely because the numbers swing wide. A composite deck with metal railing runs about $75 per square foot, while a brushed concrete patio sits near $14.
That gap lets me build more total space for the same money by putting the expensive deck where I need it and the cheaper patio where I do not.
I would resist upgrading both surfaces to premium materials; one impressive level and one practical one sells better than two compromised finishes.

【High Bright &More Safe】Bright warm white LED deck lighting bring impressive starry effect, making you feel sweet and comfortable in your house. Add the black protecting shell for embedded installed on floor/stone stairs will be safer for led deck lights kit.

All-in-one Complete Kit: 24 Packs 0.6W warm white recessed deck lights, DC12V low voltage power supply, 24 protective shells. Durable copper 2 pin connector with 2.3 ft cable for one side.

ALL-IN-ONE COMPLETE KIT: 12 Packs 0.4W warm white recessed deck lights, anti-glare design. Low voltage 12V outdoor step light set equipped with certified power adapter and connected wires. Simple daisy chain connection, no complex wiring needed.
Creating Distinct Zones
I think about zones as traffic patterns I walk every day, not labels on a plan. Cooking belongs closest to the kitchen door so I am not hauling trays across the full deck.
Dining needs shade in July and warmth in October, so I would place it where a pergola or awning reaches, or where a fire pit sits nearby.
Lounging drifts toward the quieter end, the patio level below if I have one, with seating grouped tight enough for conversation and loose enough to avoid the grill smoke.
Paved surfaces define zones better than furniture alone. I would use a change in material, wood to stone, or a level drop to signal the shift without building walls that block sightlines.
An outdoor kitchen or bar needs more circulation space than I first expect; I leave plenty of room behind a cook so people pass without brushing shoulders.
Water features and sound systems go in the lounge zone where they will not compete with dinner conversation, and I would test wind direction before placing either, smoke and sprinkler drift travel the same paths.
Frequently Asked Questions
How do you connect a deck to a patio?
Wide steps with landings, multi-level platforms, or integrated walkways create the connection.
Wide treads and a corner turn keep the descent open; I aim for stairs broad enough that two people can pass without one stepping aside, and I angle the run so you walk toward the patio, not a wall.
One outdoor room at two heights beats two rooms that ignore each other.
Should a deck and patio be at the same level?
They do not have to be. Multi-level designs separate cooking, dining, and lounging without building walls, and the level drop itself signals where one zone ends and another begins.
What adds more value, a deck or patio?
Buyers read a deck-and-patio pair as finished living space, not leftover yard, so the combination tends to recover more at resale than either alone.
A deck off the kitchen for grilling and a lower patio for fire seating is an arrangement anyone walking through can picture using.
How much would it cost to replace a deck with a patio?
Composite decking with metal railing sits far above brushed concrete in cost per square foot, and even pressure-treated wood usually runs higher than basic pavers once framing and hardware are counted.
That spread means you can often trade some deck area for a lot more patio without raising the total, or keep the same spend and end up with more usable space overall.
Stairs cost around $350 each if the design needs them.
What is generally cheaper, a wood deck or a paver patio?
Pavers usually cost less to put in than a wood deck of the same footprint.
Deck costs swing with height, size, and whether you choose pressure-treated lumber or composite; patio costs depend more on paver type and how much site prep the ground needs.
Composite with metal railing runs well above brushed concrete, and pressure-treated wood typically edges above basic pavers once you add framing, footings, and hardware.